Retrieved: 11/10/2013
Last Post: 03/28/2008
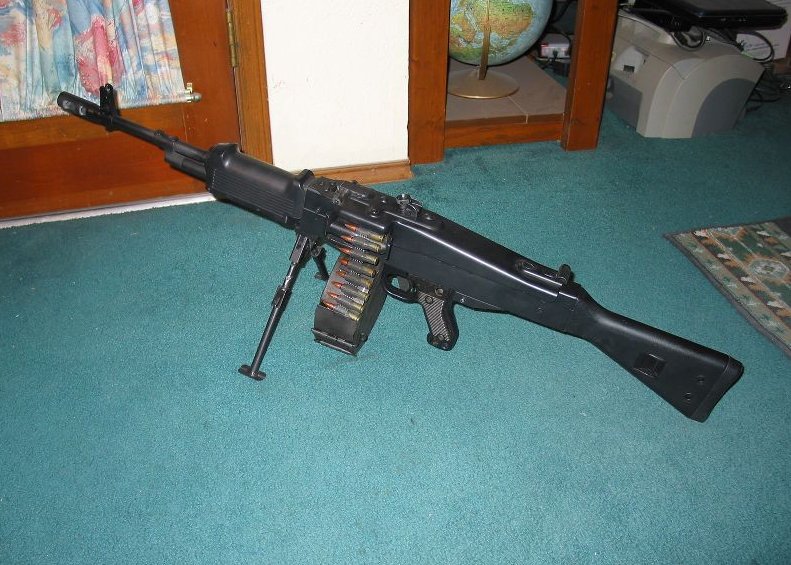
I think there's enough surplus mag/tube style entries, and I have several other projects underway that may not leave me time to finish one for this challenge. So I'm entering one of the projects I have already started. It's called the MG47.
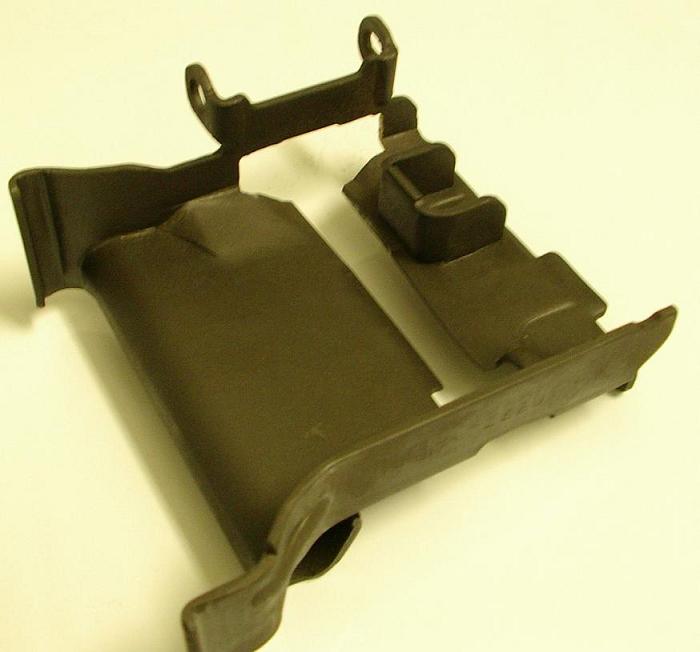
It uses an AK parts kit, some steel tubing, an MG42 top cover, feed tray, and semi grip stick, and several custom pieces to create a belt fed semi auto light machinegun.
Obviously from the photo above I am not the creator, but you could probably count the number of these on one hand. Credit for the design goes to a nice guy in UT named Tom, and another guy out west named Steve refined it into the black one shown above. I posted Steve's because I like the grip stick, stock, and bipod a little bit better and the all black look is killer.
I'm hoping the belt feed and hand made receiver keep me up in the "very unique" section of the judging. We'll see!
I'm probably 1/4 to 1/2 done and hope to make more progress this weekend. Stay tuned.
Here's what I started with:
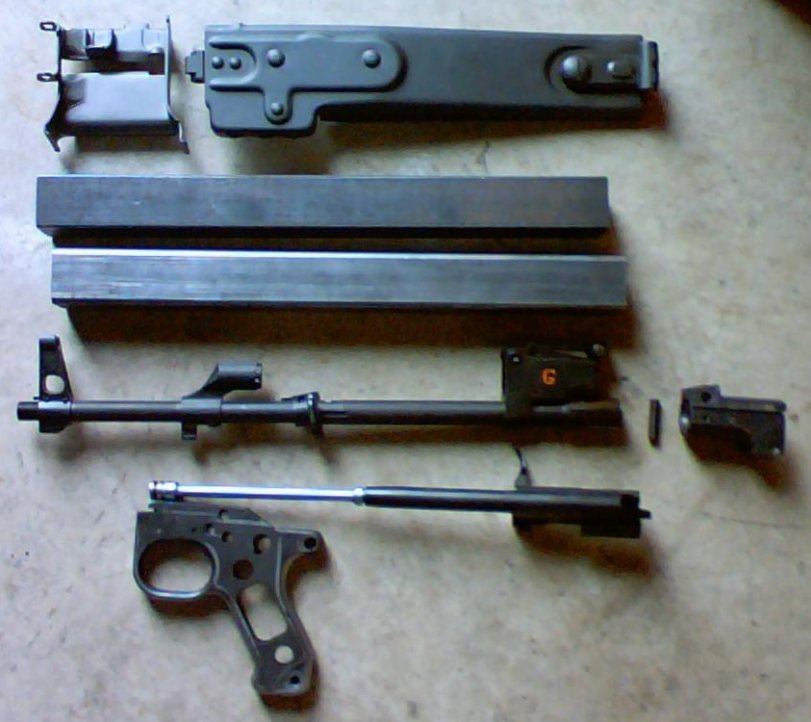
A Romy G parts kit, some tubing, an MG42 top cover, MG42 feed tray, MG42 stripped grip stick, and a very sick mind.
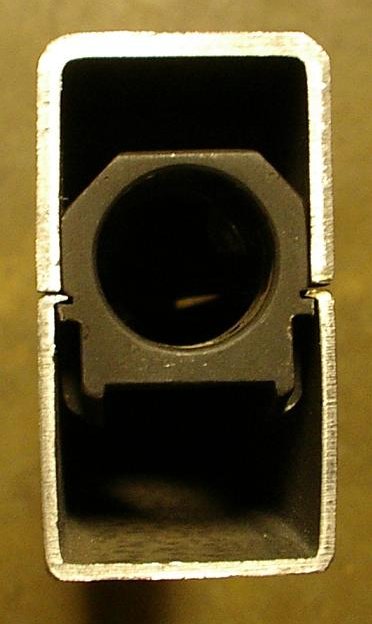
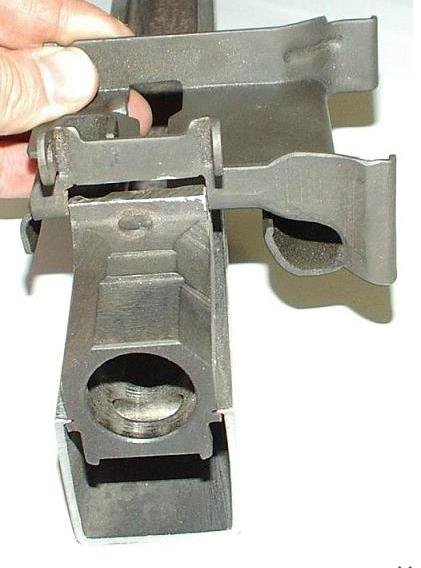
First step was to create the bottom of the receiver (the AK parts all go in upside down) with the bolt carrier rails and opening for front trunion.
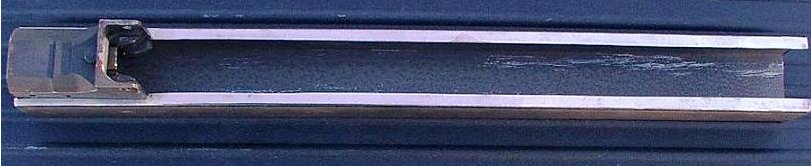
This was done with an air cut off tool, a dremel with a cut off tool, a very cheap set of non-digital calipers, a rough file, and a lot of patience.
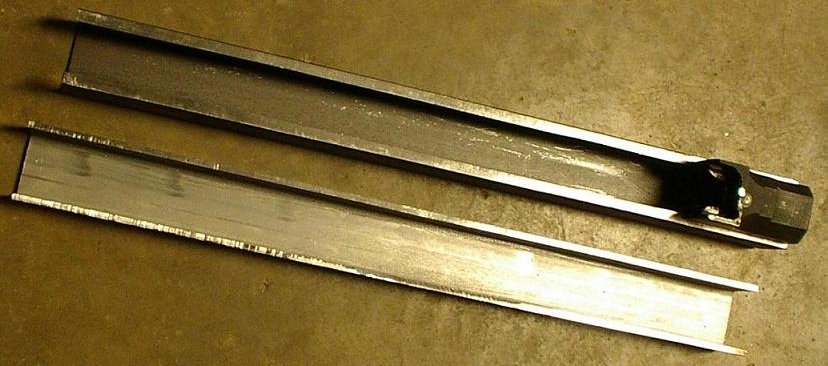
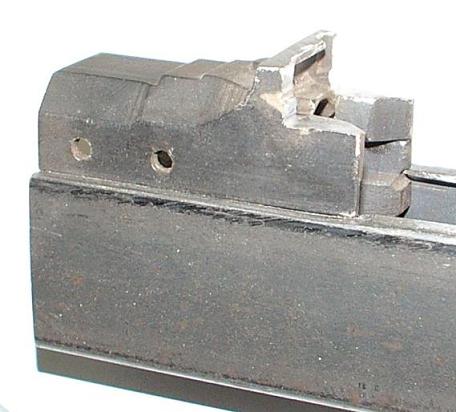
The next thing I did was grind off some of the "ear" on the right side of the trunion. This is the material that sticks out to the right side around the barrel pin. It was slightly wider than the inside diameter of the tubing so I needed to take some material off. After that, the upper part of the receiver fit down on to the lower.
You'll notice that the upper tubing is thicker than the lower. That's because most of it will be cut away, and I think the thicker metal will be necessary due to the stress from the top cover's operation.
This is where I'm at now. So the next step is to get the trunion and the feed tray worked up so they are in the proper places, and then I can tack the upper section on and upen up the top for the cover.
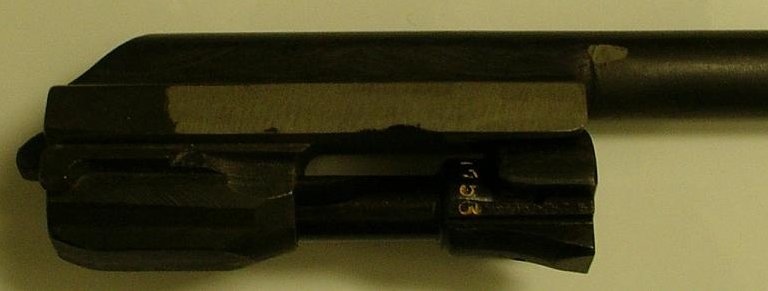
The only difference in the bolt group is to cut off the charging handle (and make a new one that doesn't cycle during firing) and a little massaging of the "bottom" of the bolt (actually top side when looking at the weapon) so it'll fit in the slot of the feed tray.
Cut off the charging handle and did a little bit of finish cleanup on the rails. The carrier and bolt now slide upside down in the lower half of the receiver. Next step is to trim up the trunion and then trim the feed tray so they mesh properly.

Ok now I trimmed the trunion and feed tray so they go together as close to the feed ramp as possible. This mod allows the feed tray to sit on the lugs of the trunion and wrap around the top.
Get the MG42 parts here: http://www.robertrtg.com/mg.html Good prices and fast shipping.
Are those push-through links?
I've searched online to find more information or plans on how to do one of these builds, but this is obviously a hardcore custom build, and as such, it's apparently not something one can easily find 'plans' for!
What are the inner & outer dimensions of the tubing you used?
Any other information on how to go about doing this build?
Do you have to modify the cartridge stop? etc...
How did you modify/file/grind the feed ramp? Any possibility for more detailed pics?
I've been always wanting a belt-fed semi-auto gun, but don't know too much about how the feed tray, and link-feed mechanism works to even begin with such a cool/fun project...
Any links you can point us to? Any information would be greatly appreciated! As is evident, many of us are watching this build closely to learn as much as we can!
Ok, well this sure is an investment in TIME! I spent all day Saturday trying to get the thing to feed while it was mocked up in the vice with C clamps. Then I found out that I needed to do a bunch of little tweaks to different feed parts. But anyway, here's what I got done this weekend:
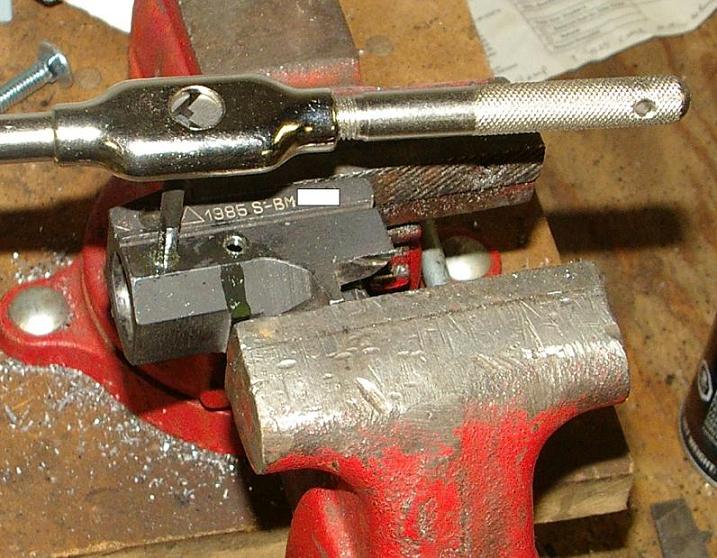
Tapped out the trunion holes:
Removed the front sight:
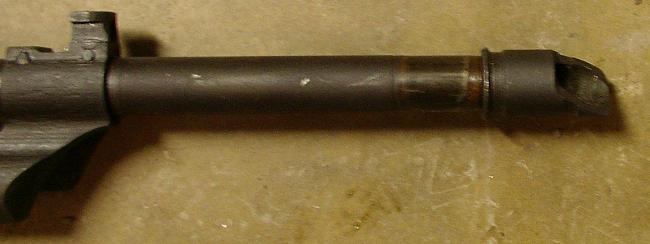
Pressed in the barrel & pin:
Shaved the rear sight ramp (to fit inside the tubing):
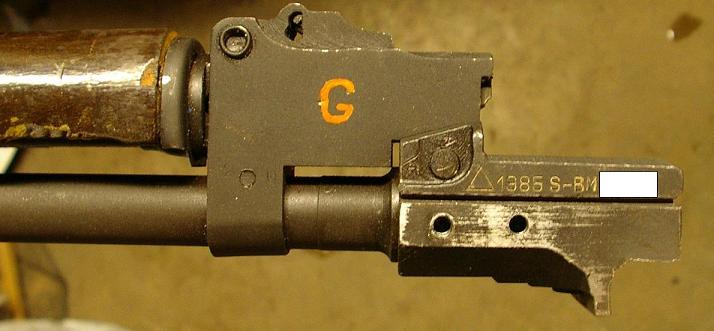
The barreled receiver:

From what I understand, the screws are mainly just a means of holding the trunion in place while mocking parts up, and doing some fitting work. Eventually more of the receiver (and possibly part of the trunion) will be welded together. Along with reinforcement rails, and you could also use rivets if you wanted on some parts. If you'd like you can also thread screws into other areas for additional support if you so desire.
That's the beauty of a homebuilt gun like this - there are so many OPTIONS and WAYS to build them - there's no one set 'right / wrong' way to do it.
I've got some parts on order to get started on my own build inspired by the work I've seen MP43Sniper doing!
A few others have gone before him, but some of the methods/designs/fabrications he's choosing really *ARE* unique, and his build is further breaking ground...
He really IS going off the beaten path to create his own, one-of-a-kind rifle!
Which I must admit, looks like it's coming along BEAUTIFULLY!
Looks like I'm not going to make it but I'm still trying. I have tacked the receiver halves together and cut the opening for the feed tray. Since I don't have the AR hammer, trigger (and whatever else I need for an AR setup to work, I dunno) yet I doubt if I can get everything in time. Too bad, I was hoping for some extra scratch to play with.