Last Post: February 25, 2011
Retrieved: May 21, 2011
My MG-47 ES build will be similar to the one MP43Sniper started here during the last Homebuild Challenge...
The MG-47 ES variant is another prototype first built by SharpsShooter, but the ES version uses little/no welding and machining. It is built mostly with common tools and materials one can find at just about any small town hardware store or Home Depot! It is mostly a 10-32 screw build version.
After I've got my MG-47 ES test fired, and functioning reliably, I'll be disassembling it, sending off both side plates to be engraved with the necessary homebuild 'Manfacturer's Info' and perhaps a couple other custom things. Then I'll reassemble the MG-47 ES as a combination weld / rivet build for more permanence, and perhaps keep a couple parts in a 'screw-build' format for ease of cleaning, maintenance, and parts replacement throughout the lifespan of the weapon.
MP43Sniper's MG47 build is (IIRC) using a common AK-47 parts kit, however, the MG-47 ES made by SharpsShooter, and the one I intend to build will be using a less-common RPK-47 parts kit. Hopefully one with an original barrel, trunion, bolt, and carrier so I don't need to deal with any headspacing and barrel pin drilling headaches!
Initially I wasn't planning on doing this, because it will likely need to be 'rolled over' into the next HBC period. I'm not sure if I can get it done by the deadline! I really want to finish this build, and I can now get started on it...
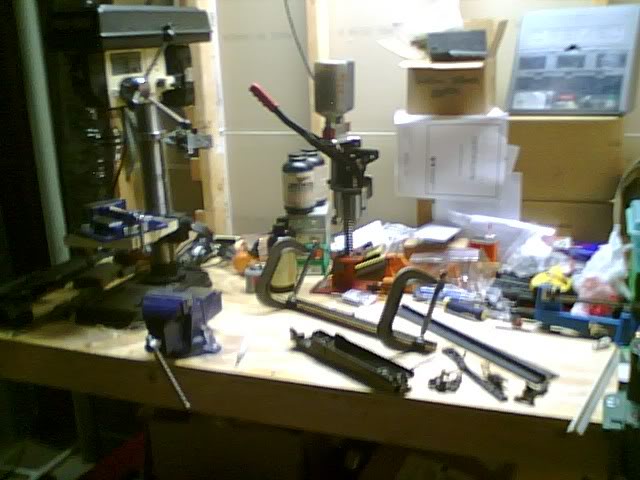
Currently, I've got the following parts for my MG-47 ES build:
[picture 404]
[picture 404]
MG-47 / MG-3 top cover amd feed tray, 50rd belt, and starter tab.
I will be purchasing the receiver parts from both a nearby Home Depot, and my local Ace Hardware store. I'll be posting my parts costs online as well.
Though SharpsShooter's build was made in a modular form allowing him to change its configuration from a buttstock/pistol grip format to a spade grip format (and back again) with ease, MY build will only use a pistol grip and Buttstock. I intend to make mine relatively lightweight so it can be carried with relative ease.
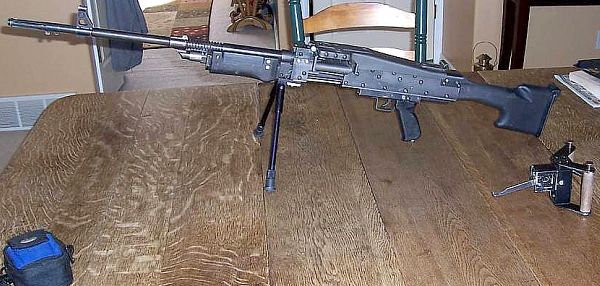
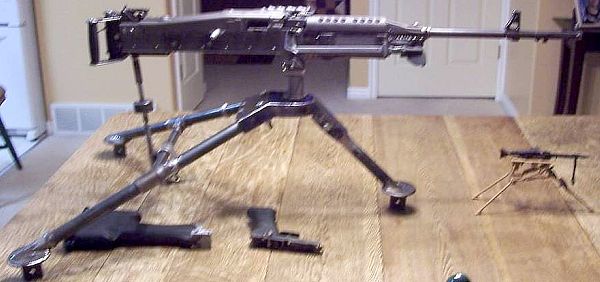
For more of an idea of what I'm doing, here are more pictures of SharpsShooter's MG-47 ES build he finished this past spring:
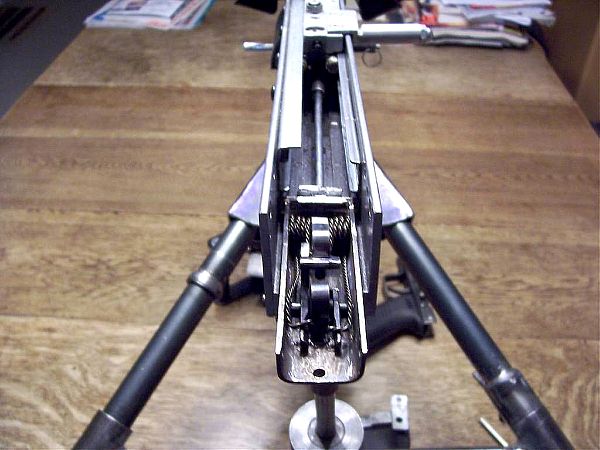
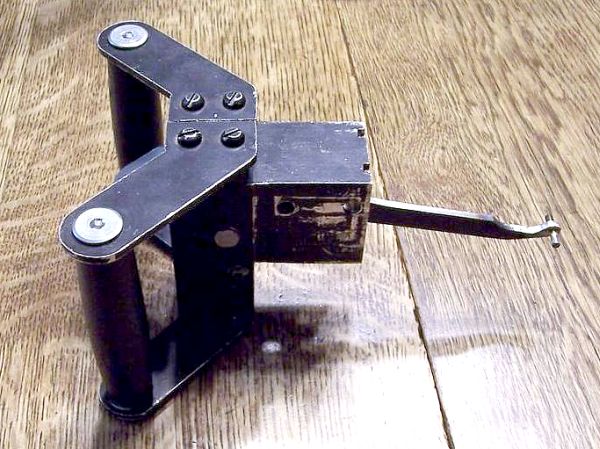
It'll be more difficult to get it running just right, but I think it's worth it to have the lower link pawl in the feed tray to stop belts from sliding back out of the gun. When testing the belt feeding mechanism by hand thus far, it seems to me like the spring-loaded feed pawl fingers don't always hold the belt 100% securely. The lower pawl in the feed tray with the mouse trap spring does a very good job of holding the belt VERY securely in the feed tray, so it'll never slip/fall out backwards... I don't think it'll even fall out if I gave the belt a good sharp tug either.
Makes me glad I got the MG-3 one instead, but it DOES increase the resistance that will be put on the bolt carrier when cycling. I'm sure some filing/polishing, and installing weaker springs (the existing ones are *STRONG*) I think it'll still function just fine, but reduce the resistance load on the bolt carrier.
When my parts all arrive, I'll have everything I need to finish this build except my buttstock, recoil spring(s), and quad rail. Everything else will be arriving in the next week or two!
I may soon be ordering another top cover & feed tray if there are any left in stock at RTG parts... Then if this one works out well for me, and If I can get a 2nd topcover & feed tray, I'll probably butcher one of my Romy-G kits and build that into a 2nd belt-feed gun!
[picture 404]
[picture 404]
And I also got the steel cut 'close' to length... Length doesn't much matter until the build progresses later. I've got drawings on the receiver, and mine is thus far a few inches too long for the ES version. Not knowing whether or not I'll use the ES version's bolt carrier extension and feed pawl setup, or if I'll make my own, I've decided to keep building my receiver so it's oversize (18" right now) length.
Once I've got it feeding by hand, I can then decide upon the other mods, and that will dictate receiver length. I'm betting it'll be 16" or less when I'm finished though.
It's just a matter of cutting a nice 90 perpendicular cut.
Not something so easily produced with a handheld hacksaw like I'm using... So, I've clamped some of the steel pieces together, and I've got them marked at specific intervals in preparation for drilling... I should get started with the drilling/tapping and screwing together the receiver tomorrow morning. Then I'll soon be grinding down the bolt carrier rails to a specific width, and then test-fitting them in the receiver before bolting them in place sometime later this week.
Some older photos and little update...
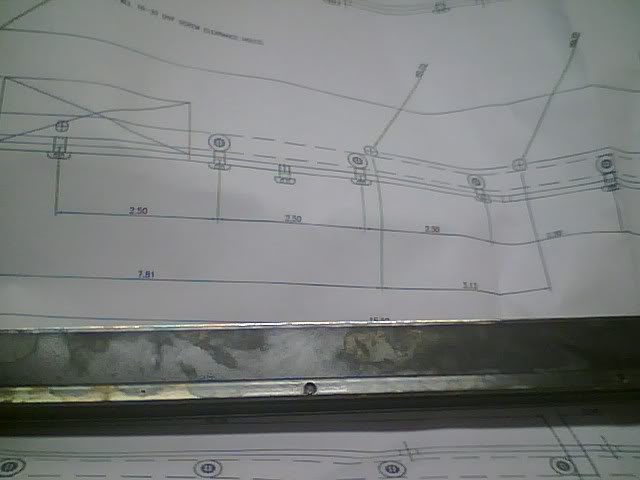
Over the past ~2 months I've been drafting up my own set of construction plans for the MG-47ES in AutoCAD (at least the way I understood how it was constructed and operated in my mind), but I was contacted a few weeks ago by SharpsShooter - the original MG-47 creator! He informed me that for the past several month he's been drawing up detailed plans with photographs, and also a tutorial on this gun's design.
I sent off a few bucks to him, and within about a week or so, he had sent me the first drawings of his MG-47ES! His drawings were more thorough than my own, and it also revealed to me that he incorporated some NEWER, and MORE INNOVATIVE design changes in this version's construction (compared with past MG-47 prototypes).
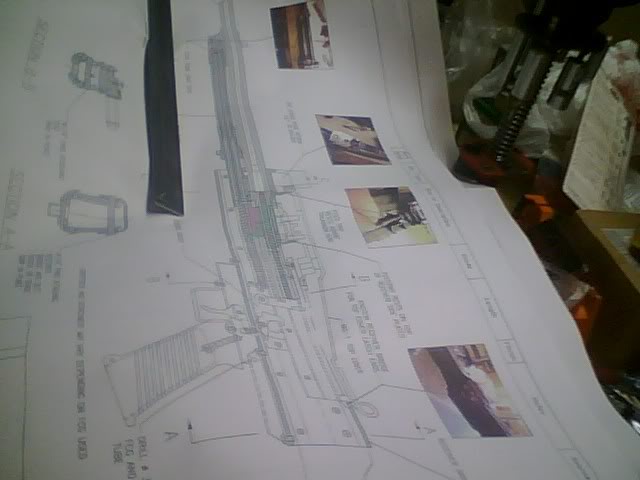
His final set of drawings is ready for purchase, so if any of you would like to pick up a set of his drawings, I'd suggest you cruise over to the original thread, contact him, and pick up a set of plans for yourself!
This makes me feel like John Cusack's kid brother in 'Better Off Dead' when he's building a laser rifle from a set of plans he got from clipping UPC symbols. If only I had gotten the book on 'How to pick up trashy women' too...
Basically, this rifle is constructed COMPLETELY of materials one can pick up at just about any Home Depot... Some 1/8" flat steel, some 1/2"x1/2"x1/8" angle steel, 6014(?) aluminum, drill bits & taps/dies and a WHOLE LOT of 10-32 button cap hex head screws of a couple lengths...
I suggest you have plenty of Clamps, Vise-Grips, a benchtop vise, and a screw- driver style ratcheting hex-head tool. A good set of hand files, etc... You're going to be drilling, filing, tapping, clamping, screwing, unscrewing a METRIC F(_)CKTON of times to get this thing mocked up, fabricated, and moving along...
The drawing set is VERY professionally done, and has VERY CLEAR and EASY TO UNDERSTAND drawings, notes, dimensions, and is very nice!
Anyway, to get back down to the working... Most of the receiver is constructed by clamping the flat steel to the angle steel (corners of Rcvr), center punching your hole placements, and drilling...
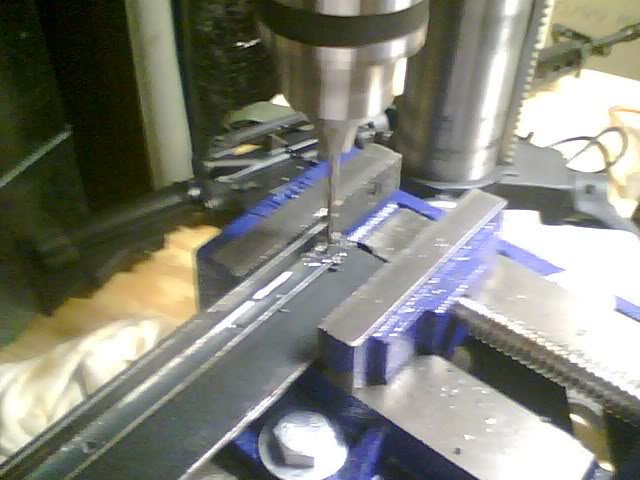
I suggest you start with TWO HOLES in your steel, stop, and then de-burr/file and Clean up your drilled holes... THEN you need to clamp them together and start tapping/threading the holes for your 10-32 screws. Make DARN SURE THE STEEL IS CLAMPED TIGHT when tapping/threading!
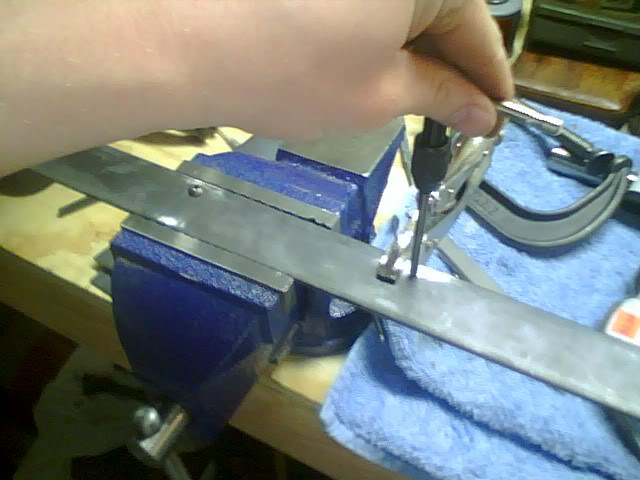
Once you've got 2 of the holes spaced far enough apart, and have them threaded, you can tighten the 2 pieces together nicely with just the screws - no need for clamps anymore (until you start threading more holes). Then center punch all the remaining holes along the line, and get back to drilling them all...
Unscrew/Separate the two steel pieces, and de-burr/clean the holes/edges... Then re-screw them together tightly, and clamp it into your bench vise... Clamp down a vise-grip or other clamp tight about 1/4" to 1/2" away from the next hole you're going to thread/tap to hold the steel tight together. Then tap it.
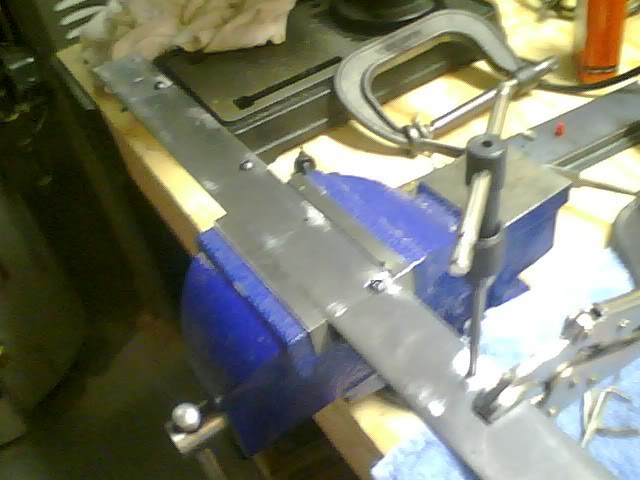
Do this with all of the remaining holes required in this length of the steel... Moving the vise grips as you go from one hole to the next... Before I screw in a hex-head button cap screw, I typically cut a Q-Tip in half, and soak one end with Hoppes #9 cleaning solvent. I then 'screw' the Q-tip into (and all the way thru) the newly threaded hole, and it catches & cleans out any burrs, or metal shavings before I put in a screw.
As time goes on, the build will continue to progress nicely!
I have some NEWER photos of my build, and the most recent progress (Bolt carrier rails, etc.) but unfortunatetly, my wife 'Cleaned' the house, and now I can't find where my digital camera ran off to! So, I'm sorry for still having crappy cell phone pics!
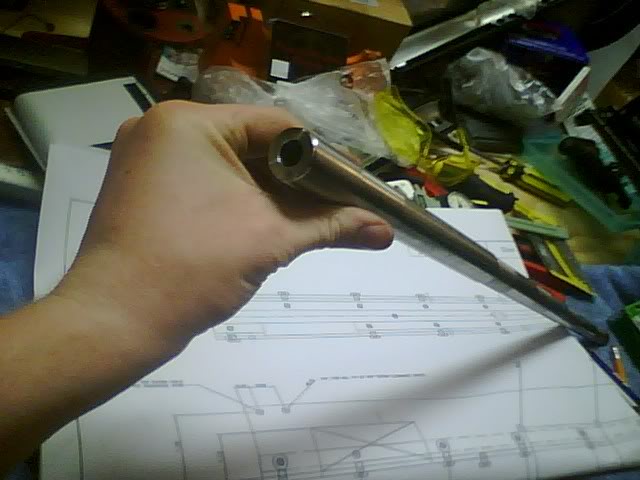
On a positive side, I still just can't get over how GREAT this new barrel is for my RPK-47 kit!