
Last Post: 03/20/2009
Retrieved: 01/17/2011
Updated: 05/22/2016
SharpsShooter5090 came up with an ingenious AK-based beltfed design. You can see his build here:
So as not to hijack SharpShooter's original MG47 thread, I've started this one for a 'hopeful' project I'm working on. Basically the same as his MG47, but scaled down to a BF pistol, using an RPD topcover and tray. It's coming along, but slowly.
Using a TEMPORARY AK recoil spring, anchored to the bottom, to test bolt/trunnion centering and lock-up in a 1/16" wall receiver tube. Shorty gas tube has me concerned, whether it will harness enough pressure to cycle.
LINK 404
What was done before the above pics were taken, can be found in post 303:
cntrailrider: Looks cool! Just wondering why you are attempting to use DM links in the RPD Feed Tray/Cover? The belts are too wide and the pitch is off. This is bound to cause issues with reliability. Just curious, are they just cheap? RPD belts must be available.
You going for a folding stock on that "shorty"?
7.62x39 is more easily stripped from DM1 links than RPD links, which are very tight. Bolt carrier won't have the inertia nor recoil spring as in an RPD.
DM1 links/belts are VERY cheap, RPD's are not.
No stock for now, unless I make a longer front end later. No plans for an SBR.
Got a little more done tonight -
[picture 404]
Made a left inside 'upper' rail (12") and installed it. Tray straddles the INSIDE rails, not the outside ones screwed to the trunnion, since they're too wide for the tray guides
[picture 404]
Started fitting the FT
[picture 404]
Temporary AK recoil spring to check rail-to-trunnion and receiver alignment, and then chambering tests. Both of mine took some work before everything would cycle/lock/unlock easily, with the close-tolerance gas tube
[picture 404]
It chambered on the first attempt - sure didn't expect that! Got that same light-headed feeling again.
No ejector rail made yet - hopefully tomorrow.
[picture 404]
Camera LCD is broke or it would be more centered.
If you're using a standard diameter piston, here is a handy way to de-burr the inside 'step' in your custom gas tube, with a power drill.
Gas tube is MUCH tighter seal (mallet fit) than a factory AK tube; had to drill out the back, so the BC snout could slide forward. That creates a smaller diameter 'step' deep inside the tube, and a problem when reassembling. Like threading a needle dozens of times, during the build. You MG47 builders will soon find out what I mean. Smoothing out that step was the key to easy reassembly.
Steve
PS Got the 'upper' rails temporarily mounted, and ejection port cut out today
[picture 404]
How did you go about locating the ejection port?Position the front exactly where it is on a regular AK, in relation the to RSB and trunnion. Cartridge is 2.2" long. Don't go back any further than that, for starters, until you begin test feeding and ejecting. Then study how/what path the ejector pushes the casing.
Had to enlarge the port higher than what's in the pic above - symetrical to the bottom, so they'd exit.
Stop me if this is a dumb question, but with the elimination of the standard charging handle, how is it that the weapon is loaded initially?
[picture 404]
[picture 404]
[picture 404]
[picture 404]
[picture 404]
Good shot of the rails. 'Bottom' rails are the top edges of the 1.5" tube. Planning a flush buttplate with guide tubes for the recoil springs.
[picture 404]
The front will get trimmed even. Barrel is 9"/ OAL 22"
[picture 404]
Next comes the BC extension, and locating the feed stud.
[picture 404]
Burned through the hinge pin shroud so you see some patch up. Hinge pin holes get hardened.
[picture 404]
The gas tube goes through the rear sight block to keep pressure contained for a longer stroke. Same set-up as my 6 inch shorty, but longer (4.5" stroke) to cycle the belt feed mech. AMD65 piston in a bobbed carrier, to keep the tube ID small / sealed. Will get pics of it later.
Got a lot of welding to do yet - some will be repair work No guarantee this will work, but hoping to be the first on my block with a 7.62x39 beltfed pistol.
How are you going to mount your feed cam roller? Is it going to be like you did on your MG47 and does it have to be right on center on a RPD cover? It appears that the the cam does not track quite on the center line of the top cover.
Is the magic of the belt feed in the top cover and tray?
You're right. I have an RPD BC, and the feed stud is off-center to the left. It will take some engineering. I've had a few problems with the bolt and BC UNLOCKING - need to get that straightened out first. Most of the other build basics are falling into place nicely. Will be using a twin-spring set-up much like 2XTM's, but simpler to build, using UN-captured springs.
The piston / gas tube set-up is well under way.
Here is mine so far, I am using one of my semi auto MG42 grip sticks with a FAL FCG.
I bushed the rear hole so it mounts front and back with HK forearm pins. Next step is to install the feed stud and recoil spring. I am holding off on cutting the ejection port and retracting slot till I can get to a mill.
I am also working on drawings to get a couple receivers laser cut and bent if this turns out good. After looking at it I have come to the conclusion it really neds a set of spade grips in the back instead of a stock. I will try that after this one is working.

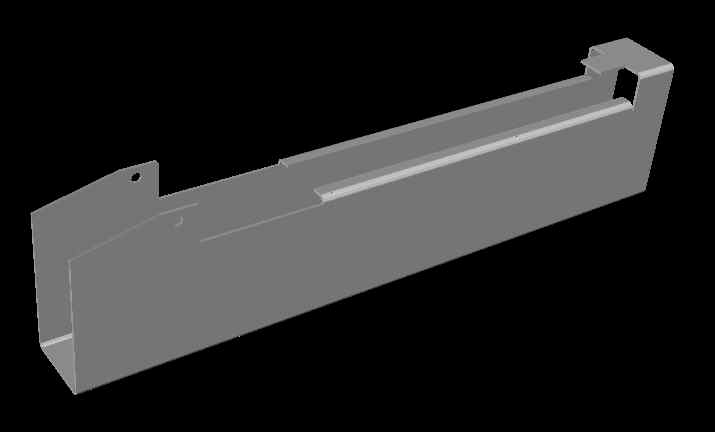
Pirate -
Really looking great! Very exciting stuff.
I found a supplier who carries 1 1/8" sq tubing in various wall thickness, that will fit the RPD TC latch - have been on the road but will post the name and link when I can. That size is difficult to come by.
Are you going pistol or carbine? Pistol is real tricky gas-pressure-wise but I think I have it figured out and will post the 'trick pics' when I can.
I wish I could weld as good as many of you can. I am envious but am practicing.
Your build is really something. I hope you'll share more pics here as you go.
Why would you need 1-1/8" for the RPD cover?
OK now for my stupid question of the day.
I never thought about this until these belt fed builds started but what is the actual purpose of the upper left rail ( I know the right is for the ejector ) and I know it would be the same as the lower right in an AK, it doesn't seem to have any real purpose or does it?
The rear of the TC where the latch is = 1-1/8" wide
The 'left upper' rail is to keep the bolt from rotating when cycling. It's easier to install than the ejector rail, and is full length. Ejector rail does not necessarily need to be full length
Coils -
I didn't think about it either, until getting into the MG47. The specific reason for installing the left rail first is so the bolt doesn't rotate during cycling tests; and to align it when you slip it in the rear. My ejector rail came with a flat; standard-length factory ejector rail.
Also, left rail goes in first (and NOT the ejector rail!) so you can 'unchamber' the rds. Otherwise you'd have to cut your ejection port right away. Found that one out the hard way too DUH so now you know I am certainly no expert.
[picture 404]
[picture 404]
[picture 404]
Cycling without a spring - pull-push wearing a glove. Long strip is the extended cocking plate. Temporary U-shaped recoil spring 'anchor' used to test chambering on this and the MG47 (before FCG and BC ext) is on the lower left.
[picture 404]
BACK END of the gas tube is visible, which should yield 5.5" of contained- full-pressure stroke. First pic above shows the piston on short carrier. Ejection port is still undersize. Hammer-to-firing-pin and cocking geometry work very well. (quick mock up for pic shows tipped grip, but perm STRAIGHT installation is done)
The trunnion-to-feed tray and feed-lever-to-stroke 'geometry challenges' are beginning to emerge, since the tray is not on TOP of the trunnion, but behind it. I was afraid to cut the trunnion down to far (up front) so as not to compromise the locking lugs. This results in a longer chambering path, and feed-lever geometry is vastly changed. There are no guarantees on this one, but I'm working on it.
I am open to suggestions which have been thought through. An option may be to extend the widened part of the feed lever (the 'funnel-like' portion, which initially 'kicks it' sideways) so the feed stud can be located further forward. There is space to extend it.
[picture 404]
Here's the section of feed-lever I called 'the funnel' for lack of a better term.
When dealing with things like this, one can better-appreciate the engineering mind of SharpShooter, and his level of ingenuity. I am no engineer so it's going to be a steep climb.
Steve
UPDATE: I have figured out the feed stud CAN be located further forward, to compensate for the longer "dead part" of the stroke which doesn't exist in an RPD. The funnel-like swell at the front of feed lever will 'catch' the stud as it moves aft. So funnel wasn't such a bad term after all. My concern now is whether that 'funnel-bend' will absorb the sudden recoil shock without damage. It seems like an odd set-up to begin with. I believe RPD's have a 'flapper' bolt lock which delays bolt/BC unlocking/velocity, like an HK delayed blowback?
It may not be any help but I pulled out my RPD parts kit and estimated some measurements. From the front of the FT to the chamber mouth was about 1/4". From the bottom of the FT to the top of the chamber was about 1/8". The edge of the feed lever (start of the "funnel") sits in the middle of the actuator roller when the bolt is closed. Measurements are approximate due to the torch cuts but not too bad.
The RPD locking mechanism has positive locking and unlocking driven by the gas piston/bolt carrier. The H&K action has an additional delay because the rollers need to be "squeezed" out of the recesses before the action can move back.
I am not sure that the RPD recoil forces are any worse than the AK.
I love your work and follow the progress. I would love to see how the cocking plate interfaces with the bolt carrier.
SW44 -
The 'cocking plate' is simply a flat plate which lays alongside the upside- down BC, and has a 'catch' on the front, which engages the front 'step' on the BC. It's basically a hook that will pull the BC back, but won't push, so it's non-reciprocating. That's why I'm using a dowel for the front stroke, until I get a butt-plate and recoil spring system made.
There is a rather poor pic of the cocking plate assembly:
http://www.gunco.net/forums/f50/belt-feed-ak-47-a-34001/index9.html
If you look close, you can see the part that catches the BC, right above the body/shank of the bolt. The hole in the plate is for attaching the cocking handle. Right now that's a weak link in the chain.
Here is another thought. If you still can't get the feed stud far enough forward to be at the same distance from the bolt head as on the STD RPK, what if you slotted the bolt carrier holes where you bolt on the 2 pieces of flat bar that goes back and mounts the feed stud angle. Put long thru bolts from one side to the other, going clear through the BC with a nut on the end of each bolt. Put a small coil spring between them with a pin thru the BC back of the spring to press against but ahead of the rear bolt. When the BC goes forward, the feed stud angle would bear against the back of the FT and retract as the BC still goes forward.
When the BC moves rearward, the feed stud/angle/flat bars would stay against the back of the FT until the cross bolts came to the end of the slots, at that point the feed stud/angle/flatbar would move back with the BC and into the funnel of the feed came so that the distance from the feed stud to the bolt face would be the same as on the STD RPD. I had to make a similar device on my 300WSM FAL to lock the bolt head from rotating when it stripped a cartridge from the magazine. The trick is to get the spring tension right as it will oppose the closing of the BC spring after the feed stud contacts the back of the FT.
You can probly save yourself a lot of problems by mounting the feed cover / feed tray in the proper location. I notched my trunnion so the bullet is in the same relative position as a round in a mag in a regular AK. this will allow the bulet guide to work right.
That's how I did mine and it feeds perfectly.
Pirate - your approach is closest to the original set-up, and you have yours feeding. I need to re-locate the tray forward and re-do the top.
First, I will try extending the BC ext. longer (forward) and re-locate the feed stud as far front as possible, just to see what happens. It might work. But a more forward-positioned feed tray (where it should have been to begin with, on TOP of the trunnion) WILL keep the feed lever geometry original, and keep OAL of the pistol shorter at the same time. I may still be able to salvage the lower tube. I sure would like to see more pics of yours if you have any.
SS - I followed your train of thought (it would work) but it's rather involved - I need to keep it simple.
I agree with Pirate 100%, if you can move the FT forward, it's a much simpler solution. I just thought it was as far forward as you could go. If he has his farther forward and it works, I would try to match his.
Basically I positioned mine so thet the feed tray was in the same spot as an ak mag, that works so this should and it does. I made a sleeve and welded it to a piece of barstock welded to the trunnion. for the feed cover hinge. My concern was that the AK rounds feed from the sides and that there would be a problem feeding from the center but there isn't.
I haven't installed the rails or ejector yet. I wanted to get the feed cover positioned first. I will be removing the fillers to do the rails now that I know that it feeds.
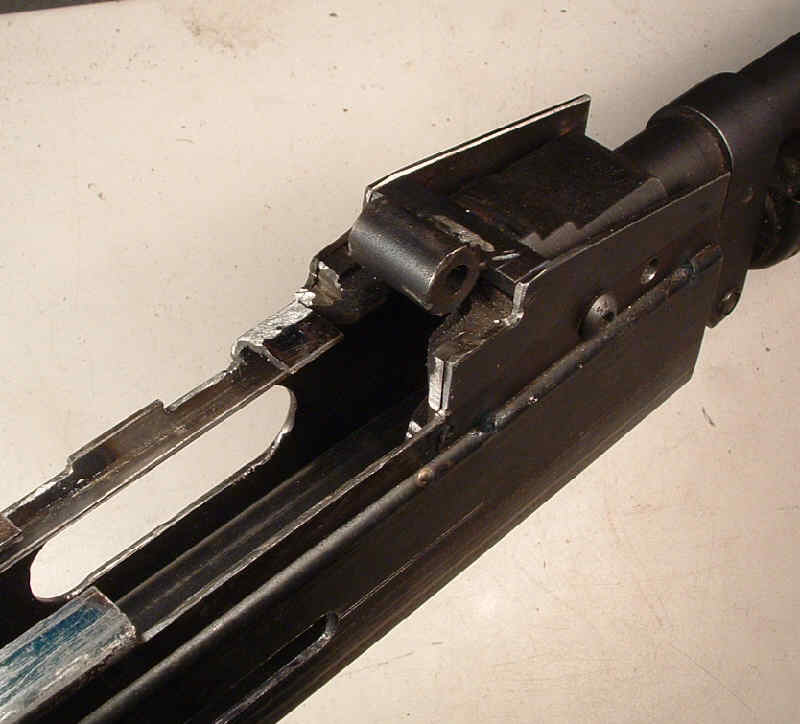
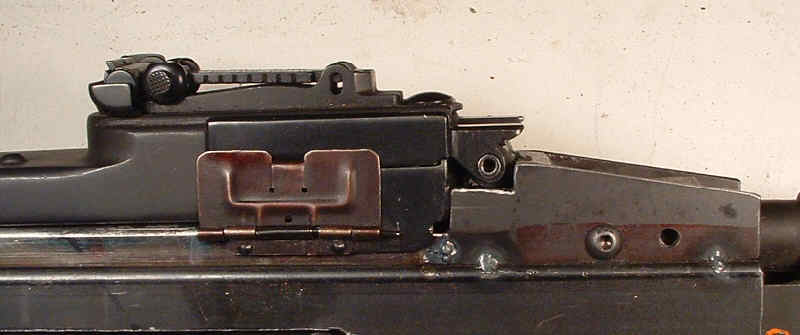
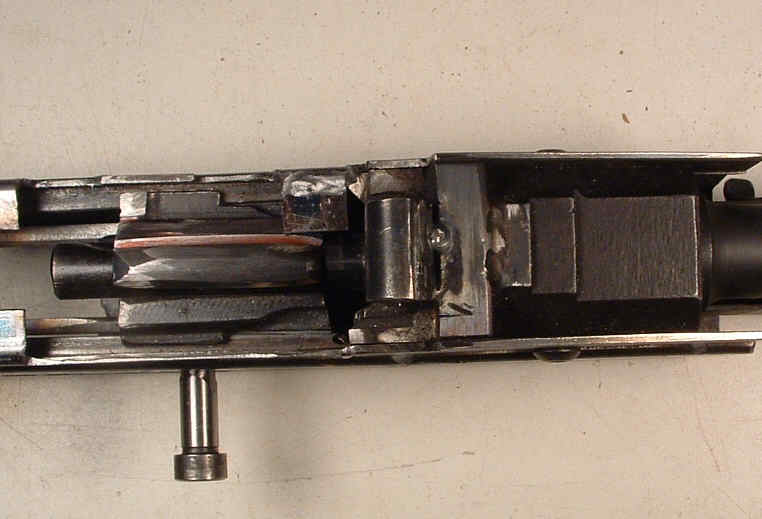
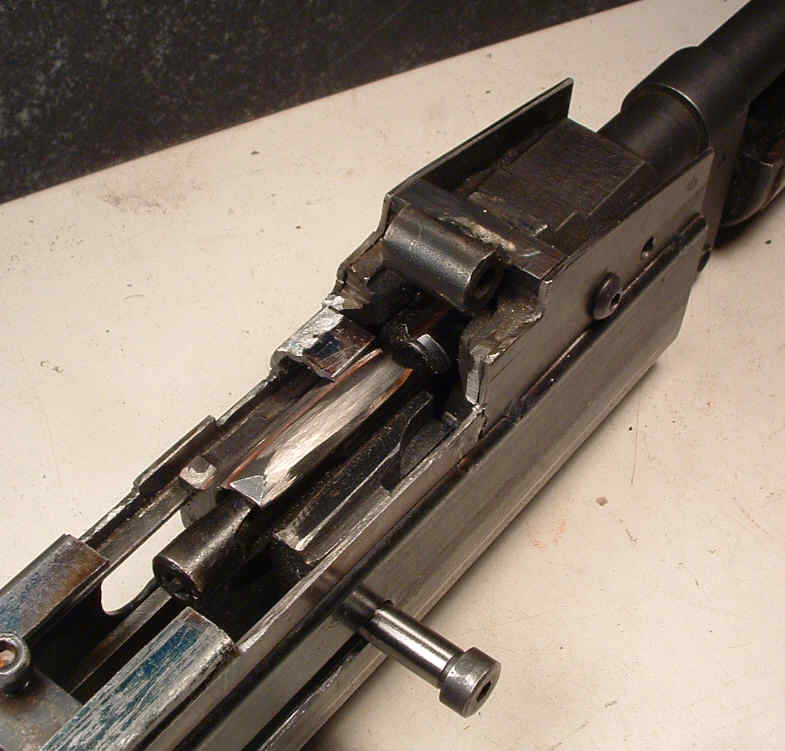
I have held off posting photos or dimentions until I have it finished and know it is right. I have to back track on the bolt carrier extension and rethink it. I don't want to post stuff and send anyone off to make the same mistakes I did!
That looks very close to the way I trimed my trunion of the prototype MG47 but I made my feed tray. I am afraid I not much help in giving advice to you or Steve in using a RPD top cover and FT. Both of your RPD builds and Sniper's MG1 build look good so far though. And Steve, I moved my FT forward and down a couple of times to get the cartridge as close as possiable to positon the cartridge sits in a stick magazine so it would feed reliably.
Pirate -
Yours feeds and that's all that matters. I like the way you welded the hinge pin bushing directly to the trunnion. It looks like it's positioned almost exactly where the 'third' trunnion holes were. I considered doing that, and now wish I'd have gone that route. Thanks for posting the pics - looks great.
PIRATE
It looks in your pictures that your bolt carrier extension is not connected to your bolt carrier and is free floating and held against the back of the BC by the return spring? If it free floating, that's a nice idea.
For those using an RPD TC, I thought of another RPD dimension to pass on. The center of the actuating roller stud on the bolt carrier extension is 0.19" left of the overall center line when viewed from the back. Dulicating the dimension might help the TC function.
Sharpshooter, the BC extension is attached to the bottom of the carrier. I need to rework it though. It is not right.
I will post some photos tonight of how NOT to do it!
I got to work on this a little today, I replaced the bolt extension and made up a double return spring set up and cobbled up a retracting handle.
Tomorrow I will mount the stock and spring guide assy and install the ejector and left rail. then I can see if it wil feed with the spring pressure, it feeds by hand now. Once that is done I will work on the gas system. I hope to have it ready to shoot by next weekend.
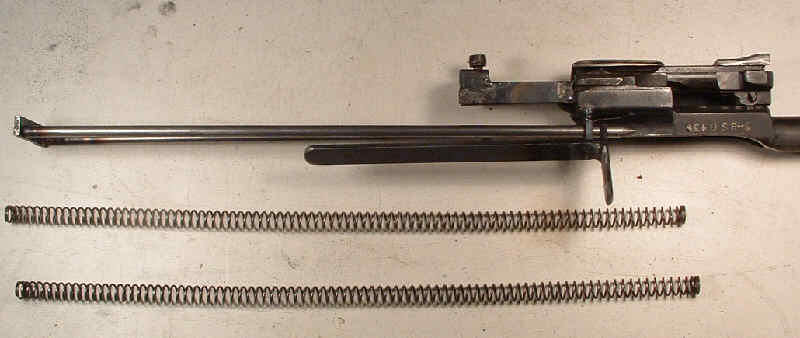
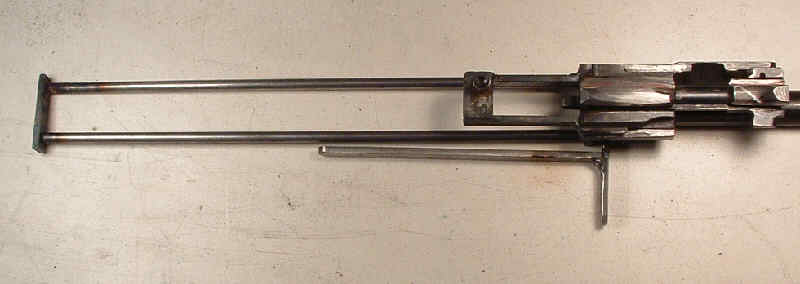
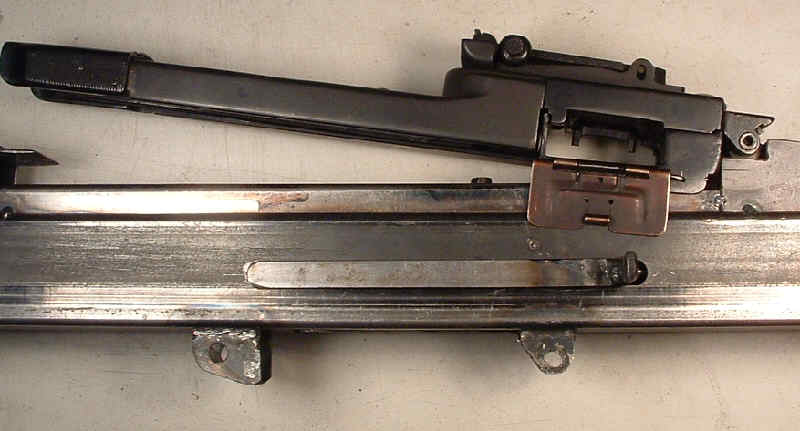
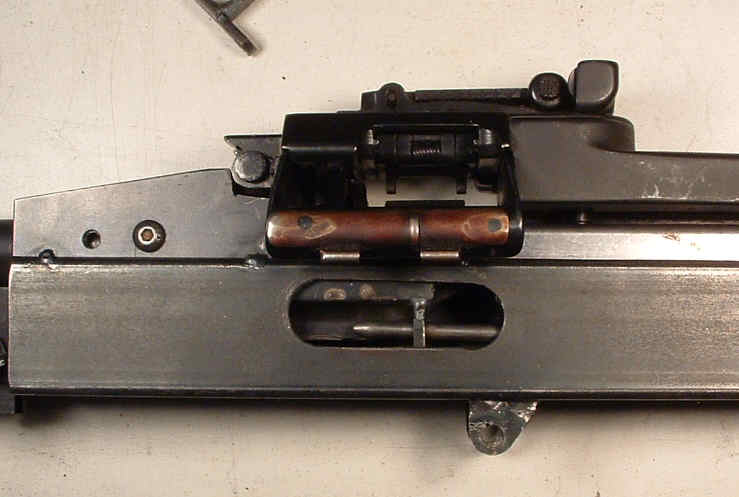
Pirate -
I like where you are going with the extended tail on the BC to carry the TC actuator. I wonder if you will see flexing and cracking in the weld joints due to the stress in the arms extending back from the BC. You are definetly cutting edge. Nice work!
How long is the extension back from the original bolt carrier to support the TC actuator? I assume it would vary depending on where you locate the feed tray and hinge point for the RPD tray and TC.
Got mine feeding, hand-cycling smoothly, but had to go with RPD "U" links, after re-locating the feed stud 3 times. Stud's located 5/8" behind the inside rear of the tray, to account for the aft tray location. DM1's are spaced too wide for the RPD TC to push them into the slot.
Have some receiver flex (wall = 1/16") so am planning a curved bridge behind the tray. Good thing the BC ext has direct contact with the upper rails, or flex combined w/ BC slop would be worse. Not much clearance in there for a bridge. I went with both rails full length, so that helps w/ rigidity. Thicker left rail would have been even better (2XTM's has a VERY thick left rail). BC slop will diminish when the full-length welds are done, due to contraction / hourglass-like effect even with spacer and clamps. I can see alot of filing heading my way...
This may wind up as a carbine experiment instead of a pistol, using the short gas system. My first RPD TC attempt, DM1 links (unsuccessful), short gas system, plus the twin-spring system is a vertical learning curve. Too many variables to tackle at once. RPD links are TIGHT compared to DM1's. Recoil springs and SMOOTH CYCLING will be the trick.
Pirate - Thanks for sharing your pics - looking good - keep 'em coming.
I've decided to go with a stock, for now, to simply things, but that also means a longer front end. Today I worked on a recoil spring guide tube, mounted in a G3 stock. The cuts align it solidly in the upper rails.
[picture 404]
[picture 404]
[picture 404]
The tube has since been welded in the front; plugged pinned and welded at the back end, and trimmed to (temporary) length inside. Tube extends back to the buttpad. The BC extension will travel INSIDE the sq tubing/mount to gain extra stroke length. First I need to weld the guide tube in the BACK of the stock attachment (sq tube) and drill take-down pin holes while it's still 4-sided. Then remove the front 'panel' so the tube is hollow, so the BC ext can travel almost (buffer) to the TD pins. Rvcr is presently 14" so everything's compacted. Then add epoxy filler to the stock-receiver joint (spray oil inside first, so it can be removed later) and sand with a flapper disc, for a seamless fit. At least that's the plan. Mice and Men, right?
Welded most of the full length seams on both sides of the receiver, without contraction or warpage. Still cycles smooth and I am thankful. That's where I ran into alot of problems building the MG47 - hand-filed till I wondered if there'd be any rails left. Very tight in there too. I had cuts-on-top-of-cuts OUCH!
Steve
PS I FOUND a LONG barrel extension - that'll save alot of work, and will get to see if the short gas system works in spite of things.
I like Cntrailrider's idea and am trying to do something simular. I am using the rear section of a FAL lower. I left out the internal spring, but installed the tube. I plan on adding a bracket on the top like the one on the bottom to stablize it. I will drill it out to allow the spring to enter the stock tube. This is a very rough idea and I will modify and clean it up later. the brackets will be TIG welded to the rear section of the FAL part. I have drilled and tapped the bracket to be able to bolt it to the receiver. This is my first attempt at this and a lot more work is needed on it, but it is a start.
I think i am going to be able to use the fal rear sites also. So far they will line

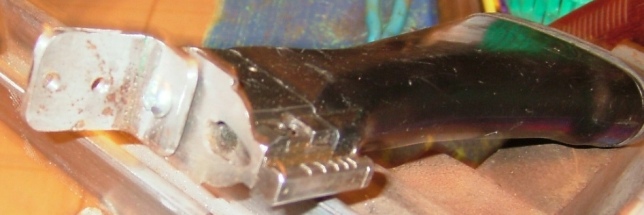

What is strength and length of your springs? Where did you obtain them?M60 from SARCO. START at around 16"+. It's in "The BIG Thread"
[PICTURE 404]
It's a VERY TIGHT fit between the hammer arc and the BC ext, beneath the feed stud. The hammer does not extend to the top of the bolt (more pics later) and that is with the "L" portion bent up slightly, for clearance.
[PICTURE 404]
It cycles the BC ext clear into the stock mount. Total stroke is 5.25", and the face of the bolt can travel 1" behind the feed tray. Made a comfortable cocking handle from a scrap section of barrel, but a vertical handle (like an MG42) would protrude less. A folding handle like on an HK, would be the ticket.
Tomorrow I sand the epoxy flush, and we'll see how she fits. It looks like the 'plan' worked out well.
Steve in El Paso
PS A guy over at Subguns posted 'this would be an easy build'. I hope he shares his amazing shortcuts!
I like your pictures and your twin spring and guide rod arrangement. I have one comment though, isn't the left guide rod going to block the ejection port as it appears to not retract when the BC does?
Been making some progress.
[picture 404]
[picture 404]
The stock tapped off fairly easily, and the mating edges are sharp. Needs to cure a few days before painting. The two holes on the bottom were for the temporary AK recoil spring mount (for chambering tests when locating the tray) and rear stop for the BC during belt-feed tests - before the cocking handle and slot were made.
[picture 404]
The BC ext rides against the rails on both sides. No play. Glad I went with full-length rails on both sides; additional reinforcements shouldn't be needed. Upper rails were welded on the bottom, before attaching the top sections to the lower tube. Cleaned up those welds to prevent interference with BC travel. It's supported in the vise by the four trunnion screws, to prevent receiver damage.
[picture 404]
This shows how little clearance there is for the hammer. It doesn't reach to the top of the bolt. Because of the feed stud location, hammer length is limited. 1/64" longer and it would hit the BC ext, even though the top is bent up slightly, and the front beveled, for all the hammer clearance I could get. If it were bent any higher, it would rub against the feed lever in the TC. The feed stud was repositioned forward (again) to delay timing / sequence, because my feed tray is further back than 'normal'. Because of that, I have very little space for a 'bridge'. Next time I'll get it right.
Video hand-cycling (feeding and ejecting) Everything's working well so far.
I've never owned nor fired an RPD (semi or FA) so this is brand new to me I didn't know how far to pull the belt in, to begin feeding (one spot BEFORE the feed slot) or that the pawl would be visible on the left, prior to feeding/pushing the next cartridge. I HOPE that's right! It's been a good learning experience. With no major obstacles, testfire may be in a couple days.
I still need to re-make the gas tube, because this one's recessed for the BC snout (gone!) and will most likely lose pressure.
Things yet to do: finish the side welds (I dread that) and fill in the pits, drill the gas port, enlarge the ejection port higher (on a normal AK, it IS the 'upper rail') harden the ejector tip, hinge pin holes, stock TD pin holes, and finish the barrel extension. Knockin 'em out one by one I hope dremelling and sandblasting can smooth out the welds. Would also like to make some sort of sliding cover, to hide the unsightly opening in front of the TC.
What I'd really like to build is a BF pistol in 7.62x25. The cartridge comes out of RPD links effortlessly. It would require less recoil spring, and stroke could be kept super-short in straight blowback. Next time, I'll do the tray- to-trunnion like the pic you posted the other day. Shorter cartridge path = shorter OAL and simpler/smoother operation.
Steve
Part II
I was asked for a pic of the cocking plate.
[picture 404]
No work of art - just a plate with a step to engage the BC. Easy fit with 1/16" wall tubing receiver. It lays tight at rest after it's cocked, so the handle is non-reciprocating.
[picture 404]
Finished welding the sides tonight. I am not a very good welder and there are some small pits visible here and there.
[picture 404]
A flapper disc works wonders, smoothing out the welds. There are some burns beneath the tray, which I hope to build up later. It will accept a '42 gripstick (using a mounting plate) or a CETME lower, which is much easier to fit and modify for semi.
Today we shot a short video: VIDEO 404
That video is way cool. Marty your camera person? Funny how these things appear to have a lot of recoil for a 7.62x39. Still think it's because of the mass of the bolt carrier hitting the stop at the rear of its stroke. The original MG47 was that way until I drilled a gas relief port about 1" head of the rear most BC travel position. Doesn't hurt any thing the way it is though and drilling a relief hole might affect reliable cycling.
Thanks - I am RELIEVED it functions, especially with the 'squashed' gas system. I had serious doubts there for awhile. Marty is the film crew and support team.
It has more than a gas relief port.
[picture 404]
Here's where the piston head is, at the back end of the stroke! I need to tig up the joint in that lower housing. That's an "L" shaped strap welded to the front, which hooks in the receiver. Both lowers interchange between both guns.
I could place a buffer between the TD pins; there is space to stack a few garden hose washers around the recoil spring guide tube. If you think that's funny, may I remind you the total project (TC under $100, spring $20, gas block $20, front end $50 shipped, steel about $25 - everything except the lower) cost under $250. The rest came from the spare parts boxes. And with what I've learned, another '42 gripstick lower would be under $40, and a heck of alot easier now! Curving/re-contouring the hammer, and adding a small side- plate (for reinforcement and weight) made it work with a standard AR hammer spring.
I am the kind of person who saves broken drill bits and taps, even when only the shank is left - someday they may become FCG pins to something.
If possible could you furnish the dimensions for the distance from the rear of the original bolt carrier to the center line of the feed roller/stud on your carrier extensions, and the distance from the inside rear ( base of the cartridge) of the feed trays to the feed roller/stud. I am doing the carriers for both of my MG47 Pattern MG1 and the RPD fed guns and a "Ball Park" range for a starting location would help take some of the trial and error out of it. I finally got the timing worked out on the "Pinneapple Upside Down MG23.5" gun but I had to make and move the cams and feed arms three times to get it. I'd like to "Cheat" a little on these if at all possible.
On the MG47, using a MG3 / MG1 TC, my stud is located 1 15/16" behind the rear inside of the tray, centered. It's worked as far forward as 1 5/8".
With the RPD TC, the feed stud is a 10/24 socket head cap screw. My BC ext is 3/4" wide, 1/8" thick, and the top of the "L" is ABOVE the top rails. Stud is 1.25" behind the body of the BC and 5/8" behind the bolt (when locked up) and 1/2" behind the inside rear of the FT. Post #64, pics 3 and 4 show how off- center the feed stud is, on a 3/4" wide BC ext. You see an extra hole which was part of the 'locating process'. I drilled and tapped four holes in the first BC ext before finding the 'sweet spot'. Remember, my breech is further forward (longer cartridge-chambering path) which greatly affects the beltfeed timing.
On both builds, to get it to feed and cycle smoothly, I bent the "L" on top of the BC ext slightly left or right (in the vise) and studied how far the feed lever and pawls moved during hand cycling. It affects things greatly. Sight down the top flat body of the BC and keep track of where you're bending it, in relation to centerline, and make notes so you don't keep bending things the wrong way. When you get it right, WRITE IT DOWN because it's easy to forget exactly where it finally worked best. I built three BC ext's for the MG47, and two for 'Jr' before getting things right. Good thing they're simple to build, because alot of trial and error was involved. I wouldn't know how to mill a BC ext and get it right on the first go.
Hope that sheds some light on feed stud location.
That gives me at least a starting point for both configurations. Mounting surfaces for my feed studs will probably look like "Worm Wood" by the time it's all over, but at least I can hope to have planted the "Tree" in the right area!! I'll just try to drill all the holes in some sort of "Pattern" and that way I can claim they're "Lightening Holes" later...
'Wormwood' means you've explored every possible option to attain adjustable timing, and we all know they're really lightning holes, right? I can't hardly wait to see pics of your "Twenty-three and a-half".
I was asked for a pic of the handguards.
[picture 404]
They're M249 HGs that I found for $5 each. I squashed the clips inside, to fit the barrel and gas tube.
[picture 404]
The lower slips into a lip on the front of the receiver; the top is held by the bayonet lug on the gas block. Strip of aluminum closes the gap. They may look a little odd, but they're comfortable, lightweight, and disipate heat quickly.
[picture 404]
[picture 404]
It gives a profile simililar to a Saiga .410 shotgun. I'd like to epoxy a mating contour on top, to blend into the receiver.
About the topcovers - Robert literally travels all over the world finding parts for us to play with - he had several hundred TC's stored in Germany destined for import. It was clear when SS first posted his MG47, there would be a sudden run on them. To those who ordered late, he's getting them out as fast as he can.
Have to limit use of the little 'ole man wearing my suspendors. I find the motion distracting, as others probably do too.
Why did you go with the CETME/HK trigger housing, easier to work with, or cheaper?
How do the sights line up, did you have to mod anything on either of them?
Thanks Coils -
As luck would have it, elevation on the sights was three turns up on the FS post.
HK/CETME pack is 'ready made' and easy to mount, and I already had one. Just add an "L", recess the housing, and drill pin holes in the rear. A complete semi-conversion takes me about 30 minutes. I've built a HK51 and 51K, am very familiar with them, and am fortunate to own a transferrable Fleming HK sear pack. The '42 gripstick w/AR group was a 3 day project in itself, before getting the geometry right for an MG47. Pirate and some other folks market 'FCG drill jigs' (that was mentioned earlier) I didn't have a FCG jig (just mic the hole distance, right?) and milling it out with a drill press, to get a hammer spring in there was alot more difficult than you'd think. Try one! Not to mention laying the hammer low enough to cock with adequate BC clearance, yet engage the DC for proper function. Then there's the problem of the light (and fragile, after the mods) hammer and spring. My '42 gripstick uses the original trigger axis hole and is up flat against the receiver. It was by no means a 'casual' project. HK/CETME lower is 20 times easier, for me at least. If you've done a few for semi '42s, it might not be a big deal - but this one was my first.
[picture 404]
Top HG slips/locks onto the bayo lug. BC was blasted and blued, and contrasts nicely with the bright bolt and piston. When building your TC latch area, DISASSEMBLE the latch (the screw is STAKED) and build it so it mates with the BACK END OF THE TOPCOVER. Don't do what I did, then have to build it up around the latch, see? There's some free advice that I didn't have. MG1/3 latch screws are also *staked*. Save yourself some headaches.
[picture 404]
There are some pits, but not readily noticable. I intend to blend the top HG/receiver joint with epoxy.
[picture 404]
Enough space for a laser, and an endcap to hide it. I bought several off ebay for $35 ea (that back screw is loose...)
[picture 404]
Elevation took 3 turns up on the FS post. It was meant to be
[picture 404]
[picture 404]
I guess this pic is the one you've been hoping to see - it will go on my wall. That's about $600 of homebuilt hardware in 7.62x39.
The shop is all cleaned up and tonight I relax. Tomorrow, my new pet dragon and I go play - Easter Sunday is always a good day to shoot and celebrate larger things.
If there's anything you'd like to see more of, let me know. I am open to suggestions and constructive criticism. I plan to post more videos, then it's on to a self-contained twin-spring BC attempt (Doubletapme did it) with a buttplate, and complete it as the originally-intended pistol. And if THAT works, I can hear a 7.62x25 calling my name...
Mounted a rail beneath the HG for a bipod.
[picture 404]
Look close and you can see I'm no expert welder (no-gas MIG) but the air bubbles are cosmetic.
[picture 404]
TIG'd the barrel ext on top, which keeps groups around 8" w/ 9" barrel (my MG47 w/ chrome Chinese barrel consistently gets milk jugs @ 150 yds, verified w/ laser rangefinder) Still planning a laser and front-cap in the HG, but otherwise, it's finished.
This wasn't easy - I would discourage the first-timer or one who's been using pre-made receivers, as it would most likely wind up being a waste of parts and high hopes. It's a very time-consuming and in-depth build that will borrow from ALL your past knowledge, and then some. But it can be done, and is a fun challenge for someone who's 'peaked out' or is bored and looking for something new, different, and cheap. For the experimental builder with extra parts laying around, it will give you and them a useful purpose. It's not the kind of project you buy new parts for. But it sure beats shelling out $2K for a ready-made semi-beltfed, commercially produced by someone else. Plus, you learn.
Last night I loaded some 7.62x25 in an RPD belt ("U" links) backwards.
[picture 404]
RPD "U" links loaded w/ 7.62x25, RPD "U"s loaded with 7.62x39, DM1 links loaded w/ 7.62x39
[picture 404]
They click right in there firmly (they don't shake out) and clicked out very easily with my pinky. Fed and chambered flawlessly, all 50 rds. So @ .08 per rd, you can guess what's next. Whether it works or not, we'll find out. In my spare time I need to get cracking on the twin-spring internally-housed recoil- spring system, but need two BC's first. Let me know if you have a couple un- needed BC's for sale, reasonably priced. I have a WTB ad for some other parts too, in the 'Marketplace'. If you're building your own MG47, please add your build pics. There are about a dozen underway, that I know of.
For Jr's T-S set-up, I plan M11 springs (compact diameter) on guide rods near the outsides of the BC in the rear. Short guide tubes in the buttplate will keep the springs guided thru the stroke. The guide rods will ALMOST extend to the guide tubes creating a simple telescopic effect. The BC ext may need side- reinforcements if the diagonal "L" needs narrowed (for the springs/guides to clear). It may sound a little mickey mouse, but I believe it will work. Let's call it the 'no-mill' approach.
[picture 404]
Just snapped this after writing the above explanation. A pic is worth a thousand words. Still need to find correct-size tubing for the guides and build a butt-plate. You can see I cobbled together the top part for the TC latch, because I didn't have 1 1/8" tubing. It doesn't set on the top rails like it should. With the RPD TC, I should've removed the latch from the TC to fit that part, but didn't. The latch screw is STAKED.
I'm open to suggestions for common small dia springs. The smaller the spring dia, the less the "L" ext will need narrowed/weakened. I don't want it to break after 10 shots. M11 springs are .275"OD x 11" OAL and compress to 5". There is 4" for 'stacked compression space', from the butt of the BC to the back end of the ext.
[picture 404]
This is the BACK of the stroke. Jr has 5 1/8" BC stroke whereas my MG47 only has 4 1/8", though it's receiver is 1.5" longer. That's because of the HOLLOW stock mount, allowing the BC ext to recess into it. Building Jr more compact, yet having a longer stroke was a learning curve. Who knows how far this design will progress a year from now -
The 7.62x25 will be a completely new build. A BC for it is on the way from Shadow Walker (THANKS) and I have all the other parts. I'm excited because of how easily they click in and out of the links, which should allow a weaker spring, leaving most of it's lesser power to cycle the TC/ feed mech (instead of overcoming a strong recoil spring). THEY ARE TOO LOOSE in the "L" link belts. This build won't happen anytime real soon. Knob Creek and Cheyenne Wells in CO are coming up, so not much time to build. If anyone else is persuing one I'd be glad to share what I've come up with, to help jump-start yours. A seperate thread for the 7.62x25 will be in order. EIGHT CENTS A RD makes it a gotta-do.
I see you got your BC annealed, drilled and tapped. Was it as hard as the ones I encountered? Got the MG47ES to feed, the op. handle on and the grip on. Also, I threaded a Bulgarian bulged trunion for a heavy 28" Ruger No 1 308 barrel, head spaced and the barrel turned for a RPK gas block for Ian's M-76 he is working on. Hope to be able to test fire the ES this weekend.
McMaster Carr has a good selection of springs.
How did you attach that cord or string to the bolt carrier so you could cycle
it when you were testing it?
I drilled a hole through that triangular section at the back of the BC (cut it off later) and put an S hook in it. I have about a mile of 'super string' I got on a bobbin about 30 yrs ago; it's rayon/nylon of some sort and I double it and make a grip like a lawnmower starter on the back, so it didn't rip my hands up. I did ALOT of cycling tests. Later, after joining the top section, you may have to press out the lengthwise 'bow' to get it cycling like it did before welding. Happened to me on both. Adequate 'slop' on the piston is important too, so the piston doesn't bind in the tube/ gas block. With a tube receiver, and additional welding/warpage, it happens. That took some time (!!!) AFTER it was already cycling smoothly, to get it cycling smoothly again.
BC's are HARD. Tapping the holes for the BC ext was a nightmare - went through two taps on each one. Had to start them with a tack hammer (ever done that? real good for the tap you know) Annealing would have helped. Used 1/2 x 1/8 flat steel for the BC ext and 10/24 screws to attach it. You can start with 8/32 and bump it up to 10/24 if the threads strip. A couple holes stripped on my first one.
Grind or mill a square corner at the base of the 'hump' on the BC for your BC ext, so it is 'seated squarely' and can't flex.
When you get the placement right, you can weld it in place, but go light on the welds because you may have to replace it later - thin flat steel will allow you to bend the "L" slightly to adjust feed-stud position side-to-side for better feed, and lighter weight for cycling. Had to adjust both of mine several times (in the vise with a wrench) even after it was feeding/shooting, but once it's right you should be OK. BC ext is easy/quick to re-create once you have it about right (built 3 for the first, 2 for the 2nd - milling one PERMANENT is beyond me). I drilled the hole in the back for the recoil spring guide a bit oversize so it will 'find center' and BE CENTERED with the RS tube, and no 'side friction' on the spring - don't cut the receiver to final length until you have it hand-cycling and feeding with the TC - Stock TD pins must clear the recoil spring. That's where all MG47s so far vary. I ALMOST got myself in a severe bind with the receiver length on #2 THE DAY AFTER writing 'the logic post' duh... that's when I re-made the 'Ferrari-tailed BC ext' to recess BETWEEN the TD pins. Gained 5/8" more stroke.
[picture 404]
Notice the 10/24 in the rear, 8/32 in the front.
A lot of miracles were involved in my MG47s. Cutting off the bayonet lug was on the list of things-to-do when I encounted M240 HG's the same day for $5 each. Upside down bayo lug served no purpose behind the FS, right? Top HG got notched, and inserts INTO the upside-down bayo lug, rock solid w/ flush fit.
[picture 404]
I didn't have a plan for HG', until these showed up. It helps to pray while you're building away. Length was perfect with the custom gas tube. No cutting.
[picture 404]
I'd made diagonal cuts (?) on the front bottom of the receiver which wound up engaging the metal inside the HGs. Looks weren't a major concern but burning my hands was. Sometimes I feel like Forrest Gump because You never know what you're gonna get.
Uzi springsCoils -
I was also planning Uzi springs, but when I first shot it, it was MUCH tighter than now. I didn't think I could pull off a twin-spring system, with a fresh build. Now she's broken in and cycles with my pinky, so I plan to attempt it. My problem lately is no shop time.
Uzi springs should work, but Mac springs are even smaller diameter for straddling the BC ext, so we'll see what happens. I didn't want to narrow the back of the BC extension too much, for fear of breaking.
G3 stocks are ideal for this because of where the hole is already located in the stock, for the recoil spring. Used furniture sets can be obtained from Robert for $8.
HK G3 Surplus Green Stock Set
[picture 404]
[picture 404]
Straight blowback with gas piston assist. Weighs 9 lbs 4 oz which is lightweight for a beltfed. OAL is 37", barrel is 18", and may get shortened if the pressure duration is adequate to feed reliably.
Here's a short vid of hand-cycling / feeding: MG47EC Feed Test 762x25 - Putfile.com VIDEO 404
Still need to sculpt the lower with epoxy and add a 'fillet' to the rear, and a folding bipod to double as a lower HG. Also need to create a link guide to support/suspend empty links (up front) on the way out. As empty links exit, I get the occasional hang-up (regular RPD's have a link guide/track) Links are the "U" type, loaded and fed backwards, which hold 7.62x25 perfectly. This was not a quick build but each MG47-type project gets much easier, just like building AKs does.
Wish me luck on the testfire. I bought half a ton of this ammo and intend to shoot all I want, with no cost concerns. The "EC" designation stands for "El Cheapo."
[picture 404]
It has stops to keep it centered / secure when folded. Will look better after it's blasted.
[picture 404]
Slot in front of the HG slips into the bayo lug. Back snaps in place over the trunnion screws (6).
[picture 404]
Fillet on the back is done; epoxy gets shaped sanded and painted to match. The $1.97 El Cheapo stuff from Walmart works great.
[picture 404]
Here's the guts. Single M11 spring, fully self-contained, 5.5" stroke. Butt- stock is removable from the back plate by flipping the button heads around and using nuts on the inside. Pardon the welding - had to re-locate the feed stud a couple times, and the rails, well... next one will be better. But it cycles super smooth.
[picture 404]
[picture 404]
G3 hammer spring is overkill; scrap of left-over M11 spring fits perfect and can be clipped to whatever length works best.
[picture 404]
VIDEO 404 MG47EC Testfire belt flips - Putfile.com
The solution to 'belt flip' is USE A LONGER BELT WITH MORE AMMO
Another Video:
Shooting it faster to see how well it would work VIDEO 404
Fast till it malfunctions - Putfile.com VIDEO 404
Shot just over 200 rounds. The best consecutive run was about 30, when I wasn't videoing. You see the front HG slip up, and there's some other minor tweaking to do, but at least I know this cheap little cartridge will do the job!
Was very windy, I was shooting with one hand and videoing with the other. That's a handfull, especially when operating a fresh experimental build. Think about that for a moment. Better videos will come later when things get smoothed out.
Concerns were:
Timing - it had to be really close, or it would self-destruct internally. Feed stud location had to be correct for smooth feeding, or it would jam and something would bend or break. Straight blowback is a quick action, with no rotating bolt to slow things down. It was a time consuming process of trial and error, hand-cycling HUNDREDS of rounds, re-locating the feed stud numerous times (re-calculate, weld shut, re-measure, re-drill, re-tap) to get it feeding and cycling as smooth as possible. You could call that 'Tinkerer's Heaven', or 'Tinker's Hell', depending on how things are going (forward or backward).
Recoil Spring - recoil spring was as weak as possible, just enough to strip rounds from the belt and chamber reliably. Spring needed to be much stronger, to keep the BC from banging on the backplate and mushing the recoil spring guide tube. Wound up going with 10.5" and that works well. Cocking stroke is 5.5" and cycling stroke is 6.5". Recoil is very similiar to an M1 Carbine.
Cocking the hammer - Hammer spring is a left-over section of main recoil spring (M11), considerably weaker than the original G3 hammer spring, to insure the small cartridge could cock it. 3rd strike did not fire. My initial fear was faulty headspacing - turned out the hammer spring was too weak. Used a longer spring and was good from then on. I will try the original G3 spring next time, just to see if it works. It may even slow down the action.
Punctured primers - was not a problem; none were punctured.
Ejection. Every one cleared (just over 200) NO stuck nor broken casings (that was a major concern) and ejection path was fairly consistent. It ejects empty casings a different path than loaded ones. Majority of the necks are cracked, so the chamber will get dirtier than most blowbacks.
Empty belt/links jamming on the way out - I went the quickie route - put a piece of plastic packing tape on the right side of the feed tray. Empty belt/links came out like they were sliding across ice - until the tape began to wear - and about then is when I started to video. I need to add a small guide to suspend the links/belt on the way out, so empty upside-down "U links" dont catch on the flip-down dust-cover hinge.
[picture 404]
Something I'm really pleased about is it will feed 'squashed' cartridges (with the bullet jammed too deep in the casing) just as smoothly as 'good' cartridges.
[picture 404]
I've read about firearms that can feed empty casings, a testament to their extremely smooth feeding and reliability. This one won't chamber empties, but it comes close. I have a milk jug full, left over from failed cycling tests, and this little rifle will eat them.
IT IS VERY ACCURATE. The barrel will remain 18". Rough sight-in was fast and easy, but the primary concern for today was mechanical function. Bullets are 85 grain. More specifics on range and accuracy later, with some tannerite for fun and videoing longer range shooting.
There's the report. Now I need to clean it SO THE FIRING PIN DOESN'T RUST IN THE FORWARD POSITION (like a fixed firing pin in a blowback SMG) creating an unsafe condition. That was detailed in another thread, for those unfamiliar with shooting corrosive ammo...
if you hold the belt as it feeds you will get a better assesment of how the
gun works. belts don't feed right flopping around like that.
Thanks Pirate -
It worked much better guiding the belt with a small amount of tension, but in the videos I was holding the camera with my other hand. Was getting full strings of 25 - 30 (thats all I loaded) including the last round. Overall, it fed really well, even for flopping around. Only had a half hour of daylight left, so the test fire session was somewhat rushed. Dragging a longer and heavier belt will help - more are on the way.
The bolt is removeable, and is standard length. The only mods were reducing the cup size by TIG'ing a sleeve inside (then turning a very slight bevel) and a small build-up on the stripping lug. Remove the extractor spring, so it doesn't lose it's 'set' from the heat, when building up the stripping lug. You can't cut those kinds of corners, or else you'll run into extraction problems later, when shooting - although it will extract and eject hand-cycling, just fine... one less puzzle to figure out later.
[picture 404]
Here's the beginning of locating the feed stud. The plate was later enlarged. I went this route after Dvann proved it would work - THANK YOU DVANN! I made a 'cammed' cap-screw using a dremmel, to help determine the feed stud location - after going 3 steps forward and 4 steps back. A partial turn had a large effect on the feed. Finding the best location on that 1/2" sq area was like looking for buried treasure on half an acre. The 'final' feed stud is a regular 10/24 cap-screw with some grease.
It uses one M11 recoil spring, self-contained in the receiver, with two guides. I drilled the BC and inserted a small rod, and in the back-plate is a small tube. There is a 1/4" gap where they do NOT telescope, so the spring is NOT completely captured. Otherwise the stroke would be limited by the telescopic rod and tube. The spring will escape, instead of compress, if the gap is too large. The spring should not 'solid stack' or else it will self- destruct. That's one of the tricks inside an HK51K.
[picture 404]
Pardon the welding. I am a tinkerer and amateur home-builder, not a professional welder, and am still learning to tig. Next one will look nicer, with the welds on the inside bottom of the upper rails, like on Jr. I jumped too far ahead on that, and decided not to go back.
[picture 404]
Here's after 200 rounds. Very dirty. The gas port should be smaller (it's .125") I plan to fill in the gas block hole, and re-drill it a smaller dia. My main concern during the build was whether the small cartridge would have enough pep, so everything was geared towards low-energy operation. But the little 7.62x25 cartridge has pep to spare. Lakeside Machine builds beltfeds in .22 and I am certain a somewhat experienced AK home-builder could pull this one off in 9mm.
Well now you have all the 'secret details'. I'd really like to see someone else do their own version in this caliber. There are many improvements still waiting to be found.
How about some more info on this mounting plate for the feed stud, does Dvann
have a post with this info?
Dvann posted the pics on his MG47 build thread. It's exactly what I'd envisioned, but he'd already built his. Look at post #2:
http://www.gunco.net/forums/redirect-to/?redirect=http%3A%2F%2Fwww.akfiles.com%2Fforums%2Fshowthread.php%3Ft%3D38708%26highlight%3Dmg47
SharpShooter's first bolt carrier extension reminded me of Queen Amidala's Starship, and opened the portal to Home Hyper-Building.
So far there've been 4 different types of BC ext's which accomplish exactly the same thing. The goal is to get the feed stud there by whatever means; mostly your imagination.
I was afraid my "L" type ext would be too heavy and too long, plus a self- contained recoil spring would be a very tight fit.
Topcover $75 (but that was a while back)
 Lower (new, Numrich) $100
 Barrel 30-30 (Numrich) $18
 Re-chambering $25
 Other AK parts $60 including '74 gas block
 M11 spring $6
 Tubing around $10 (bought 10')
 Handguard $5
 Stock $2 (Century)
 Bipod (Tawian) $15
 Belts (w/drum, Numrich) $25
 Misc pins, screws, epoxy, welding supplies, etc
This one cost around $325, which is pretty cheap for a beltfed. Todays surplus junk is tomorrow's treasure. Bargains are out there if you search, although TC's are getting harder to find. I spend as little as possible on parts, and use leftover spares and other people's junk whenever I can.
On the road right now, but will post a few more pics (stock mount, trunnion, rails, gas tube) when I get home
Just rereading the posts on the El Cheapo. Is it blowback and gas operated?
The way Im reading your posts its a non locking gas operated. Is that right?
Dvann -
That is correct - straight blowback (non-locking bolt) plus a regular gas system with a very close tolerance tube. I am wondering now if any gas system at all was needed. Have a notion to weld the gas port shut in the block, and try it that way, just to see. It might still cycle with the pneumatic 'suction' in the gas tube, but definitely slower. Never thought I'd want to 'slow down' a semi, but I'm afraid the super-fast stroke could wreck the feed mechanism. And to think I was sooo concerned it wouldn't have enough pep to cycle... best laid plans. I have no doubt it could be built in 9mm, but x25 is half the cost. 9mm would probably fit in the links too, frontwards. I'm not home yet or I'd already know.
I've had many x25 casings seperate (none in this one, yet) probably because my chambers weren't kept as clean as they should be. Residue builds up, a (cheap surplus) casing sticks/breaks, then I'm pulling it out with a turned-in drill bit. In the process, the chamber receives a tiny nick; now the likelihood of a stuck or broken casing has increased. So I'm keeping 'EC' super clean - 9mm chamber brush on a long rod, in a power drill. I have shot ALOT of x25 and it's been educational, for sure - my first experience with anything corrosive. 8mm was next - same lessons apply.
Thanks Dvann -
I WILL TRY THAT! A small weld to join them could be cut with a Dremel, if it needed removed later (extractor, firing pin). It has a TINY bit of fore-aft play between the B and BC. I can see how that small inertia slap could rip some. Also need to do that in the x25 carbine. It has about 1/64" of play and has had the most seperations.
[picture 404]
[picture 404]
[picture 404]
[picture 404]
This will get you very close for starters. I drilled and tapped two locations at a time (I believe three times). The stud is presently in the rear hole. The bolt makes a good reference for scale.
Feed Ramp - the link/belt guide keeps the cartridges from nosing up. The original guide was ground off since the belts are fed backwards.
[picture 404]
The 'spanners' beneath the feed tray are the same width as the receiver. They need to rest on something, so they straddle the upper rails. The trunnion is notched and the rails insert into the notches. The right side (ejector rail) is free-standing, but the feed tray keeps it compressed it into position. This is like wood-working.
[picture 404]
Here's another shot which shows how both rails interlock into the trunnion ears. With a SLIGHT bevel on your bolt cup, it will center on the cartridge rim every time.
[picture 404]
You could call this a show-off pic. I'm happy with how the stock fits into the rear of the receiver, but my welding needs some work.
[picture 404]
Another show-off pic.
[picture 404]
That little lower cap was a couple hours work.
[picture 404]
Here's the stock mount w/ recoil spring tube. I could've ground it off purdy for the pic, but it works the way it is. All metal, but epoxy would've helped the fit. May add some later.
[picture 404]
The skirts on the HG were peened over so it snaps into place and no longer slips up. There are 3 trunnion screws on each side, since it's straight blowback, and the trunion is what takes the beating.
[picture 404]
Tomorrow I shoot her again - I plan to drill and tap the gas block, to make a primitive gas regulator, using a cap screw. This little cartridge has more pep than I would've guessed.
What size tubing did you start with on the receiver?Dvann -
It's 1.5" x 1.5" and 1/16" wall. The sections on top are 1/2" x 1/8" steel from Lowes. Those sections are visible in this pic of the front trunnion and TC hinge bushing. That's probably my nicest tig weld so far.
[picture 404]
Need to get some oil on that barrel
[picture 404]
The handguard locks into the upside-down bayo lug up front, and the back snaps down over the trunnion screws.
[picture 404]
Folded bipod doubles as an adequate lower handguard. That's rationalizing, but I didn't have a better plan. I don't know yet if ejected casings will clear the leg or not.
Here she is wearing the right amount of make-up, dressed in black, and ready to play. And wouldn't you know it's been raining here in the desert, for 3 weeks straight.
[picture 404]
[picture 404]
[picture 404]
It beat the recoil spring guide tube (which is on the right side) against the back-plate, where the stock is attached. Very minor damage (more like evidence) and the receiver and pin holes are intact. One M11 spring is not strong enough to counter the recoil. There is enough space to locate another recoil spring set-up on the left side, then go from there. Also thinking about a stiff coil-spring buffer behind the bolt stem. There's very little rear surface area for a buffer.
I am wondering if a rotating bolt and a super-tight gas system would have been better than straight blowback. I didn't think x25 would have this much energy, while cycling the belt feed mech.
On a brighter note, accuracy was good. Was hitting milk jugs @ 150 yards, even though I was distracted with the other problems. I only shot about 30 rounds.
Stay after it bub.
Yes the x25 really does make this kind of power and if you stumble across some hot stuff its WAY more than that.
Even if you just ad a small piece of leather in the back as a buffer (like the PPS43) it will help you a bunch.
Same thing on evening out your spring vs. bolt ratio... I'm going to go back and re-read this thread and see if you got your bolt weight listed. Because if your bolt is about the same weight as PPSh-41 bolts and your in a blowback set up, then your spring from one of those would be perfect.
Or if you are down at the PPS43 bolt weight then one of those springs which is a bit longer would be the trade...
The gas tube set up would be cool, but this cartridge has been used in about 40 million firearms in blowback set ups... so I'm sure you will get it with just a little more tinkering.
Dutigaf -
Thanks for the support. I'm not abandoning the project at this point -
Here's a pic of what happened. Fortunately the damage is only to the stock insert where the tube is welded to the rear; the back of it pounded against the backplate, bending the right side out. It can be bent/pressed back into shape. Front of the tube is slightly mushed. From the top, looking down:
[picture 404]
[picture 404]
B and BC weigh 15.6 oz - intent was to keep the weight down, plus be internally self-contained.
Here are the BC's from previous builds, with a long "L" type extension:
[picture 404]
#1 = 22.8 oz
#2 = 21.4 oz (Jr, using RPD cover)
Standard BC + bolt weigh 17.3 oz
I could insert round stock inside the (unused) BC recoil spring cavity to increase the weight. A better choice would be adding a recoil spring on the left side.
************
Just now snapped this pic to illustrate another possible solution. Small section of spring is just for display/clarity.
[picture 404]
The feed stud PLATE could be replaced with a section of square tubing, sliced edgeways, into an upside-down "U" cross-section, 2.5" long (image is distorted / tube is 2 and 5/8" till impact) The back end of it would be closed flat, creating a rear buffer surface between it and the stock insert. Buffer cut to the insert profile, and slipped on over the tube. This would add some weight to the BC, and limit the rearward travel, with an evenly distributed impact, instead of being on one side. Thinking this out as I type. I have some of the liveliest conversations in the shop, when I'm alone...
The back end of it would be closed flat, creating a rear buffer surface
between it and the stock insert.
The only thing I'd worry about with this is interfering with the hammer swing.
Coils -
Hammer swing will clear it.
[picture 404]
The difficult part is getting the feed stud location in the exact same position again, for smooth feeding. Plus a reinforcement plate on top for deeper stud threads.
[picture 404]
Had to have access to the top screw that holds the G3 stock to the backplate, which made it more complicated. A G3 buffer spring, about 1" long, goes in the back of the tube. It's a VERY HEAVY DUTY spring. Turned a 'plug' to go if front of it.
[picture 404]
The steps on the 'buffer plug' are clearance cuts for the feed stud plate, and feed lever (in the TC). The back of the bolt stem centers on the buffer plug.
[picture 404]
The short sections of recoil spring are only for illustration. Actual springs are much longer. There's a slot with a screw in the bottom, to secure the buffer plug and keep it aligned. I used a C-clamp to partially compress the buffer spring, for assy, so it's already under pressure.
Had I anticapted the actual energy of the cartridge, it would have been designed differently. And it would look neater, instead of bent back in shape and re-done with welds on top of welds. Next one should be better; maybe a rotating bolt with a tight gas system and super-light BC. Straight blowback doesn't need the gas assist. These MG47's are addictive beyond description.
What are you using to get a bolt head that is small enough for the 7,62x25?
The 7x39 looks a bit large.
you can sleeve a 47 bolt or use a 74 bolt which fits perfectly as is.Tig a diameter-reduction sleeve into a 47 bolt cup and turn a very light bevel/chamfer on the insert so it centers on the chambered casing. Details:
The Guns Network LLC ~ Discussion Forums [LINK 404]
Not to be a damp rag but we're gettin' off track. That's why folks have to sift through 600+ posts on SS's MG47 thread to find the 100 containing relevant build info. Don't take that the wrong way. Any questions, PM and I'll answer as best I can. I would have answered above but my thread subscription dropped out for some unknown reason.
If someone would post the weight of a PPS43 or PPS41 bolt, it would be usable information.
I hope you guys have seen Doubletapme's latest build: XT74 belt fed
Droog and Winn -
Here's the bolt sleeve tig'd into the cup, before facing it in the lathe.
Tedious welding - it's my nicest one so far
Need to hone a little off the extractor (base) so it can grip casings tighter / stronger ejection. Once in a while one doesn't completely clear.
http://www.gunco.net/forums/redirect-to/?redirect=http%3A%2F%2Fs524.photobucket.com%2Falbums%2Fcc324%2Fcntrailrider%2F%3Faction%3Dview%26current%3DWorking.flv
She filmed this through the windshield. Still the occasional failure to eject; that can be fixed.
http://www.gunco.net/forums/redirect-to/?redirect=http%3A%2F%2Fs524.photobucket.com%2Falbums%2Fcc324%2Fcntrailrider%2F%3Faction%3Dview%26current%3DFilmedthroughthewindshield.flv
You can get an idea from this one that it is accurate. But velocity is not strong enough to set off Tannerite.
http://www.gunco.net/forums/redirect-to/?redirect=http%3A%2F%2Fs524.photobucket.com%2Falbums%2Fcc324%2Fcntrailrider%2F%3Faction%3Dview%26current%3DAccurate-buttooweakforTannerite.flv
Sorry for the delay with the bolt wieghts but last week was nuts at work.
The PPSH41 is 1.26 lbs
The PPS43 is 1.21 lbs
The weight added to the BC brought the gun to 11 lbs 11 oz, including the bipod. That's 12 oz heavier than "Jr", sort of an oxymoron since it fires a lighter cartridge. But most blowback SMG's are heavy for their size, due to their heavier bolt.
I re-built a better link guide to position the belt/links more precisely.
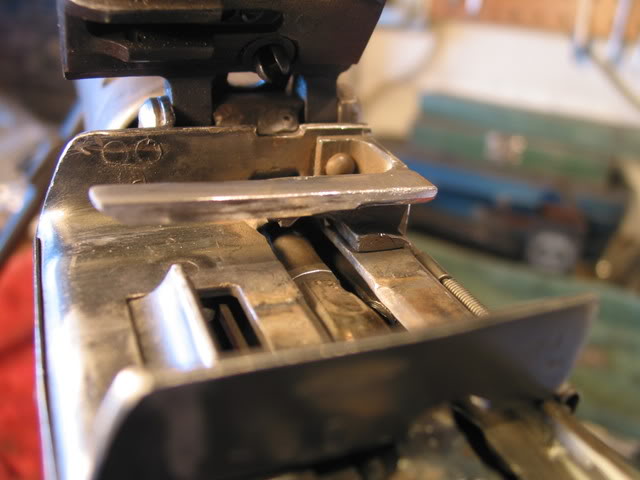
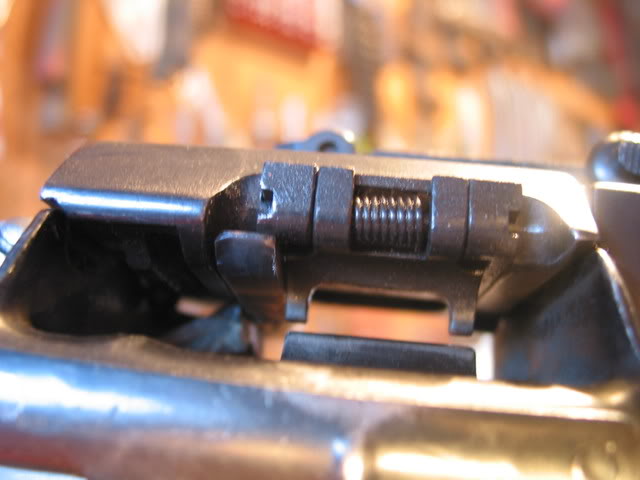
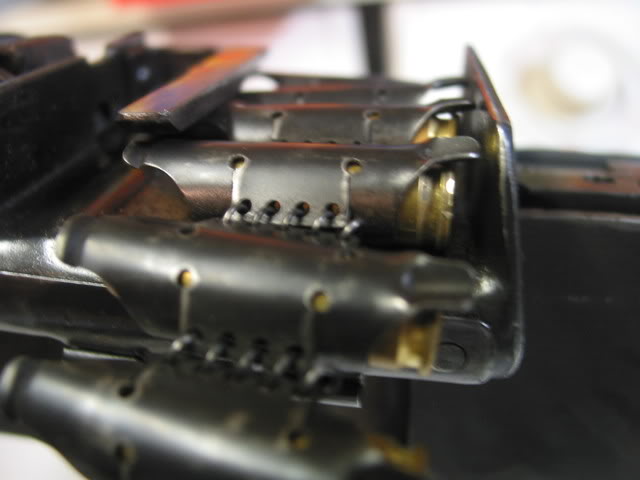
Since the "U" links are backwards, the part where the rim normally snaps in acts like a ramp - cartridges are pushed out of the link already nosing down. It feeds short 'squashed' cartridges (overseated bullets) just as well as 'good' ones. So send me your 'squashed' x25's!! I need to see whether it'll feed empty casings.
Going through $2.08 worth of ammo.
http://www.gunco.net/forums/redirect-to/?redirect=http%3A%2F%2Fs524.photobucket.com%2Falbums%2Fcc324%2Fcntrailrider%2F%3Faction%3Dview%26current%3D208Worth.flv
I needed to hold the belt up - because loaded links are a few 1/000" smaller dia than x39, and it wouldn't pull every one 100%.
So I modifed the belt stop to spring up higher; so the weight/tension of the belt doesn't pull the links (backwards) over the stop, since they're smaller.
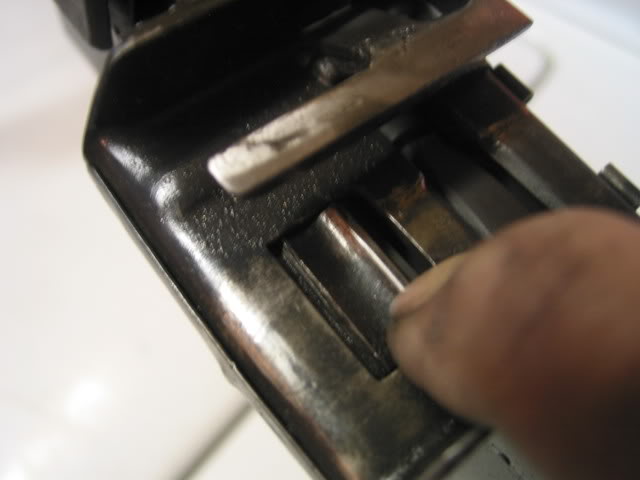
The gap between it and the feed slot increased. I built up the right side of the stop to compensate; now links are centered over the slot again. It pulls a long heavy belt on it's own. The topcover is stock - no modifications.
All the test fires have been shooting downhill, which affects the angle of the belt (cartridges feed nose high). Will try on level ground and see if there's a difference.

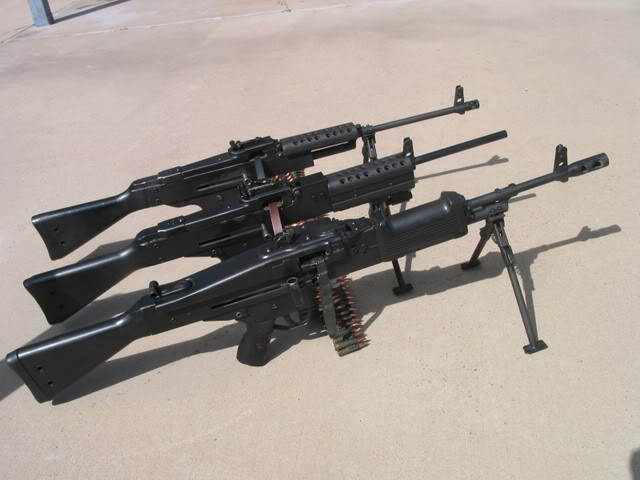
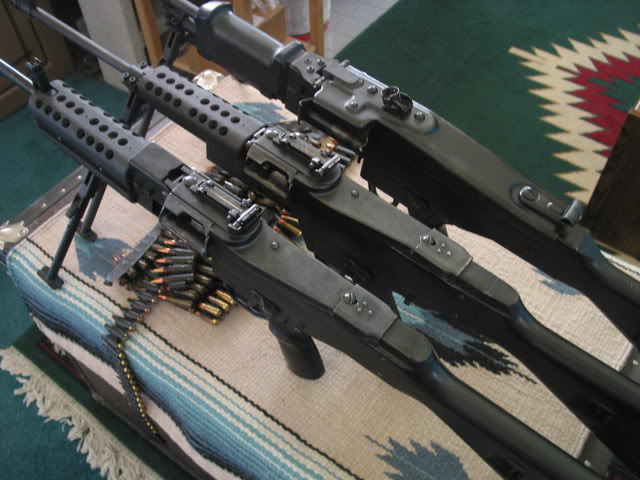
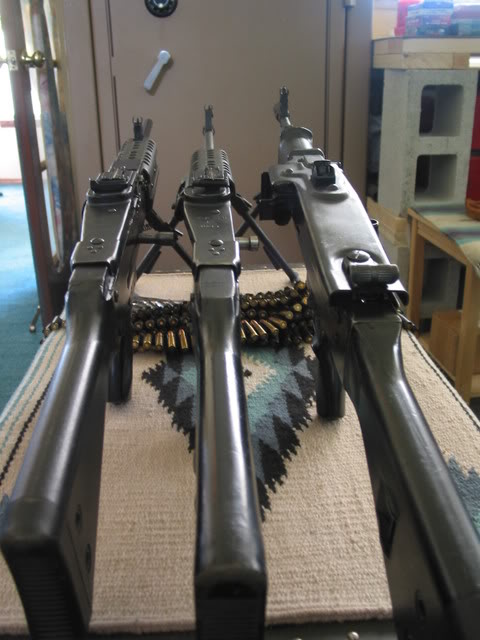
TC isn't shut on that last one - just now noticed it.
Steve how wide is your receiver under that MG-1 cover? I just measured my cover and its about 2 1/8 in. That seems to me to be a pretty wide receiver or am I missing something?
That's correct. RECEIVER tubing is 1.5" wide and TC has quite a bit of overhang. That's part of the reason I used RPD TC's on the last two.
#4 is nearing completion. 7.62x25, but gas operated. No guarantees it will work, but I won't know if I don't try.
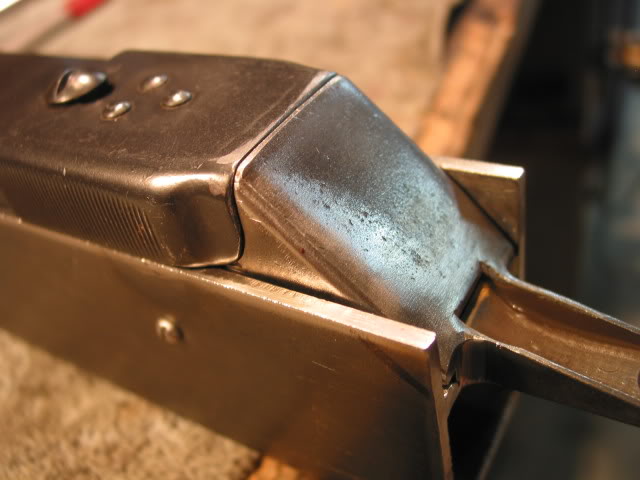
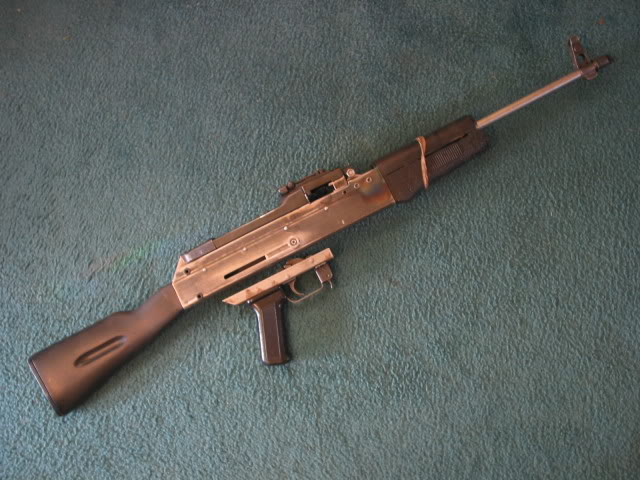
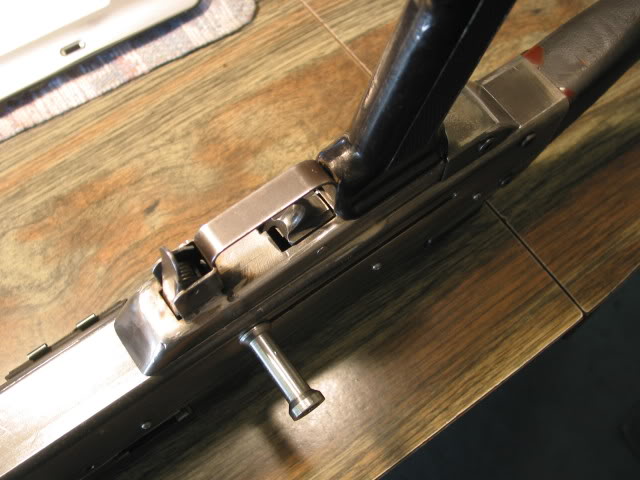
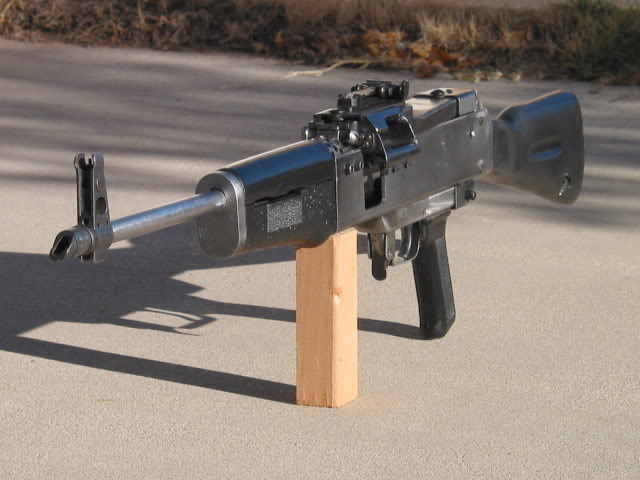
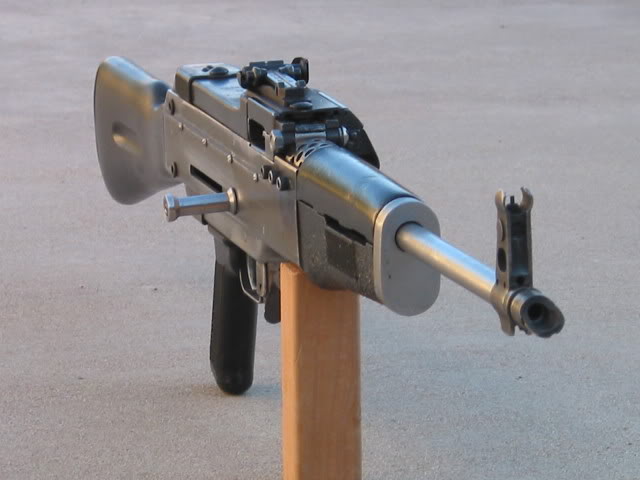
More info and pics are over @ AKfiles
There's also a poll to guage interest in MG47s