Thread: Loose Enfield barrel
Retrieved: 06/20/2014
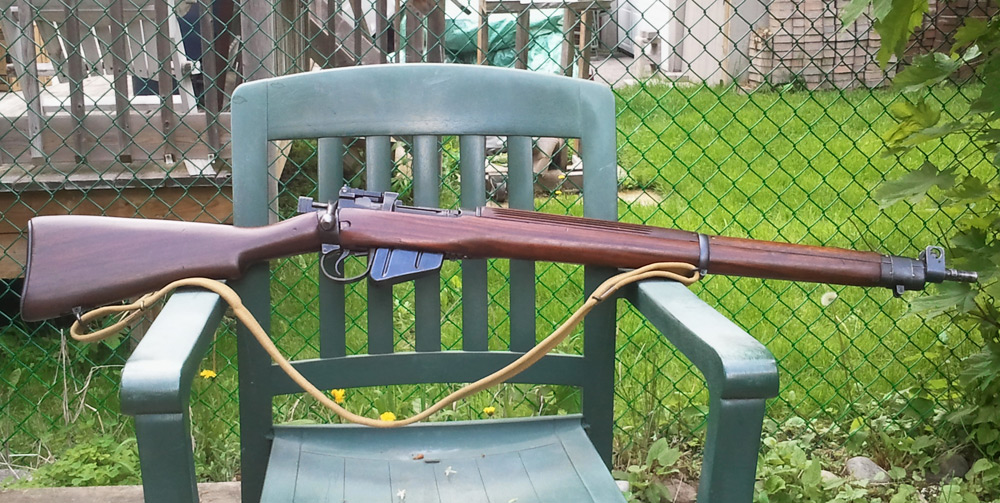
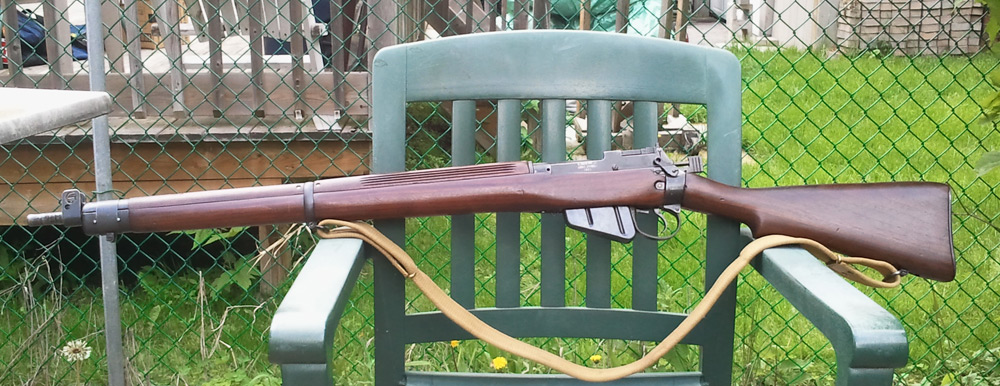
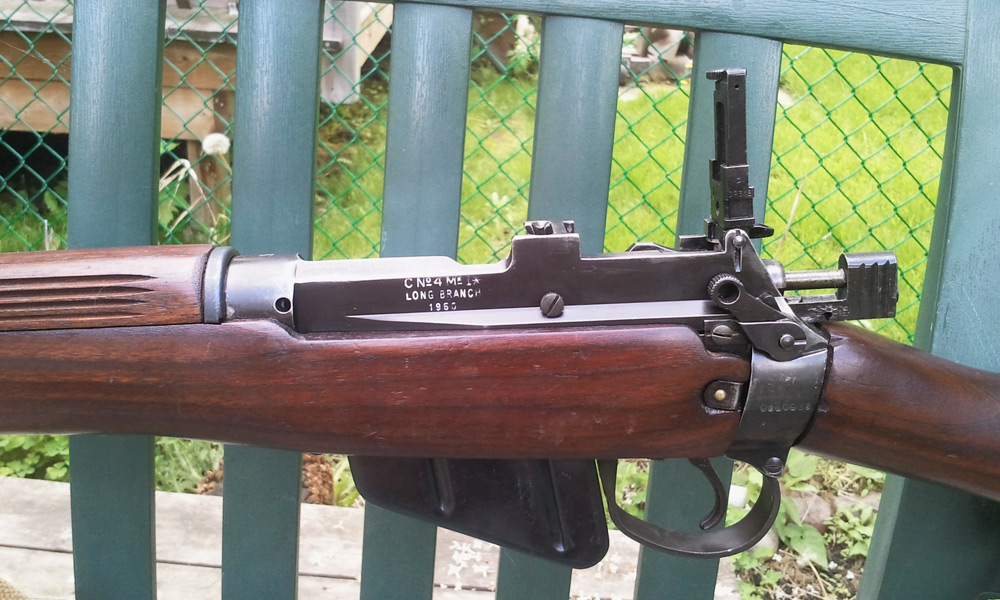
Picked her up a couple of weeks ago No1.Mk.IV Long Branch, milled rear sight, 5 groove bore, 1950 receiver. Looks great, shoots great, but a couple of issues kept popping up.
The barrel is noticeably loose in the stock, I did some reading and found out about the it's most likely normal, make sure it has 2-7 lb 'up pressure' so I have a small piece of felt in there under the barrel at the front band. Not sure about that, it's not stringing but it's also not grouping as well as it was.
The butt stock kept working it's way loose after 10 shots or so, [truthfully I never would have pulled the gun apart if it wasn't doing this] no matter how hard tightened it down... so - removing the butt screw [ahah you said butt screw!] some small chunks missing from a few threads, nothing serious receiver threads are perfect however, when tigthened right up, the butt screw is in contact with the forestock, enough to leave a dimple in the stock and prevent tightening up the butt screw enough. [should I start calling that a bolt]
The fix is obvious [a spacer or washer in the access hole] but first off, is this normal? could this be causing the excessive movement at the muzzle end?
Last, adjusting the action/trigger screw ahead of the magazine. Is there a correct way to do this? It seems to have a spring in the wood recess, but it never gets to compress, the screw only goes in so far then stops. There is no tightening feeling, it just stops as if it reached the end of its threads. Again, is this normal and what is the correct way to adjust?
SW28fan
05-30-2013
There should be a flat spring like washer the butt screw is tightened against. There should not be a spring the front trigger guard screw tightens against. That screw being loose is most likely your accuracy problem as it controls the bedding. Here is a link to an exploded view:
mkrainc
05-30-2013
When you were tightening the butt stock bolt, was your forestock removed? Tightening and loosening should be done with it removed. The end of the bolt protrudes into the stock, and damage can be done.
As for your other questions about the loose barrel, there are more informed ones that will chime in. These will likely need a little more info.
sean69
05-30-2013
So there are parts missing and extra parts, the stock bolt washer and the guard screw bushing, I guess bubba ben done dicking wit dis boomstick somewhars down the line!
Perhaps things will start to fall into place with the correct parts.
sean69
05-30-2013
When you were tightening the butt stock bolt, was your forestock removed? Tightening and loosening should be done with it removed. The end of the bolt protrudes into the stock, and damage can be done.
As for your other questions about the loose barrel, there are more informed ones that will chime in. These will likely need a little more info.
You can't actually remove the forestock with the but stock in place, that stock bolt will prevent the forestock from moving at all. I gather that the forestock is supposed to be bedded against the back of the receiver. I think the bolt stock is forcing the forestock forward and preventing it from bedding properly.
I think maybe an inventory of parts is in order, perhaps once I get the correct parts in there I can dispense with the felt bedding as well.
points
05-30-2013
On a #4, the stock bolt should not contact the rear of the forstock as it would on a #1. If you are missing the spring washer then it will protrude too much and can damage the forstock. The front trigger guard screw should have a washer and needs a spacer. You can live without the spacer but it's not optimum. Onc have all of that then you can bed it.
If you can't find a spring washer for the stock bolt then use a couple of flat washers for now. The stock shouldn't come loose with casual shooting.
sean69
05-30-2013
Marstar had all the parts I need with the exception of the trigger guard screw washer [I'll figure something out] - just ordered, $33... cheapest gun repair I've had!
bigedp51
05-30-2013
Step one, read related Enfield manuals.
1991 No.4 (All Marks) .303 Rifle Manuals (Complete Set) this set has bedding instructions.
2002 No.4 (All Marks) .303 Rifle Manuals (Complete Set) newer manuals and is a complete five volume set with Parts Identification List
Step two, after reading manuals and familiarizing yourself and then dissemble and oil the entire stock with raw linseed oil mixed 50/50 with turpentine. Oiling the stock may cause the wood to swell and tighten the bedding points without having to shim the forestock. Keep oiling the stock until the wood will not hold any more linseed oil and let dry.
Read the bedding section in the 1991 manual, what happens over time is the stock dries out and the wood shrinks changing the bedding forces. The forward trigger guard screw is the fulcrum point of the forestock, if the wood shrinks the rear of the stock moves upward and you loose up pressure at the fore end tip.
Sometimes just oiling the stock will fix the problem, if not the bushing or collar under the forward trigger guard screw will need to be shortened. Tighten the forward trigger guard screw and make reference marks on the trigger guard corresponding with the slot in the trigger guard screw. Now remove the trigger guard and take out the bushing/collar and leave it out and replace the trigger guard and again tighten the forward trigger guard screw. If the screw turns past your reference marks the bushing is too long and will need to be shortened. The bushing should be approximately .010 shorter than the actual thickness of the wood to allow proper clamping action between the receiver and the trigger guard.
Adjusting the bushing/collar length is simple, with the bushing removed in the above test, place a second set of reference marks on the trigger guard. Chuck the bushing in a electric drill and slowly shorten the bushing with a file as the drill rotates the bushing. Slowly keep filing and checking the bushing length until the trigger guard screw will align with your second set of reference marks and then remove .010 more from the bushing and thus allowing for slight wood crush.
Below with the bushing/collar removed if the screw turns past your reference marks the bushing is too long.
PICTURE 404
PICTURE 404
Bushing length will change the angle of the trigger guard and and thus your trigger pull adjustment, forestocks were replaced if the forestock had more than .020 wood crush. To compensate for excess wood crush and no replacement forestock the trigger guard guard can be bent downward to compensate.
Below the distance between the receiver and the bottom of the trigger guard effects the trigger pull and is why the trigger was moved to the receiver ring. With excess wood crush the trigger guard is bent downward to compensate.
PICTURE 404
Below, the reason the trigger guard is bent is (1.) you do not have a new replacement forestock to decrease the trigger guard angle (2.) and when using your old forestock with excess wood crush the trigger lobes have run out of adjustment range to properly adjust the trigger pull.
PICTURE 404
Below, the draws area contact points that effect forestock tightness "AND" the rear position height that effects up pressure.
PICTURE 404
Below, shimming the forward draws area pushes the forestock to the rear and into contact with the receiver ring. Adding thicker shims causes the rear of the stock to move downward and increase up pressure at the fore end tip.
PICTURE 404
Below additional bedding info, BUT read the Canadian No.4 manual on bedding also.
PICTURE 404
PICTURE 404
PICTURE 404
sean69
05-30-2013
That is some great info [thanks!] - though I'm not anxious to change the trigger at all, there is no 'first pressure' on it at all [I call it first stage] - it's all slop then BANG for only the lightest touch. [several people have commented on how nice it was] I had assumed it was the result of a trigger job, but appears to be just an improperly bedded action. [?]
Sounds like time to do some reading, tinker with the king screw and see if we can get it setup properly. Not anxious to refinish/oil that stock, it's quite nicely marked. [it's the long butt stock too - fits me perfect ]
bigedp51
05-30-2013
Below is the one photo that help me understand the rear draws area of the Enfield rifle better than anything else. The photo is a Australian No.1 range rifle with modified bedding, the two screws in the bottom of the photo are threaded into the receiver ring. These two screws pull the rear of the stock tight against the receiver ring, and are also used to center the barrel in the barrel channel. The light colored shims in the top of the photo prevent the stock from moving up and down, the bottom of the receiver rests on these shims. These shims prevent up and down movement that would change the up pressure at the fore end tip. This modified stock is unaffected by moisture changing bedding forces and up pressure at the fore end tip. The copper block shims were used on Australian rifles because a softer wood was used due to a shortage of walnut in Australia.
PICTURE 404
The older Enfield rifles had steel dowelled stockbolt keeper, the forward steel dowels contacted the forward area of the receivers draws and the rear contacted the receiver ring. This method locked the rear of the stock in position and prevented up and down movement.
PICTURE 404
Once you understand the draws area acts like the second missing stock bedding screw and holds the stock in proper position it should be very clear. And if the stock is not kept properly oiled the wood will shrink and dry out and change all the bedding forces.
bigedp51
05-30-2013
Originally Posted by sean69
Not anxious to refinish/oil that stock, it's quite nicely marked. [it's the
long butt stock too - fits me perfect ]
I did not say refinish your stock, I said oil your stock with raw linseed oil
and see if it will swell and enlarge back to its original dimensions. The
stocks were hot dipped in a tank of raw linseed oil when new and soaked
overnight, the stocks were hot dipped again as needed by the armourers during
their yearly tear down inspections.
You can use a wallpaper wetting tray and toss your stocks in and let them soak overnight in "RAW" linseed oil. BLO will dry much faster due to the driers added to it and become thick, "RAW" linseed oil and turpintine are what were used by our forefathers and works best. The purpose of all the oiling and soaking is to save "YOU" the trouble of bedding the forestock and let the oil do all the work.
PICTURE 404
PICTURE 404
flying pig
05-30-2013
Surprised no one has said to check the fit of the butt at the butt socket. If it is a loose fit there it will never stay tight. If its loose you need to clean the oil off the socket post end of the butt and shim it with a thin strip of brown paper bag that has no wax on it. The butt should not slide easily into the socket, you should have to grease it and persuade it into place with a rubber mallet. If this fit is tight it should help with its coming loose problem as well.
Tinman204
05-30-2013
Originally Posted by flying pig
Surprised no one has said to check the fit of the butt at the butt socket.
If it is a loose fit there it will never stay tight. If its loose you need to
clean the oil off the socket post end of the butt and shim it with a thin
strip of brown paper bag that has no wax on it. The butt should not slide
easily into the socket, you should have to grease it and persuade it into
place with a rubber mallet. If this fit is tight it should help with its
coming loose problem as well.
This was my first thought also.
I have a '43 Long Branch that was converted to a target rifle by AG Parker. The gun is in spectacular shape, with a perfect burnish barrel, carefully fitted fore stock and perfect up pressure on the barrel.
But that being said it grouped well on my initial outing but then after my groups opened up and accuracy was getting worse with each trip to the range. I checked the large screw which was loose so I tightened it up and went and shot it again, groups were better but not ideal. After another 50 rounds the large screw backed its self loose once more.
A week or so later I was buying some 8mm bullets from a fellow gun nut I mentioned my problem. He has a good sized collection of Lee Enfields and right away asked if the butt fit tightly in the socket?
I went home and did a complete tear down of the rifle I realized that he was right, the butt stock had excessive clearance in the socket. I shimmed it with paper as stated above and now the gun is a tack driver ever since. The bolt hasn't come loose since and it has maintained stellar accuracy.
I never thought that something as simple as the butt not fitting tight into the socket would have such a dramatic effect on accuracy but it really did.
sean69
05-30-2013
I'll probably break it down today and decide if it needs to be soaked in linseed or if I feel like refinishing [three are a few dents that could use some steaming, though nothing major, not sure if is worth the effort.
I'll double check the fit of the but stock then, but if I remember, once the bolt was loosened, I did have to worry it off. Didn't need a mallet to get it back on though.
cantom
05-30-2013
You can make it into a sticky if you wish "BUT" all this information is in your Canadian No.4 manuals, the 1931 "Instructions for Armourers" and the "1964 "Canadian Marksman" and is in a sticky at http://www.milsurps.com/forumdisplay.php?f=72 and "HERE" at the top of the page.
I donated a large percentage of these manuals and the secret to learning is reading the information.
NOTE: One step was left out above about tightening the butt stock in the socket, the wood was cleaned of oil on the socket end of the butt stock. (acetone will remove all oils) After the oil is removed the wood is coated with varnish to seal the wood and then let dry. After the wood has dried the brown paper is coated with varnish and applied to the wood. (see 1931 Instructions for Armourers)
Below on the left is the photo I posted on the Australian range rifle, on the right is a bedding diagram from "YOUR" "Canadian Marksman" on center bedding the No.4 Enfield rifle. Please note the red arrows and the shim locations in both illustrations, both the Australians and you Canadians accurized the Enfield rifle using these shimming methods.
PICTURE 404
Below is a diagram from the Canadian No.4 manual, the blue areas are called the draws because when fitted properly they "draw" the stock tightly in place against the receiver socket. The red areas are where the shims were added when accurizing the rifle for competition.
PICTURE 404
Below is one of my No.4 Enfields, you can see the light colored wooden shims that are placed between the bottom of the receiver and the top of the stock to prevent up and down movement. Also at the forward draws area of the draws brown paper shims were used to shim and tighten up the stock. Because I was too impatient to wait for varnish to dry these shims were super glued in place and filed, scraped and sanded to fit. Each side might require a different thickness, this shimming also centers the barrel in the barrel channel. It is amazing what a brown paper shopping bag and some super glue can do to make your Enfield shoot like a champ. The very rear of the forestock can be shimmed in this manner to compensate for wood shrinkage.
PICTURE 404
The shaded area below should contact the receiver socket, it does not need to be 100% contact but both sides should touch equally. The red area are where you can add the brown paper shims on both sides below the reinforcement strap.
PICTURE 404
Below are targets from my first Enfield rifle a No.4 that came from Turkey and the wood was as dry as a popcorn fart. In the top photo the forestock was loose, the trigger guard bushing was too long and the rifle was stringing its shoots vertically. In the bottom photo after repairs and proper bedding, 10 shots at 50 yards.
PICTURE 404
NOTE: Holland and Holland rejected any No.4 Enfield rifle sent to them for conversion to a No.4 (T) sniper rifle that did not have the required 2 to 7 pounds of up pressure at the fore end tip, these rejected rifles were sent back to there owning organizations. Meaning Holland and Holland was not going to waste time and money trying to make a silk purse from a sows ear or put a scope on a rifle that wasn't going to shoot accurately.
cantom
05-30-2013
...had that forestock cut off long ago...
mbogo3
10-26-2013
Correct me if I'm wrong but didn't they use a ribbed handgard on LB's up until 1949?
mbogo3
05-15-2014
Yes a 50 should have a different handguard.