Retrieved: 06/17/2016
Last Post: 06/02/2016
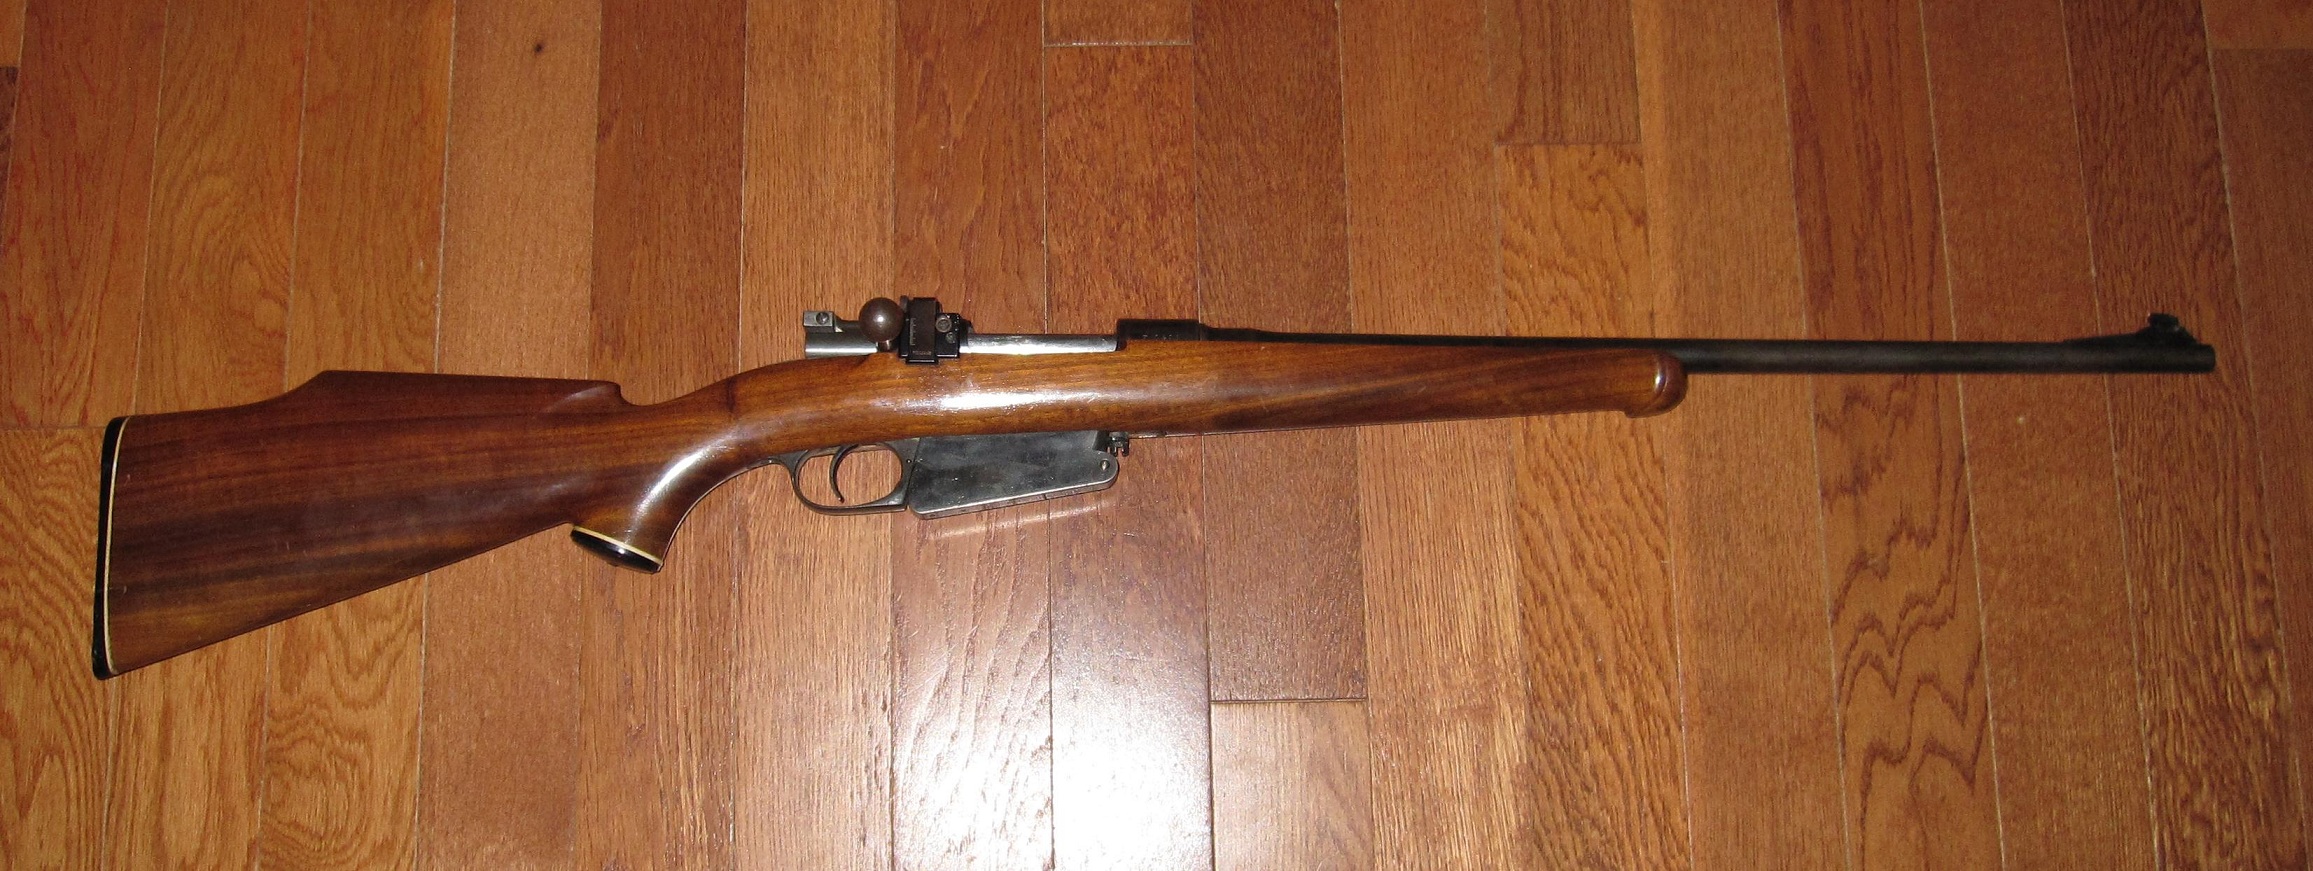
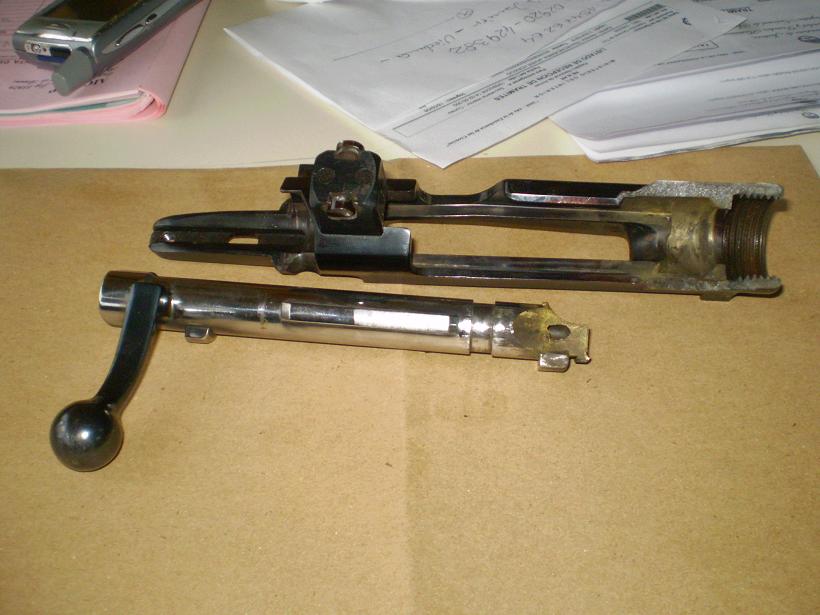
A while back I got an 1891 Mauser for cheap that had been sporterized with a new stock, peep sights, and oddly a really crappy condition Italian 6.5 Carcano barrel fitted to the action. I figured I'd rebarrel it for something more useful and the 444-1BG fits the bill since it will be legal to use in the MI shotgun zone. Made an action wrench and removed the barrel, and started gathering parts. This will likely drag into late spring or early summer before it's ready to shoot.
So far the basic list of steps is:
1. Figure out cases and loading
2. Modify the magazine to feed the 4441BG rounds
3. Modify action for better gas handling
4. Make chamber reamer and headspace gauges
5. Make a barrel
6. inlet stock for new barrel
7. Shoot, debug and deer hunt with it!
Here's some pics of the progress so far.
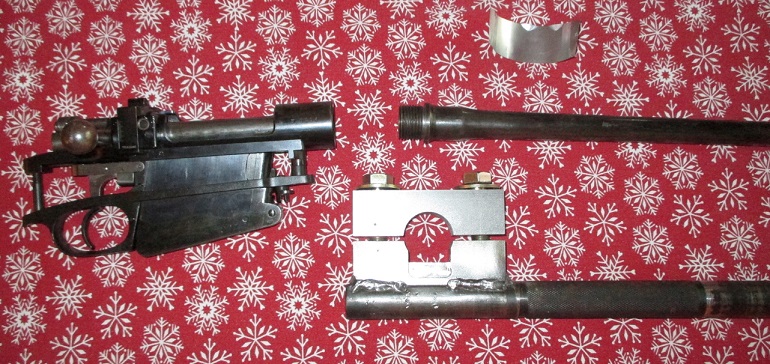
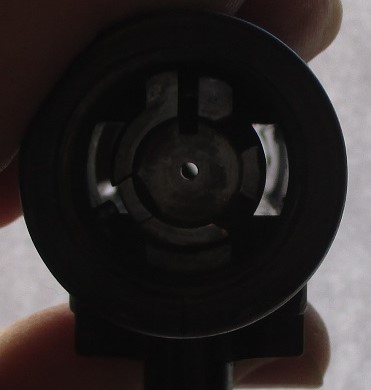
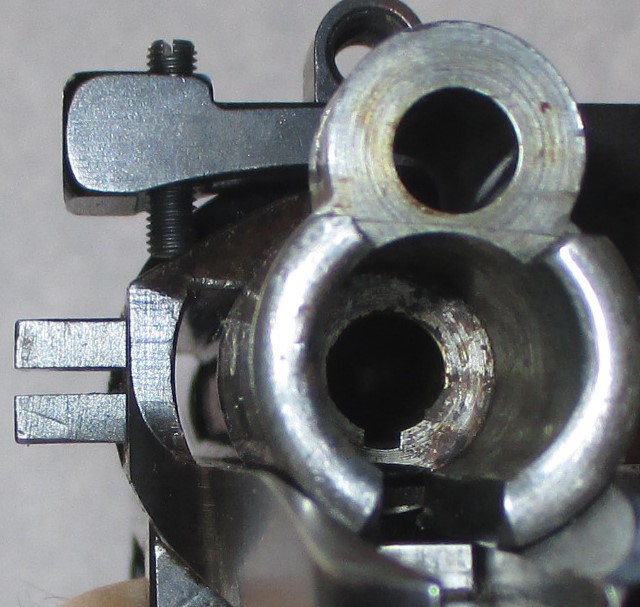
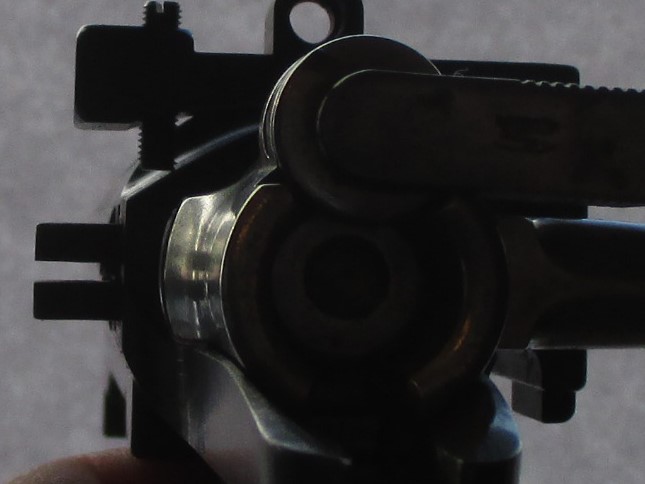
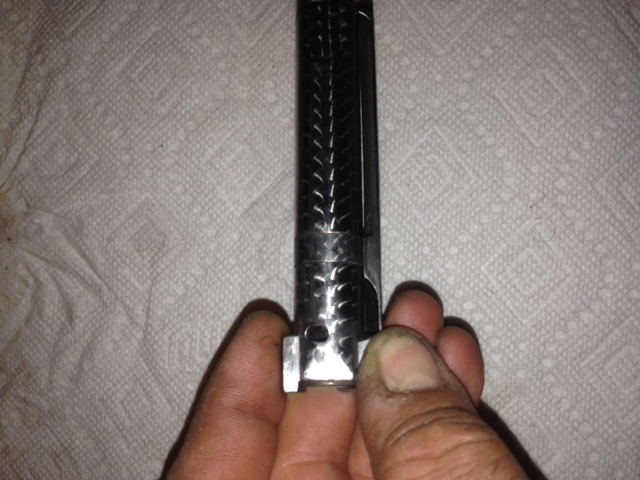
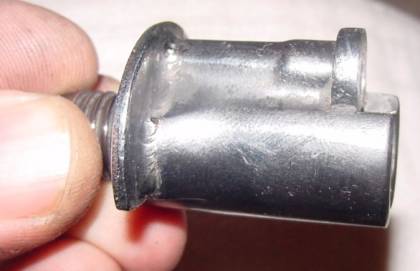
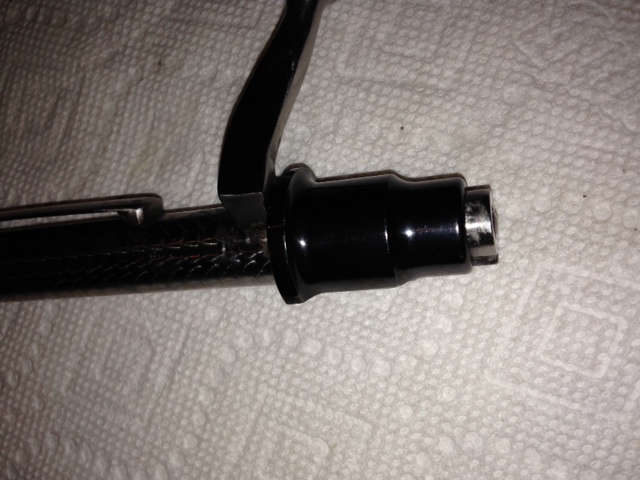
You might of noticed in the pics in the prior post that there was an extra bolt sleeve with the wings on the side to block off any gas running down the bolt rails. Here's a couple of pics of how open the left bolt rail is now and how the newer style bolt sleeve blocks the rails off. Before you could actually see the back of the barrel down the left rail. With the bolt sleeve replaced I did notice it changed the firing pin protrusion so that it is no longer correct. It looks to be around .030" and shorter than what I've found on the net as correct (.055"-.060"). So that will need corrected at some point.

It was about $100 with the Fajen stock and Williams sites, figured I could always part it out for more easy enough if I never built it. I still can't figure out why someone would buy a nice stock, new sights, and go through the trouble to make a pitted and dark bore carcano barrel fit.
Our income tax refund came so I ordered the .429" barrel and it should be here next week some time. So back to modding stuff. I have been thinking of adding a gas vent in the side of the receiver and to the bolt. The shape of the bolt face channels gas towards the left bolt rail and once the extractor is blown out some out of the right rail. It's been over 20 years since I had a DWM 93 Mauser with the vents. Is the receiver vent centered on the barrel/bolt gap or is it back and little, and what dia is it? The bolt a little different for a Mauser and doesn't have a controlled feed extractor so the bolt vent placement is a little less critical. What is the dia of the bolt vent and general placement?
The replacement bolt sleeve also changed the firing pin protrusion. I cleaned all the parts well and rechecked and sure enough it's about half of what it should be. The ID of the bolt sleeve is about .514" which would mean I'd have to make a reamer to deepen it or I could just mill off the front contact area of the cocking piece unless someone knows an easier way?
mike928
February 28, 2015
Bolt vents are 90 degrees to the lugs (bottom of the bolt in the unlocked position). On a 98 there is one in front of the extractor collar and one behind it.
They are oval shaped and a bit over 13/64" (sorry, I just stuck a drill bit in there did not look for my calipers )
Moleman
February 28, 2015
So the bolt vent dumps it out into the left rail where ever the receiver vent is? It almost seems like it would be better to dump the bolt vent into the magwell which would get blown out anyway, and have the receiver vent close to the barrel bolt gap. But, I'll defer to the Mauser brothers for proper vent placement. I'd rather not have the thing split apart on me.
1BIGGUN
March 01, 2015
On a Spanish small ring the vent hole is on the LH side an is after/behind the lugs.
The hole aligns with a hole in the bolt.
Here is a pic of my 1931 Spanish small ring.
No idea how effective the hole is but the later Spanish small rings have them an the early ones do not unless they're added.
mike928
March 01, 2015
I only have one "98" that has it and is an FN400 single shot (appears to be a mod not originally there because other 400 actions do not have it)
If the hole was an improvement it would have been there on 98s.
The Spanish actions have it because that is the only gas handling feature on that action, the 98 can handle gas inside the receiver because of the shroud.
Moleman
March 01, 2015
Bob, what is the width and length of the two slots? Mike said the receiver one is around .2" but the one in the bolt looks smaller?
1BIGGUN
March 01, 2015
The receiver slot is .269" long and .160 across.
Bolt is .205" x .142"
Measured with frozen digital calipers with dying batteries LOL.
The receiver slot runs horizontal and the bolt slot runs vertical.
Mauser 98's have two huge slots in the bolt body going toward the LH rail.
Not sure why they can't be replicated in a small ring.
You might want to look a Ruger M77. It has a port on the receiver were the bolt face an case meet an also two large slots in the bolt body an a 1/4" hole about 1.25" back from the bolt face there all inline with the the RH lug so they must dump into the mag well toward the RH side.
IF I had to suffer a case separation I'd rather be shooting the Ruger vs. the M98.
mike928
March 01, 2015
I will still take a 98 over anything else!
here is a 1909 Argentine in 300 winmag loaded full of pistol powder!
I bet you he could still lift the bolt handle and remove the bolt... the stock must be intact too!
Unfortunately the scope is probably toast!
NO INJURIES btw!
1BIGGUN
March 01, 2015
My post '64 M70 has a port on the RH side were the bolt and case meet, and a .200 hole in the bolt body facing the LH rail.
My Rem 721 has a RH receiver port about where the back of the bolt lugs would be, not at the bolt face to case line.
It has a smaller hole in the bolt body also.
I wonder how much the port forward of the lugs at the bolt face the case line would weaken your action?
Interesting The spanish small ring had a bolt body to receiver port alignment and the 98s an others just dump into the magwell or LH rail area.
Shroud or no shroud, it would seem that the small ring could use some slots in the bolt body like a M98. What could it hurt?
It should also be noted that the ports on a Spanish small ring are on guns built well after the M98 was designed.
Why would they just not port to the LH rail side like they did on a 98? And why not add a port on the receiver of newer 98s?
mike928
March 01, 2015
If I was adding ports to the bolt of a small ring I would add the port on the receiver as well. I wouldn't dump it on the left rail. The 98 is a different story...
The Arisaka 38 has the best placement for receiver vents IMO but the bolt/breech face is a different design than the Mausers.
1BIGGUN
March 01, 2015
mike928:
Here is a 1909 Argentine in 300 winmag loaded full of pistol powder!
And how would a receiver port at the bolt to case area make a 98 worse if it did not hurt the action strength?
What that Mauser in the pic has little to do with gas handling that gun blew apart, and it was not from a case sepertaion. It was from the receiver failing from a case basically exploding. I don't think any system of ports would have mattered. All the ports in the world won't matter when the top the receiver blows away.
I'm not saying an M77 receiver is stronger or weaker, I'm saying it might have a better system over the original M98 for handling a case separation or blown primer.
The M77 does have a lot bigger bolt lug and also the lack of a slot running directly through the LH bolt lug. IMO the bolt is likely stronger than a 98.
1BIGGUN
March 01, 2015
If I was adding ports to the bolt of a small ring I would add the port on the receiver as well, I wouldn't dump it on the left rail, the 98 is a different story...
On the Spanish small ring the receiver port is behind the lugs in a non stressed area of the receiver. On the Ruger and post '64 Model 70 the port is in front of the lugs and in a stressed part of the receiver.
IMO they must have felt the hole would weaken the receiver if put front of the lugs.
I don't have my pre '64 Win here so I can't see how it's done.
I still don't see why the small ring could not have porting into the rail area or mag well? Shroud or no shroud it would be directing gas away from your face.
I'm not thrilled about the LH side port placement on this Spanish SR that the side my pretty face is mostly on seems a port in the bolt only and venting where the rounds eject would be as good?
Somewhere on the net a guy adds a shroud to a small ring. I was considering it for this one if I ever get off my ass and build it. A 444BG would be a good choice that or a 444BGXL (extra long). I'm not stuck with MI laws :)
mike928
March 01, 2015
I never said a port would hurt anything...
1BIGGUN
March 01, 2015
I wouldn't dump it on the left rail, the 98 is a different story...
I was wondering how you felt how it's OK for a 98 but not for a small ring?
Moleman
March 01, 2015
I upgraded the cocking piece to the 93-96 style over the 91 which has a straight shot down the left bolt rail to the shooter. The 98 does have a ring added making it better, but I don't want to weld one on. Perhaps if I could make it look original and seamless, but I can't so I won't. There is also not a big extractor blocking the right bolt rail so it is also a huge vent. None of which will help if I accidentally load a round with red dot and shoot it. In that case I deserve to have chunks of 122 year old steel flying back at me for being a moron. I think the vents like the 93 might be the better choice.
1BIGGUN
March 01, 2015
I think the vents like the 93 might be the better choice
Sure can't hurt. I can't see why they can't be bigger also or more than one if its behind the lugs an a non stressed part of the receiver.
Moleman
March 05, 2015
Has anyone modified a standard bolt sleeve to a side swing type safety? I saw this one on Brownells: http://www.brownells.com/rifle-parts/safety-parts/safeties/m-98-swing-safety- conversion-prod5474.aspx
Moleman
May 30, 2015
Worked on modifying the magazine today. Cut a section of 1/2" plate out big enough to make a magazine block. It'll need a new mag spring and follower made, but it will feed rounds from the mag now. The feed lips run the entire length of the mag with the forward section unsupported which lets them open up a bit to let the cartridges snap through. If it turns out that the cases hang up slipping into the chamber the mag lips can always be trimmed back so they release the base of the cartridge sooner.


Moleman
June 01, 2015
Thanks Rick, I've wanted to work on it for a couple years now. Just couldn't decide on a caliber.
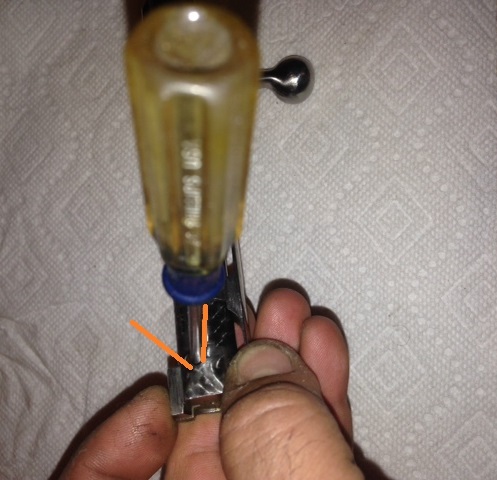
Today I was all set to drill the gas vents in the bolt and receiver. Looked at a bunch of pics online of mainly 1893 Mausers. Laid out where the vent needed to be on the receiver and compared it to where the vents were on the bolts online which left me with a question. The vent in the bolt appears to be above the centerline. Can someone look at the vent in their small ring Mauser and see if the vent is angled slightly or if it goes straight in?
mike928
June 01, 2015
On my Spanish small ring the vent hole is above the centerline and it is "oval", is not in an angle but it covers a relatively large "angle."
On the last two pictures i did not move the bolt body in relation to the camera (look at the handle), I put a screwdriver at the two extremes to show what i mean by an oval hole. I hope it makes sense.

Moleman
June 01, 2015
Thanks, I wasn't sure if they milled the bolt with the lugs horizontal, tipped up 10 degrees or so, or just threw it in a dividing head and plunged and rotated. I have the dividing head on the mill right now so I'm leaning towards plunging and rotating. I'll have to see how easy it is fixture in the dividing head. Otherwise I'll just put it in the vise.
mike928
June 01, 2015
I honestly have no clue and cannot see why any of this would make a difference... I think just a hole will do!
Moleman
June 02, 2015
It is done. Laid out a vent, and went with just holding in in the vise. After the receiver cut was made with an 1/8" end mill I figured what the hey and put the bolt back in the receiver and held it shut and pulled back. Then lined up the end mill in about the middle of the receiver slot and plunge cut until the end mill broke through to the firing pin passage. It looks like the bolt hole is at the back of the receiver slot, but that's because of the angle of the pic.


mike928
June 02, 2015
Cool!
It will never really do anything useful if a case lets go but it looks cool and "updated" so be careful and keep pressures reasonable for that action.
1BIGGUN
June 02, 2015
Mike, why would a vent not help?
mike928
June 02, 2015
I did not say it would hurt. i said it will not do much to help in the unfortunate event that is needed.
The gold standard for gas handling is set by the model 98, it has two huge oblong holes and it vents out the magwell. BTW it has a third lug as you know.
I am not slamming Dan's project, he knows what he is doing and as he stated he is not going crazy pressure wise with loading this round. I am just saying that drilling a hole in the action does not make it a 98, as a matter of fact I have only seen one 98 with a vent hole and is on my FN400 action and I know for a fact it was not done at the factory.
Moleman
June 02, 2015
It's more for a pierced primer or split case v/s a kaboom type thing. I'm just trying to make it as safe as the action can be within reason. I also don't plan on running that rifle at modern rifle pressures even if the caliber it was originally chambered in operates at 56k-PSI.
1BIGGUN
June 02, 2015
I'm not sure in the event of case rupture how all that gas is susposed to go down a little firing pin hole an out the giant holes in the middle of the bolt.
I don't know if I'd call the Mauser the gold standard. Lot of other modern bolt actons handle gas as good or better. Obviously the 98 was the first to seriously address gas issues.
The later Spanish small rings have the reciver port as well as bolt ports. Unfortunately no rear shroud.
I'd say my Ruger77 has better gas handling than my 98s. Its got all the Mauser features and more.
The odds of a modern good condition 30-06 case able to withstand 65,000 plus pressure, cut down, having a separation or blowing a primer at 40,000 PSI is very slim.
The concern I have is case expansion an sealing to the chamber at lower pressures. I doubt there will be a problem.
1BIGGUN
June 02, 2015
I keep eyeballing this Spanish small ring an thinking a 18" version would be slick.
mike928
June 03, 2015
"and more"?
Anyways, i would suggest the bolt shroud mod at least.
1BIGGUN
June 03, 2015
Yeah, more. Bigger holes in the bolt and also porting on the reciver.
This Weatherby Vanguard has holes in the bolt that vent to the right just above the receiver anf a port at the bolt to case point.
I have seen the bolt shroud mod where a washer is fitted and welded in on the small ring guns. I have considered it.
I still might do a 22 CHeetah on it. LoL.
Moleman
June 03, 2015
I saw the bolt sleeve with the washer welded to it. Probably did a much nicer job at it than I could ever do and I still thought it looked hideous. With the brass reamed I don't think we'll have an issue with it sealing.
mike928
June 03, 2015
This looks that bad?
Here is the one on my small ring:
Moleman
June 03, 2015
That's the best looking one I've seen. The others have looked like they were done with flux core MIG or someone just learning TIG.
1BIGGUN
June 03, 2015
Mike is yours a modified part?
mike928
June 03, 2015
I did not do it but I am pretty sure it is... I don't know what else it could be.
Moleman
June 03, 2015
It's a commercial part since it doesn't have the safety on it, or at least I don't see one.
mike928
June 03, 2015
Have you seen one like it?
Yes. it does not have the safety, but I have not seen one for sale like that. I did not look too hard though.
Moleman
June 03, 2015
Looks like a Sunny Hill FN type bolt sleeve without a safety: http://www.midwayusa.com/product/615418/sunny-hill-fn-style-bolt-shroud- without-safety-cut-mauser-96-steel-in-the-white
Moleman
June 04, 2015
I chickened out and sent the bolt out today to be forged. I should have it back in a couple weeks.
mike928
June 04, 2015
Forged?
Bolt handle?
Moleman
June 04, 2015
You know, bent so it's not sticking straight out the side.
mike928
June 04, 2015
They are always too short when forged...
Best way is to weld a new one, I will admit that I have been too scared to weld on a bolt and have never done one yet.
Moleman
June 04, 2015
That was a concern also. I spoke with the guy who I sent it to and he said they can be made 1/4" longer during the forging and end up a decent length. One of my mother-inlaws old friends welds them and I was waiting for him to do another run of bolts... Was supposed to be March, then June, now it's "some time this summer". He does great work, but I get the feeling it will be a while before he does any more. Last I spoke with him, he seemed more interested in jeweling and checkering than welding bolt handles almost like he didn't like doing it.
Moleman
June 05, 2015
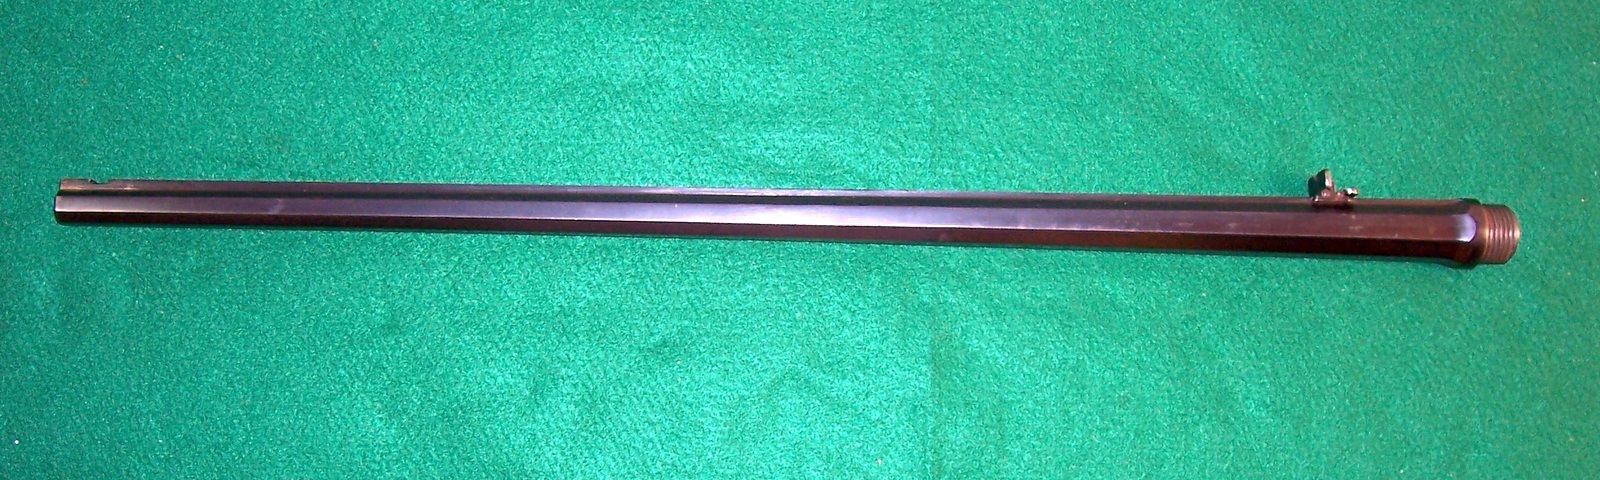
I couldn't pull it off, but I thought this octagon small ring Mauser barrel looked neat.
I may have to end up going with a half round barrel which just might kill it for me. IDK if I like just a plain round barrel or the half round better. I checked the travel on the Garvin horizontal mill and it is around 16"- 17"... Really thought it was going to be longer. If I use my mill/drill I can get 18" and maybe 20" if you let the table expose more of the ways than you really should. I was hoping for a 22" barrel, but perhaps 21" and start the taper octagon about 3"-4" from the chamber mouth and then have a straight octagon between the receiver and that. Another option would be to rotate the mill head side to side, but I think the transition would show badly and require lots of draw filing. I had hoped to have a larger mill by now.
Any suggestions or creative fixturing ideas?
mike928
June 06, 2015
You want a straight octagon or tapered?
Moleman
June 06, 2015
It has to be tapered with my stock. Similar to the one in post #65 only no rib. I could cut part move the barrel and cut the second part, but I know that's not going to end well. I really don't want a half round or round, but between the two I'd lean towards round. The table on my horizontal mill is longer and I really thought it had more travel than my mill/drill.
Here's a pic of what I'm talking about with a short straight section near the receiver that transitions into a taper. It would be a way around getting the flats to line up perfect requiring a lot of draw filing to correct. I may be able to get more travel out of my horizontal mill if I remove the power feed.

mike928
June 06, 2015
Mount a tool post grinder 90 degrees off on a lathe so it creates a flat, and do it on the lathe!
Moleman
June 06, 2015
There is a guy making a single shot on PM who basically did that after a lot of cranking back and forth with two cutting bits to form the octagon. I'd prefer not to hasten carpal tunnel/trigger finger surgery.
TRX
June 06, 2015
The annoying thing is that it's a trivial job for a CNC with enough table travel...
If I had to do an octagonal barrel I'd probably wind up going really old school. Cut a couple of curved guide plates out of hardwood or metal-capped pine, make an indexing jig, and make a "file trolley" with some ball bearings and a clamp to hold a file. Remove as much metal as I dare with the angle grinder, then start with a coarse metal file using the trolley guide to maintain the shape. Switch to a fine file to finish up.
At my rate of speed it would probably take at least a full day to make the fixtures and another to do the cutting.
I'd make the indexer so it could hold the headspaced, torqued barreled receiver, because it would be simpler to do all that stuff first. I hate clocked barrels...
There are good reasons I've never seriously considered a build with an octagonal barrel!
ps: hmm, looks like Green Mountain is only selling .38 and .45 tapered octagon barrels at the moment.
1BIGGUN
June 06, 2015
Any way to make a jig that would slide in the slots of the mill table and just slide the barrel down left set up in the jig?
I don't think a half round or part round an part tapered octagon would look terrible. I saw a really cool Mauser like that somewhere and I think I saw a Martini Henry custom like that once.
1BIGGUN
June 06, 2015
If I use my mill/drill I can get 18" and maybe 20"
If you can get 20" I don't think going from a straight octagon after 2" or even more will look bad. You got about 1" of that needed for threads and the shoulder and then the area where the flats curve into the flange take up a little room like in the picture you posted. You're going to be about 21" of total barrel length right there.
The receiver so I don't think a 1" longer round barrel section would look awful.
I don't think a 1 or 2" tapered octagon section that was not as sharp of a agnle that rest of the barrel would look bad either. Almsot all round barrels are tapered at less of a angle for the first bit and then the angle sharpened after where the chamber ends.
I don't think the .444 1BG needs 22" for good performance. I have a Mauser sporter (bubbafied) that has a barrel that's 21" from the receiver anf it looks and feels about right. I agree 22" would maybe look a little better depending on how long the forearm on the stock is.
If you were not using a peep sight anh were using a rear sight on the barrel I think it would be even less noticeable.
You could do as much as possible and see how it looks with about 1" of round the receiver. Maybe use the biggest end mill so the transition to flat to round has a bigger curve an takes up more space.
Moleman
June 13, 2015
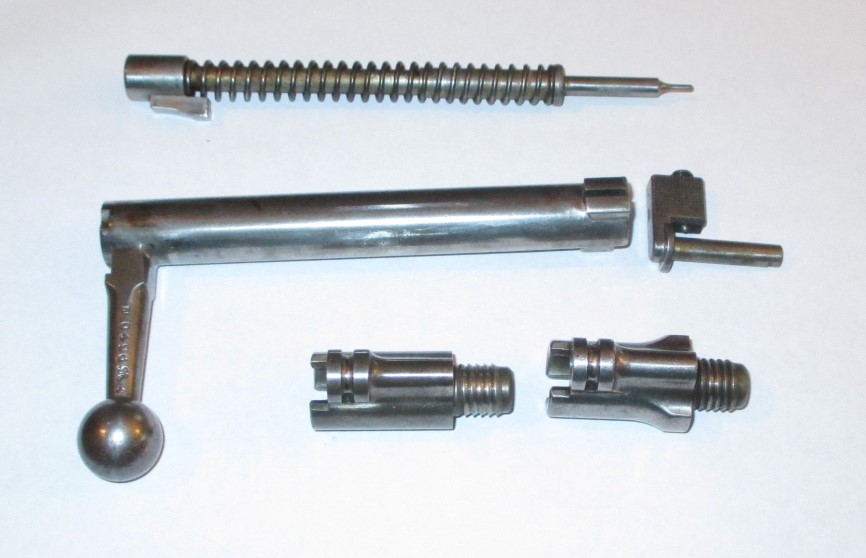
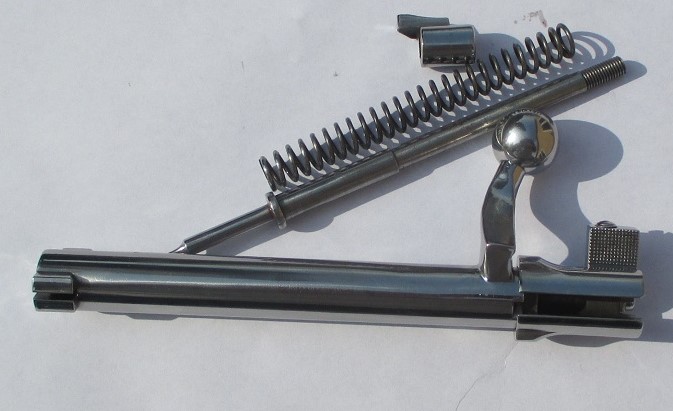
I guess it comes down to you can either have it done quickly or done right. Sent my bolt off to get bent and got it back today. Slid it in the action and it promptly locked up (as in it was binding). Worked it loose and struggled to take the normally smooth as glass bolt sleeve off. I figured it just had some polishing compound in it... boy was I wrong. It looks like the a-holes gripped the cocking piece sear in a vise (since it's now mushroomed and has a bevel to it) and pulled on the bolt body to screw on the bolt body. From the look of it the sear slipped out of the vice, not once, not twice, but at least 3 times from the marks the cocking piece camming surface left in the back of the now softer bolt body which was supposed to be rehardened. Two of the strikes are in the striker camming surfaces on the back of the bolt. I don't think the bolt is ruined, but it certainly will need attention if I want the bolt to work.
.JPG)
.JPG)

Quote from: mike928
Why would they put the cocking piece in a vise anyways?
Laziness or stupidity on how a 91 mauser works is my guess. The cocking cam slots can be recut, the ID and OD can have the displaced metal removed and the mushroomed cocking sear can be stoned, but why do that damage in the first place. They make a fancy tool for the 91 to take down the bolt but all you really need is a piece of wood with a hole in it. You cannot lock the striker on mine without locking the bolt. On some you can flip the safety straight up and it will lock the striker but still allow you to work the bolt, but on this early one you can't. So, you take the special mauser tool or ANY OLD SCRAP OF WOOD and push the striker back by the sear surface about 1/16" or so, just enough to let it slip out of the cam slots and unscrew. Once the firing pins assembly is out stick it in the hole in your piece of wood like you'd do for any mauser and push down on the bolt sleeve until you can unscrew the cocking piece the 20 turns (it's threaded not interrupted thread) or so until it's off. At no point is the cocking piece far enough away from the bolt body to damage it if it were to slip as you purposefully didn't pull it back far enough to let it get a running start.
The thing that pisses me off the most is they had to know something was wrong because once the bolt sleeve threads into the bolt body you have to force it the last two turns, and without using some sort of tool I cannot turn in the stripped cocking sleeve the last 3/4 turn with my bare hands. TRX should be able to agree with me when I say normally everything on that action works like oiled eel snot. I have owned other Mausers and none have been as nicely fitted and finished as this one was.
mike928
June 13, 2015
That's why you don't send shit out for other people to work on...
Especially modifying a bolt handle that involves heating the bolt! If they did not care about not damaging the bolt on cocking piece removal then what makes you think they gave a rat's ass about keeping heat away from critical areas?
Moleman
June 13, 2015
Yep, the guy I wanted to weld the bolt for me suggested this guy. Checked his feedback for the last year and it was good. Here's some more pics. In the top pic, that is as far as it will screw in with decent force stopping about 3/4 of a turn out from where I should stop. It's not like I'll be sending it back to him. It looks like there are at least 5 and perhaps 7 places where the cocking piece cam struck the back of the bolt body peening metal to the sides and making the cam slot in the bolt body that keeps the bolt sleeve from rotating while cycling into a 3 steps and not an inclined plane.


Rick Leslie
June 14, 2015
That's pretty crappy! I believe I would have to 'out' these guys so others don't get taken. I've never had to have a tool to remove the small ring FP and shroud either. If the 98 had an aftermarket safety, then I used the edge of the work bench if my fingers weren't up to the task.
mike928
June 14, 2015
The edge of a wooden workbench is all you need to take one apart... military safeties don't even need that.
I agree with Rick, who is selling this "service"?
Moleman
June 14, 2015
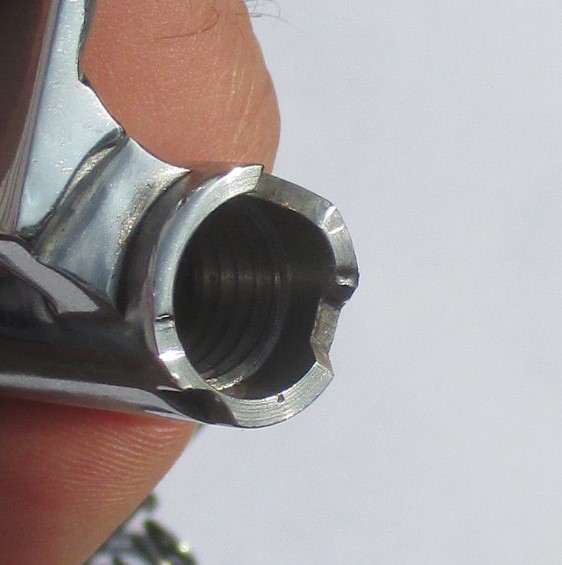
www.fincherscorner.com. They also list stuff on ebay. Going back one year on their ebay stuff they only have one neutral where someone had a bent screw on a used site. The 91 bolt safety is either on and the bolt is locked or it is off and you can open the bolt. There is no intermediate area where you can lock the firing pin and still unscrew the firing pin assembly. So yes, the corner of a workbench or just a small piece of wood is what I've used to pull the cocking piece mainly out of the cocking/firing slot 90 degree side. The id at the buttress threads is also .007" out of round. If I measured everything correct there is .010" clearance so it may have something to do with the binding, but maybe not. It's clearly binding on the mushroomed areas. In one pic you can see where the tip of the largest mushroomed area is burnished from rubbing on the bolt sleeve recess.
Moleman
June 14, 2015
Removed the mushroomed areas and now the bolt sleeve can be screwed on with hand pressure. The one cam slot needs to be recut, and the front top surface of the bolt handle where it cams the bolt back needs a couple thousands taken off of it as it binds and is removing the bluing on the receiver. There is still a bit of binding in the bolt sleeve threads most likely due to the bolt ID being out of round... But it's livable.
I think it is most likely shiny junk. I spent a few more hours on it and recut the damaged cam slot and cleaned up other places it was binding. It is still binding a bit from being out of round in the buttress threads. The main issue now is the rear of the bolt is very soft, which according to their performed work description was "rehardened" (yeah right). With the cam slots as soft as they are it may be best to just get another bolt body and start over. I sent them an email along with pics and quickly got a reply that they'd give a refund, so I'd still be out shipping and a bolt body. It may be best to just get a bent carbine bolt body and live with it.
mike928
June 15, 2015
Get a regular "cheap" bolt and weld a handle yourself.
I would never trust the bolt they sent you even if you got it to were it worked.
Moleman
June 15, 2015
I found "new" bolt bodies for the 91 carbines with bent down handles that are
the later style with the radius where the ball joins the handle for $32 each
without shipping:
https://www.libertytreecollectors.com/productcart/pc/viewPrd.asp?idproduct=650&idcategory=38
I sort of like the first style bolt where it almost looks like the ball was added as it has a sharp corner, so if someone knows a source
Holescreek
June 15, 2015
I can't access the site from my work computer but check out Hoosier Gun Works for parts.
Moleman
June 19, 2015
I have a NOS straight handle bolt body and a NOS arched handle bolt body, along with a NOS cocking piece ordered. If I can live with the arched one I may just stick with it, otherwise I'll have a new handle welded on the straight one.
Moleman
June 19, 2015
I was pretty pissed when I got it back. At least the bolt bodies are available and pretty cheap at $32-$36. I'm still debating the straight taper octagon or the straight section to taper octagon profile. My back has been bugging me so I haven't taken the dividing head off of my drill/mill from modifying barrel extensions a couple weeks back. I almost have a trolley done so the electric winch I have can be mounted on the trusses to lift crap I'm not really supposed to anymore. Should make hanging a deer super easy too.
The arched carbine bolt from Liberty Tree was the first to come in. It was advertised as NOS with storage wear and it certainly looks it. It had some blackish Cosmoline on it which came off easy enough in the parts washer. There are a few nicks in the polished finish like you'd expect from being mixed in with other bolts for 120 years. Other than that it looked like it was made last week. It's one of the later versions with the rounded transition from the bolt knob to bolt handle, and the only marking on it is the funny hat stamp which is also on a few parts on the rest of the action. I had previously ordered a few new extractors and snapped one in. I may just use it as is.

1BIGGUN
June 26, 2015
If there are no plans for a scope I'd run it as is.
Maybe drill out the knob or something custom just for giggles.
mike928
June 26, 2015
Why not just cut the ball off and thread it for a longer knob?
1BIGGUN
June 27, 2015
Quote Supbrah:
What the hell is 4441BG? What does the round even look like? Do I need
one?
It was designed by a Ballistic Genius 1BIGGUN and refined in response to lesser rounds designed for AR15 use that were also held away from gun owners as proprietary or the lack of loaded ammo or brass.
It was designed for use in the stronger AK 47 platform and to be able to be made from easy to get components.
I originally designed the round longer as the AK is not magwell restricted like an AR15, however a Gunco meamber named Gunter (who left Gunco over the BS spewed there) suggested I keep it shorter so a lesser builder who did not want to modify their AK receivers could use it in a AK length mag. So this version was developed and I and Gunter shortened it.
I made up a few rounds to prove it could be done. Gunter disappeared from the internet.
At the time the Hornady Leverlution bullets were not available yet an the project was placed on hold. I still have a semi-profiled barrel here for the project
Moleman, upon realizing this is likely the best compromise of case capacity an bullet diameter an sectional density that can be obtained on easy to get brass that meet the new MI hunting regulations of a a straight wall cases has taken up the further development (he was also involved in the original discussion on the round). He has made a reamer and also perfected the case forming an also refined the specs for the neck thickness.
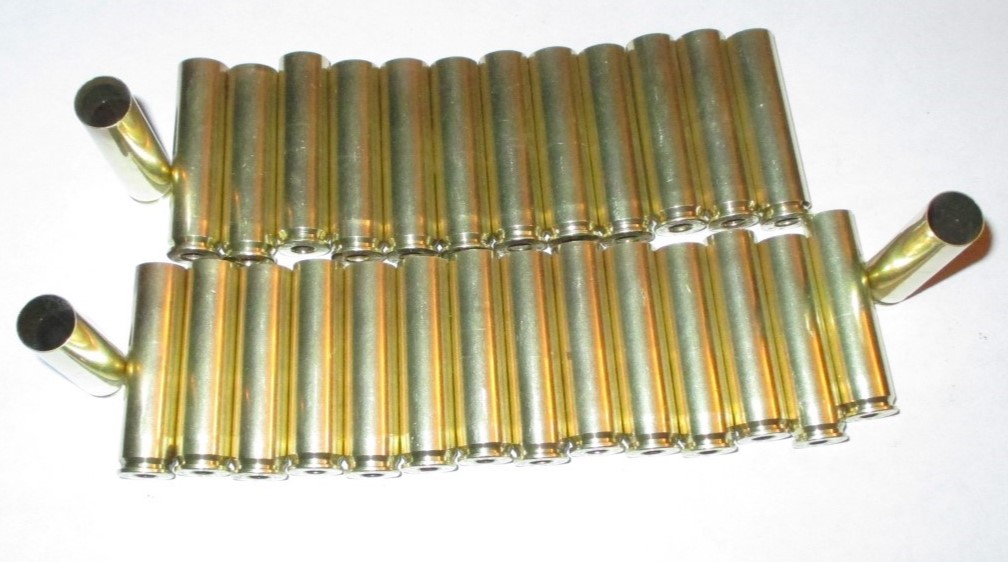
In short this is now .30-06 (or similar) brass cut down to 1.800" or less, made straight, and then formed in a .444 Marlin die. The neck is inside reamed to give a thinner neck an allow better sealing to the chamber and allows the ability for all brands of brass to be used regardless of how thick it is at the 1.800 mark.
It runs a .430 44 Mag type bullet and the chamber is spec'd to allow the 265 grain Hornady Leverlution bullets.
Loaded to higher pressure is will meet or exceed 444 Marlin ballistics in a bolt action. Loaded to around 50,000 PSI it will outrun most of the AR wonder round big bore choices, and loaded light it will work in lesser guns like the AR15 if the bolt face is opened up to .470"
Yes, you need one.
I also feel that when Moleman gets this thing up an running the name of the round needs to be changed a bit.
I'm thinking the .444 BGM is a more appropriate name.
The .444 Biggun Gunter Moleman would be more indicitave who really made this a reality. It sounds good also :)
I came up with the concept of a 44 cal AK round. Gunter (wish he was here) refined the idea to use it in a standard mag and Moleman is actually getting it done with a real reamer (I was going to bore the chamber originally). Moleman an I have been discussing this round off an on for at least 5 years an refining the specs. A lot of thought has been put into it allowing the widest range of bullet weights an seating depths to allow it to still fit in a AK an AR mag.
It should also be noted that the reamer Moleman has made will ALSO allow the original concept of a longer 444 round to be made with the same dies and brass. The rimless 444 Marlin is not a new idea an had been done before on bolt actions. I'll take the credit for it being a AK round. So in a non- Michigan-state bolt action or AK or AR10 type gun it can be made in an even more powerful version that will give a flatter shooting, harder hitting, yet version. (think 45-70 power levels but faster).
It's going to be a great round for hunting and play. Should work great with cast bullets and should be able to be suppressed fairly easy.
Moleman
June 27, 2015
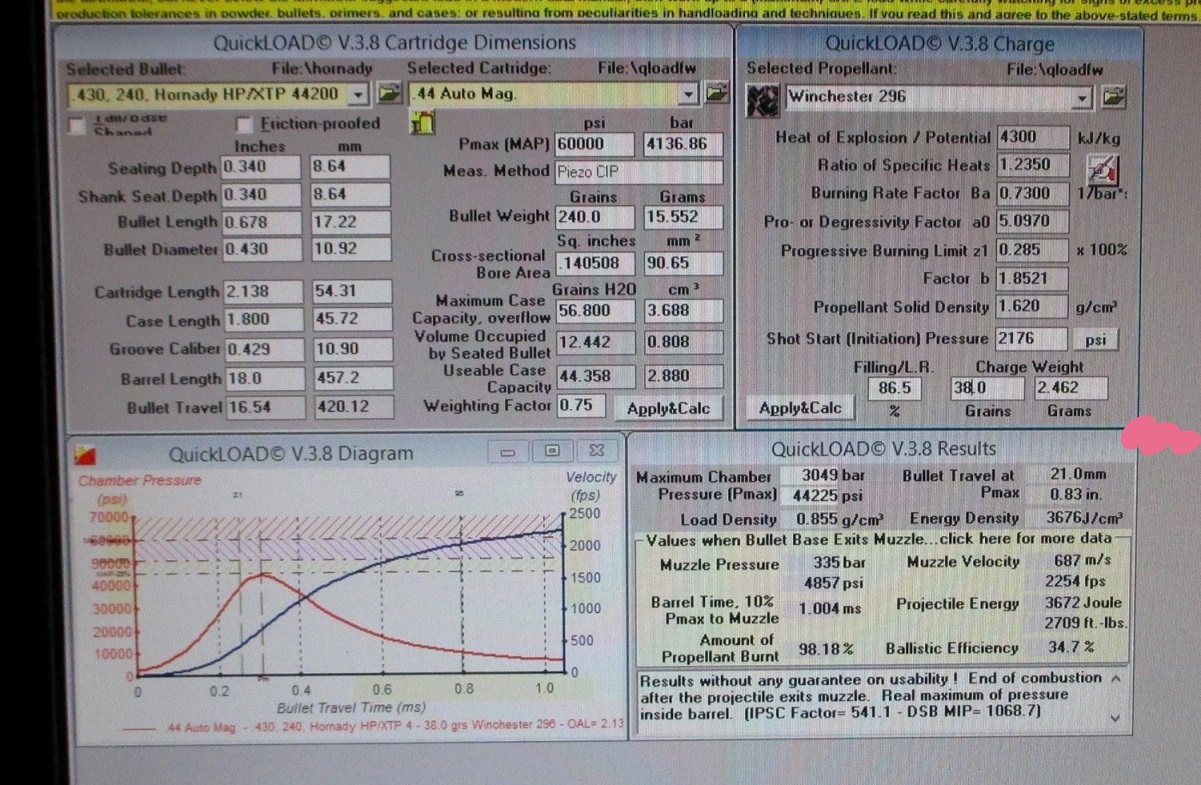
Up the pressure in a strong action and it will beat a 444 Marlin. I'm happy with being a 100-150fps slower(*) than the 444 Marlin to keep the pressure down for a 122 year old action. Here's a pic of the round between a 444 Marlin and a 44 Mag, and a mild load QL graph for an 18" barrel.
*My 444 marlin will toss the same bullet another 150fps faster with it's 4" longer barrel and a 48g charge of 4198, but once you compare similar barrel lengths the difference is 26fps according to QL... 18" max load 444m-2280fps, mild load 18"444-1bg-2254fps. At 52k PSI it is running 2360 fps, and at 60k it is running 2460 fps.

1BIGGUN
June 27, 2015
Quote
At 52k PSI it is running 2360 fps
That is double the bullet weight of a 7.62x39 round going the same speed.
That is the same speed as a 300 Savage with a 180 grain bullet.
Quote
Ok, what is needed to get this up to 2500 FPS or better in a 22" barrel? Would
be a great AR 10 load.
I have a Mauser 98 small ring sitting here. We know the brass can take at
least 65,000 PSI. Let's call that the MAX pressure allowable. It's what a 22-
250 runs.
So what is the max we can get this baby to do with a 220 or 240 grain bullet
and whatever barrel is optimum?
I'm also wondering what the max is in a the longer case version?
We need to take this to Africa for testing.
Not sure how the Leverlution bullets will perform at higher speeds?
That's a lot to work out. Upped to 65k and a 22" barrel you can get 2500+fps.
It gets peaky with the 296 powder in this QL guess, as another .5g took it
over max. Perhaps another powder would be better, but that's half the fun of
these things.
2500 FS at 3500 pounds of energy at 63000 psi works for me.
That's about a 1000 pounds more energy than a 308 win 150 grain load an only a
150 FPS slower or so.
Quote
That will stop any deer if you hit it somewhere important in a really big
hurry.
I've used a 240gr lswchp out of a .50 Hawken over 90-100gr of powder since the
early 90's for deer hunting. Best I can tell is that is supposed to be around
1900-1950fps. It puts a hurt on them real fast. The farthest one has run was
about 70yds down a steep hill. Most don't go very far or are DRT. It's the
main reason I got a 444 Marlin. Of course as soon as I got it we moved away
from my rifle hunting spot. I've also pistol hunted with a 44mag since '91.
Some were dropped on the spot and most have run a little ways. I suspect this
will be even better than my BP gun for deer DRT performance.
Lol that's one hell of a round. I love the warning on the chart. The pressures
are a little scary.
Well I will keep watching the thread for the range report.
Nice work, guys.
You're right at the higher pressures little changes can make big changes in
pressure, things like seating a little deeper or using a different case with
less capacity can bump it up fast.
If you have the reciever hardened would that make it easier to withstand
higher presures?
The hardening is not the limitation with those actions, neither the reason a
98 is so strong.
Back to figuring on how to fit 10lbs of crap in a 5lb bag... or how to jig up
a barrel that's longer than my drill/mill's travel. Talking back and forth with
Holescreek (if I understood correctly), it looks like jigging the barrel and
indexer to a plate long enough to hold it might be the way to go. Sort of like
this pic only longer. I have a piece of 3/4"x2.5"x36" steel that I could use
as the plate.
The end of the plate with the dead center could be just a simple steel (or
thick aluminum) plate bolted to the end with the center at the correct height.
That would save several inches of bottom plate. My Hardinge indexer is at
least half the size of the one in the pic, I'll get dimensions.
I was wrong, my little one is a KAL (Kalamazoo).
My thought was to mount a 5C indexer on one end of a plate (jig) and a dead
center at the other. Mount the barrel chamber end in the indexer collet and
push the center into the bore at the other end to hold the barrel in place.
Calculate the taper and drill two sets of offset holes, one pair on the left
and one on the right. Mount a riser block/plate on the table with dowel pins
on top for the jig to sit down on. Machine the 8 sides in one setup then move
the jig to the other end to finish it.
The only problem (I just realized) is that 5C collets only go up to 1" OD and
Mauser barrel threads are 1.1"
I have a small 3 jaw chuck that's 5C but it would take up some more space in
the X axis. I was trying to find a way to keep the setup short.
Just trying to understand so i may be able to come up with some ideas.
How is holding that in a plate help with the travel limitation?
Holescreek, I'll keep my eye out on one of the Kalamazoo indexers as they seem
to go for a little less than the hardinge ones for some reason. I think with
this type of setup we're back in business once everything gets hashed out. I
measured the longest flat plate that ca go on top of the table and it was
about 30.5" With a set of 5c blocks and a home made tailstock it comes in with
room to spare. I think the Kzoo indexer would be nicer though. The small ring
threads on the takeoff barrel are right at .988" so the stub could be turned
to 1" and once milled it could be threaded and chambered. Do you think if I
just used the square block in the pic and milled 4 flats, put a magnetic level
on it and then rotated it to 45 degrees and locked it back in to cut the other
4 flats it would be close? If not, how about threading a block for barrel
threads, then milling 8 flats in it and just screwing it to the barrel to use
to indicate it?
Mike, the plate in effect makes the table clamping area longer so I have more
room to mount stuff.
Some neat pictures of M88 mausers with octagon barrels:
Some nice stuff there. I love those old sporters.
I really liked the peep site inlaid in to the stock that folded up.
I also like the scope mounts on some of those.
Not fond of the spoon handle bolts however.
Now you need double set triggers and a way to do all that fancy inlay and
checkering on top of the barrel
Wish guys still did engraving like that as often. It's just a lost art, it
seems.
mike928:
You move the fixture plate/jig to the opposite end of the table when you run
out of length.
Why not get another square 5C block and mill four more flats on the block?
They're fairly cheap and you would have it for the next octagon project. (You
know there's gonna be another.)
Next, how are you going to clock the flats? I've always cheated and put the
barrel in the receiver, then cut two 'clocking' cuts, one flat and one
vertical. Then remove the barrel and dial it in the fixture using those two
cuts. I'm sure there are much better ways, but that worked for me on several
barrels.
Rick, I was going to turn a little off of the shoulder until it matched up,
but I like your way better. The receiver has a nice flat bottom to indicate
off of. I wanted to have the barrel threaded and chambered already in case I
screwed up either one of those the barrel wouldn't be lost. The barrel could
likely be indexed by the muzzle end, then set up with a spider in a center
rest to crown it while the chamber end was held in the lathe chuck. I had also
considered getting another 5c square block and cutting it octagon like you
suggested, but that leaves only a 5/8" wide spot to clamp against. It takes up
the least amount of space out of the options so far, but I was worried it
might try to rock a little since the flat surface would be narrow. That's
where the threaded block octagon came into play. I have another block left
over from making my barrel vise that I could thread and make octagon. I had
also thought about getting an emergency 5c collet and threading it for SM
threads to hold the threaded chamber end... and, and... I think I'm starting
to overthink this little project.
Does anyone have a 5c spin indexer like in this pic? If so what is the length
from the back of the base to the front of a collet?
I don't have one assembled but looking at the parts it appears to be about 5-
3/8" from the rear of the base to the front of the collet.
What if you turned a collar that threaded onto the barrel, maybe 2" OD by 3/8"
thick then did a 16 hole bolt circle with 1/4" holes around the face. Then
make a rectangular plate with a clearance hole for the barrel threads and put
two 1/4" pins with a matching spread for the collar to slip over. Mount the
plate on the end of your fixture to hold the barrel for indexing with the BC
holes. Turn a nut the size of your barrel threads to use to pull the collar
against the plate. Cheap and simple and won't take up much space.
Picture will be easier to understand and would've saved some typing.
I assume there is going to be some support in the middle of the barrel to
prevent flexing?
Thanks Holescreek, I was hoping it was shorter than the Kalamazoo indexer, but
even at 5-3/8" that is "do-able". Out of 30" total, 22" barrel with .7" or so
inside of the collet so really 21.3" + 5.4"=26.7" which leaves me with 2.3" to
make a simple tailstock that can actually have supports cantilever back on the
bar if needed. The reason I asked about it is I was following down the 5c
square block milled to octagon idea since the local PTS has one listed at $28
for a 2" wide block(just the block). That got me thinking another $20 would
get me something a little more versatile and already machined/ready to go. All
of the K-Zoo indexers that I've found are going for around $150+ to my door
right now. The indexer drawing likely could me made from steel I already have.
It would allow for a pretty short mounting plate or even the possibility of a
longer barrel.
From 1BIGGUN "I assume there is going to be some support in the middle of the
barrel to prevent flexing? "
That is something I wondered about also. Since we figured out it can be
mounted on my tiny table, I would like to try the rounded stops on the flats
(tulip?). My horizontal mill has less travel (16"-18" IIRC) and seems like
more of a PITA to set up, cut, slide down, cut index,repeat 8 times. So I have
a couple 7/8"-1" end mills that could take the final cut and form that area.
If I screw it up it can always just get squared off. I figured an angle plate
could be pressed up against the side of barrel to limit flex/chatter, but
would it be better to have the contact surface be steel, aluminum, plastic or
even neoprene?
Just a stupid thought but what if you mill the first inch of the barrel ahead
of the threads into an octagon and use that for indexing?
You would transition that area into the narrower flats later anyways. It will
take zero space and you could clamp the barrel to secure it.
Of course I have no idea of what I am talking about since I have never done
any of this.
Are you going to be cutting with the end of the cutter or the side? If the
end, a simple machinist' jack will be fine. If from the side, an angle plate
with some wood between them lightly clamped would be great. Clamp slightly
past center and machine then move the clamp down to a finished area and
continue on. Either way you need to be careful to not flex the barrel before
cutting.
I had one of those spindexers (back when Enco sold them for $29) but I used
the 5C spindle for my motorized spin grinder.
I think I saw on Practical Machinist or somewhere a guy who did a barrel had
flex issues that's why I mentioned it.
The dowel pin is probably the cheapest route to go. The nuts can be made from
the same 2.5"x3/4" bar I already have. I likely have some drill rod that could
be made into the pins. It all comes down to time. For $50 that ready made
indexer saves me a lot of time and I get another tool as you pointed out. I
have made a similar sort of jig in the past to hold and index a gear so I
could mill some teeth back into an area that was filled with braze. It indexed
off of the gears own good teeth though.
I'd like the end of the flutes at the chamber end to have the radius in them.
The machine I'm using is a HF drill/mill. Would it be better to mill the
majority of the material away using the end, then switch to the side for a
finishing cut and to form the radiused end?
Depends on your bearings and setup. I'd try using the side of the cutter first
and see how it finishes. Rough the stock out conventional cutting and finish
climb cutting. If you get chatter from the bearings or gibs, using the end of
the mill to rough it all down negates the spindle bearing and gib issue but
you'll still have swirls to file out. Most of the endmills I use regularly
have pretty dull ends so I'm always looking for ways to use up the sides
before they go into the "I'll resharpen them someday" box.
When I did the barrel for my 45/70 highwall we set it up and used a fine pitch
roughing endmill to take the majority of the metal off the flats then used a
regular endmill to take it down to final dimension. Setup was using the side
of the cutter with angle plates supporting the barrel on the far side.
There was a reasonably priced Kalamazoo type 5C indexer on eBay that looked
better than the spin indexer so when it shows up I'll start on the mounting
plate. Also ordered a 55 degree Whitworth fish from England (oddly it was
cheaper than getting a China made one in town here).
The barrel shaft is around 63/64" IIRC but it would be nice to have it
threaded and chambered beforehand. Would an emergency collet that was threaded
with sr threads be better than a collet on threads as far as holding goes?
Quote:
Probably, but I don't know if I would go through the trouble to make one for a
one time use since all of the loading will be on the side or top of the
barrel, it's not going to pull out of the collet.
I was concerned about the barrel slipping out of time. The tailstock should
keep it from pulling out.
I wonder how some flutes on a hexagon or octagon barrel would look. I think we
need to find out. Maybe ball mill were the points are?
https://youtu.be/Hm8bpaSpWCA
Found this on another forum. He's using a gear tooth cutter from the side and
stacking lead against the barrel to reduce chatter. I've used ball nose
cutters but never considered a gear hob.
Be nice to have a clear shot of the support that he's using on the backside.
Jump down to 4:45 and you can see there are just bolts top and bottom with
some kind of non-marking caps.
I have a R8 slitting saw arbor or could make one to fit in a 3/4" or 7/8"
collet to use a wide horizontal mill cutter, but don't think the mill/drill is
up to it. If this can be made to go on my E.E. Garvin mill it would have to be
cut in two setups since the travel is only 16"-17" or so. The indexer would
have to be set on an angle wouldn't it?
If you used the horizontal the barrel would need to be tilted to bring the top
surface parallel to the table right? So yeah, the setup would be more
complicated, especially with limited travel.
If you look at his setup in the video, it would be greatly improved if he was
driving the cutter with an R8 socket tool holder instead of that long assed
ER40 setup. I have an r8 adapter (actually several) in the shop to hold
horizontal milling cutters with varying ID's and thicknesses. After seeing his
video using the gear cutter I might even give it a try because they make
cutters with interesting shapes across the bottom (not all are round between
the teeth of the gear). It wouldn't be hard to make a "steady" like he's using
either from some C channel bolted to an iron angle plate. Besides the top and
bottom screws you could even add one in the back behind the barrel to keep it
from bowing backwards.
Why wouldn't the mill/drill be up to it? Mine has a 2 HP motor and my
Bridgeports only have 1HP motors. Worst case you just have to make multiple
passes.
Power wise I think the mill drill is fine, but it's the rigidity and speed I
wonder about. I did see a couple 2.5" dia cutters wide enough to make the
flats this time on evilbay which might be fine compared to the 4" ones that
were there last time I checked.
After we talked about the ridgity last time I chucked up a 7/8" or so 2-flute
M42 bit and faced off the ends of some 3/4" thick 1018 using the side of the
endmill. The finish had that fish scale look to it. Of course using the end
left swirl marks that would also need draw filed also. My mill/drill is also
rated at 2hp if I remember correct at 220V and 1HP on 110V... been happy with
it on 110V. If you think I'm good then I'll start trolling for horizontal
cutters.
How was the finish if after you take a conventional cut you feed in
another .002" and slowly climb cut back to where you started?
(I should clarify, I'm talking about using the side of an endmill)
Didn't try climb cutting, but 2-3k just left a less bumpy fish scale finish.
I'm out of town until Friday but will try climb cutting for finish when I get
back. It was just a standard 2-flute endmill that I used. Between a 7/8"-1"
4flute and a 2.5" horizontal mill cutter in an R8 holder. Which do you think
would be the better choice? I was leaning towards a helix cutter v/s straight
if going that route thinking that the helix might give a better finish with a
smoother transition between flutes. But is that what makes the fish scales
versus ripples in the finish?
If I had only one choice I'd go with the 1" diameter end mill, cutting with
the side, and finish with a light climb cut. The light climb cut or "spring
pass" with the helical cutting edge shape should peel rather than scrape the
steel off like a straight cutter and a light climb cut should help keep the
bearings centered.
The 24 position indexer was waiting for me when we got home tonight! I don't
see any maker information on it, so it is likely a knock off of a Kalamazoo
indexer. It's a little dirty and is missing the ball oiler. It is tiny next to
the dividing head. After a few pm's with Holescreek to narrow down end mills I
ordered a set that should be here early next week.
At least you got the nut with yours, I had to make my own. I used mine almost
exclusively for chamber fluting because it left a lot of room on the table.
That blue thing on the left in the picture is my Mecca dividing head. This
little one probably takes up the same space as the chuck on the dividing head.
And it isn't heavy. Just using the little lever to lock it into the positions
it doesn't feel like it has any backlash. Do you leave it like that, or it
looks like you can lock the spindle by tightening the allen bolt on the split
ring on the back? It came with no instructions of course.
I always used the lever, never tightened anything.
Their site:
http://www.kalamazooind.com/products/5c-collet-fixtures/5c-5c-collet-indexing-
fixture/#sthash.YmwjgHoE.dpbs
I didn't realize they made different index rings for them either. I bought
mine off eBay and only used it for the one thing. I may need to research it
myself now.
I only knew they offered different ones because one I was watching suddenly
dropped a little in price so I was going to buy it until I noticed the
description was changed to say the 24 position index ring was no longer
included... That's when I started looking at parts for them. It was no longer
a decent buy at that price so I got this one. It looks like it got used once
then was put on a shelf to collect dust and rust where there were
fingerprints.
I just turned a straight shank mandrel for my horizontal cutters and slitting
saws. I've got the old B&S horizontal mill I could use, but it's (shamefully)
turned into a work bench. I like the small collet holder you have. Looks like
a major step up from the Chicom spindexers (what I have).
Ebay usually has gear hobs very reasonably priced. I use the word "lot" in my
search criteria to turn up some bargains on cutters and tooling. Most sellers
dumping estate stuff don't know what they have and lump them all together.
I also like the steady in the video. May have to make one as well.
The main problem is that much lead in my shop would turn into bullets real
fast.
I looked at getting a spin index and believe it is overall a better indexer
since it gives you 360 degrees of indexing positions where as this one only
gives me 24. Watching a couple youtube videos on how to use the 36 plate holes
and 0-9 index pin positions got me thinking I'd screw up somehow remembering
to go 4 plate holes and 5 pin holes every turn. The straight 3 clicks of the
24 position indexer seemed a better option.
I got nothing done the past two days other than swapping out the dividing head
for the vise, and centering the barrel to be threaded and chambered. I did get
the 55 degree center gauge in from England, and a 7/8" 4-flute Cleveland
endmill in. Still waiting on the two 1" Niagra endmills.
Got a little work done. The two hoist trolley bodies that I made too short
will work perfectly for an adjustable tailstock body. It will basically be a
beefier version of the one that I made to hold reamer blanks for fluting. The
Niagra 6-flute end mills came in, so with the 7/8"4-flute Cleveland and a few
others about the same size one hopefully will work. I'm debating adding a
couple 3/4" keys to the bottom side of the bar with slotted screw holes to
help lock it in once the correct taper is set.
Little more work on the tailstock part of the jig. Drilled a hole through the
middle piece and reamed it to 7/16" and threaded the back 1/3rd to /12"-13.
Then slit the hole on the top and at the back for clamping with 1/4"-20 bolts.
Need to make a center/nose piece and bolt everything together next.
I've been watching this thread, but haven't commented because Moleman seems to
have everything handled, and there isn't much for me to post besides that his
project is looking good, and that I like the octagon barrel concept. But after
the problems that he had with getting his bolt handle forged, I decided that
the next time that I weld on a bolt handle I'm going to take a bunch of
photos, and write up a tutorial on how to do it. I'm far from an expert, but
the job isn't that difficult, and if I can do it then anybody can.
Also, I think that you made the best choice in the 1891 Argy for this build.
The inline magazine will work great with the 444 1BG. If it had been built on
a '98 or a small ring, the fat, shoulder-less case might have required some
tweeking on the feed rails to get it to feed right. The big cylindrical case
might not have wanted to rotate easily from the right or left side of the
magazine, but the inline feeding on the '91 should work great. Here's a
question - will a trigger guard/magazine well from an 1891 fit onto a '93
Mauser? If it will, that might be a good set up for a rifle in this caliber.
The cases are the same diameter as a 30-06 they should double stack just
fine.
I can't say how they will feed.
1BIGGUN:
The reason I was asking if an 1891 trigger guard/magazine would fit an 1893
receiver was because of the small ring action that you have. Cartridges with
the .473" head should fit into a Mauser double stack magazine fine, but the
444 1BG cartridges might, (or may not) feed well. It's one of those "try it
and see" things. If it binds up while trying to rotate in off the feed lips,
then switching to an inline magazine should fix that. I know that you've got a
'93 receiver, and that your just itchin to build a rifle in 444 1BG, so it the
Argentine trigger guard fits, this might be a solution if you run into feeding
problems. I was also thinking that if the trigger guard can be made to match
up with the receiver, then that action might just work in a stock that was
inletted for the model 1891. This is just food for thought.
I know that rimless versions of the 444 Marlin have been done successfully on
a large ring.
So I'm confident that at least my original design (the longer version) should
be pretty easy. I don't think its going to be to hard to make it work.
I never considerd a single stack but that's an interesting idea.
Almost done with the tailstock. It still needs two nuts made so it can clamp
the center section. Haven't made it out to the shop much this week, but hope
to make some notable progress soon.
Since I wasn't quite so sore today and TRX is waiting on me the barrel is now
threaded! Suppose those pesky HS gauges should be made now so I can chamber it
huh? Once that is done I'll mark TDC. The riser block is almost done. It just
needs a few holes drilled and tapped for the dividing head and tailstock.
Theres a big buck waiting to test this round.
Really sorry to hear your back is acting up again. I'm sure that makes things
hard.
What are you figuring for distance between GO an NO GO?
Its going to be interesting to see how the brass acts when its fired.
Hopefully it won't shrink.
Don't think they'll shrink, the 357AR cases grow although not as much with a
tight chamber with less taper. I'll have to look back up what we decided upon
for the go/no-go gauges. It's in one of the threads. They're easy to make
since they're just cylinders with an extractor cut. I hope my back is calming
back down finally. We were thinking about trying to get a hunting lease so my
son would get a chance to hunt where he can see more deer than hunters. I was
getting worried I'm headed for back surgery #5 this past week and haven't
placed the ad for it yet.
EDIT to add info from PM from this past January:
GO GAGE = 1.795"
NO GO GUAGE = 1.799"
MAX case length = 1.794"
MIN case length = 1.792"
I hope the specs are right, they're yours. I had several spots to hunt back in
IL, my sisters up in WI and my buddy's farm in MO. The nearby state land here
is infested with morons with orange vests. The dozen or so that walked by our
stand last year on opening morning really took a lot of the enjoyment out of
the hunt. The idiot with the climber stand on his back "stalking" through the
woods might of taken the cake. We heard him coming well before we saw him
since he seemed to hit every small tree or piece of brush with his stand. It
was either him or the idiot who couldn't find the surveyor tape highway he had
put out the day before and after consulting his map and walking in a circle
twice, started walking over to our stand before finally finding his way.
The specs should be fine.
As long as case length is precisely maintained it should work well.
Head spacing off the case mouth of course mandates precision case length.
With the Mauser extractor, as long as the case is snapped in I doubt even if a
case was way undersize there would be a issue.
Some guys fire form cases with just the extractor holding the case to the bolt
face.
I know we went over all of this back in January, but a difference of .010"
would also likely be fine (still going with your suggestion as it can always
be opened up later if needed) between the trim to length and max length if you
weren't going as high for PSI.
I think I suggested around Go at 1.8" and No-Go at 1.805" with the cases
between 1.790" trim to length and 1.8" max length. That way there would be a
bit more firings between trimming. Or at least I'm hoping it will be that way.
With a tighter chamber on my first 357AR I got around a dozen firings before
the case got long enough to need trimming. With a slightly wider chamber for
easier extraction and chambering the cases needed trimmed between 3-5 firings
depending on how hot they were.
But that round is also an odd duck as the case is basically straight and the
chamber is tapered to ease extraction. The chamber on this should have .015"
taper built into it as well as the case so the case won't get blown out as
much and then resized where the extra width has to go somewhere so it gets
longer. So I think it can be held a little tighter and still have a good
balance of case uniformity and firings between trimming. If that makes sense?
Yes, it all sounds right.
We can always tailor case length if needed.
The brass will handle at least 60,000 PSI or more. so we're way on the
conservative side with your intended loads.
Now if we get a barrel on Mauser large ring or other strong action and try
60,000 PSI pressures the tight specs we have settled on will be perfect IMO.
I don't know if the gains with more pressure are worth it when most bullets
right now are designed at 444 Marlin speeds and less.
Some field testing on real game to see expansion an damage.
If the effective range can be increased significantly by going from 40,000 PSI
to over 62,000 and bullets stay together then I will consider it.
Custom made bullets are not out of the question. Some solid copper maybe. If
guys turn them for 50 BMG an other big bores they can be done for this.
Likely not really needed for short range deer, and this was never designed for
long range. It would be fun to see how far it can be taken.
What would a longer case an a custom high BC bullet offer?
Basicaly take .444 Marlin specs, up the pressure to 65,000 PSI, and increase
the bullet BC to the max would we see numbers like makes the 45-70 so
legendary but even faster?
Got started on the HS gauges. So far they're just turned to size and left
long. They'll get an extractor cut, polish, marked, hardened another polish
and cut to length.
Little bit further down the rabbit hole. Go-1.795" No-1.799"
Should work.
Do you plan to short chamber it and then finish it on the action?
I was thinking of going .002" under receiver ring to bolt face on the barrel
with the go-gauge to barrel shoulder, knowing that it would likely need
touched .001"-.002" up once the barrel is torqued down. Before I do any of
that the lugs should likely be lapped. I'll have to find my valve lapping
compound and see what grade it is.
Yeah, I'm sure it's going to take a little to get the flats on barrel where
you want them.
Best to leave some margin for error.
My plan is to install the barrel and put a witness mark on it, then mill one
of the flats (not to full depth of course) as I think Pamrick suggested. That
way I'll have something to clock the flats off of. Otherwise I think it will
be a PITA to try to match up by turning the shoulder and chamber face.
The reamer didn't harden enough and is ruined. First one I've had do that
since I stopped tempering them. On the brighter side the lugs have been lapped
so there was at least a little progress today.
I'm going to try to recut this one. I've got the case mouth shoulder freebore
and leade recut, but it leaves the case mouth shoulder .002" oversize so I'll
need to figure out a way to mount the Dremel to take .001" off and leave a
decent finish. The flutes will need stoned as it is to remove the burr that
was formed from the chambering attempt.
I wonder if I could run it in reverse and run a hardened flat smooth cutting
tool over it to burnish it the .001" then just stone the cutting surface for
any burr it may of raised? Otherwise I may just set it up between centers with
a guide for the stone and start lightly stoning the flutes at the heal area
and rotate the reamer until the Dykem gets stoned off where the side meets the
cutting edge. That would likely take .001" off of the OD... Then again it
might be better off to just make another reamer.
Welded a 1/2"-20 nut to a piece of steel and screwed in a Dremel wand thingy
with a stone attachment in it. Turned in reverse and the Dremel on high. 3-4
passes until the Dykem came off of the flutes and the case mouth area came in
.0005" over the final OD. Figure the final stoning to remove the burnt oil
would bring it down the rest of the way. Perhaps I should look at building a
tool post grinder as another to-do project.
I'll try rehardening this reamer and see if it'll cut a good chamber after the
flutes are stoned.
It lost about 3/16", so perhaps a 2" case length would be about max. I'll
likely have to make another one, but it seemed easier to make than the 35
caliber ones.
Hardened it again, file skated across it and polished it up. Tried it out on
the barrel and initially it cut well until it got to the part I ground with
the Dremel. I think what happened was the Dremel wand bearing isn't rigid
enough and was sort of rounding off the flutes as it would get pushed away a
little, then go back as it reached the end of cut.
The reamer started squeaking which to me means something is higher than the
cutting surface and the reamer felt warm when I took it out of the holder.
Never had one feel warm before. I Dykemed the flutes, tested it and sure
enough... So new reamer it is as I'm done dicking around with this one.
I'll give it another shot as there still might be enough time to get a rifle
done.
I just don't think I got the last reamer hot enough or kept it hot long
enough. I've got about 2 hours in this one including changing over the lathe
from chuck to centers and face plate. Figure another 1/2hr to an hour flute it
with setup time and another hour to harden and polish it.
It now will close on a go, and not close on a no-go! I fiddled around with
feeding from the mag without any luck YET. I moved the end of the feed lips on
the mag back 1.3", but I think it still isn't releasing the chubby rounds in
time. The feed lips originally ran up to the front of the mag and never let go
of the base of the cartridge, now it does, but it doesn't have time to
straighten out before going into the chamber. It's sort of hit or miss if the
bullet below the feeding round pops up and pushes it clear of the mag. If the
feed lips ended another 3/4" further back where the case portion of the round
below it could push the base of the feeding case up I bet that would solve the
issue. Then to make a mag spring as I don't think rubber bands and a block of
wood are a good long term idea for a follower and spring.
It's "chambered". I might have to touch it up as it's only on hand tight and
it'll tighten up a few thousands once it's torqued down. The reamer worked
fine, I may have to turn the cases as the .44 AMP reamer didn't thin them deep
enough I think as there is a ring on the case near the base of the bullet from
rubbing on the chamber. I'll try adjusting the reamer depth first, but if it's
still there I'll just turn the cases. Not fancy, but it'll work if the reamer
die adjustment doesn't.
To bad you can't shoot it with the barrel heavy like that an again after its
profiled an octagoned to see what difference the machining does.
So you think you need to out side turn?
I wonder if it possable to expand the case completely straight in the front
portion an then inside ream a little deeper?
When you seat the bullet its expanding the case?
It's been a couple months since I made those cases, but in a nutshell, yes the
case is bulging. It's leaving about a 1/16" wide shiny ring where the bullet
base is, and it measures .4575"-.458". The chamber reamer at the case mouth is
.456" so it's not too far off. I think all I should have to do is set the
reaming die back up and raise the stop collar on the reamer 1/4" or so. The
case reamer has a taper to it, so I think I just didn't ream it deep enough is
all. Here's the round I was cycling through the mag over and over again this
afternoon. It chambered and extracted just fine, so it must be just barely to
tight. But too tight is too tight. You can see the bright ring about .2" back
from the case mouth. It's a 180gr bullet, so the case will need some attention
one way or another so we can use the longer flex tip bullets.
Quote:
That's what I'm thinking also. I'd ream it just a bit deeper or get a reamer
with no taper.
For the record what is the reamer size again? And did you have it in a die
that compressed it when it was reamed?
When we get this all figured out we should do a official thread on dimensions
of it an exact procedures to make the round with what dies and stuff needed.
If it fits but is snug that means were going to have about .002 neck clearance
if the inside reamer takes care of the problem. The alternative is a very
light outside turning. That takes a lot more time, however it would give a
very concentric round.
Would the flex tips feed any better or is this a case of the rails not
releasing the case were it needs to?
Screw that barrel on snug and take that outside and shoot a couple rounds once
they're inside reamed deeper and see what the brass looks like after it goes
bang.
I wish you lived a little closer. I'd drive over to see this go bang.
I used the .44 AMP die, which that is what this thing is. Now that I'm
thinking about it, it may of been the issue since the base dia. and case mouth
dia. are basically the same for both rounds. The .44 AMP is shorter, so the
case taper and reamer die taper is going to be steeper on it, which I think is
what I ran into. I'll try reaming it deeper first, but if it doesn't work
there's always turning the necks like on the 357AR. Not a big deal, just
another step.
Got the barrel torqued down, made a witness mark to line it back up later and
milled a flat at the 9:00 position as you're looking at the chamber end. I'll
use the flat to square up the barrel in the jig. Got a little bit more done on
the riser block. I'll need to get an angle block before I drill the other
clamp down holes, along with some better suited bolts for clamping. I also
need to decide if I want to use an emergency collet and thread it or get a
63/64" collet. The 1" collet in the pic doesn't feel like it has a very good
grip on the barrel threads.
http://www.beartoothbullets.com/bulletselect/index.htm
I'm just thinking in a newer bolt action, the heavier the better as it can
handle the pressure so up the bullet weight to keep subsonic. More energy =
more dead.
I'm thinking the 444BGM would be great in a bolt action with a long heavy
bullet as the long bullet length will be fine as there is plenty of room.
Not sure about the twist rate however.
Anyway best to not hijack your build thread. Better to have a separate 444
thread later.
These guys make .44 molds up to 560gr... That ought to stop a train or at
least a runaway Suburban with a 100 pound starter brace.
Thanks for the link RW. I looked through their .44 bullet page and it looks
like 495 grains is as high as they'll go before "too long" shows up under the
comments section. Makes me wonder about twist rates. I'm running a 1-20" in
this build, but my 444 Marlin is a 1-38" and is really only supposed to be
good up to 265gr or so.
Bob, here's a pic of the finished reamer after chambering the barrel. It looks
like you could do a 2-5/8" to possibly 2-3/4" total chamber depth (bolt takes
up 1/8") with this reamer.
Fiddled around with the riser block and got it to the point where I really
just need the angle plate and some lead bars before I can start making the
barrel octagon! Reamed another case another .2" after measuring the reamer and
die to figure out that the reamer really should of reamed deep enough. Loaded
up a 265gr flex tip and tried running it through the action. No dice. The slim
band was now 1/4" wide and was enough to prevent the round from chambering. So
unless I want to make another reamer die body the cases will have to be
turned. Not a big deal, but I was hoping the .44 AMP die would work.
HMMMM, so the problem is the reamer is not cutting the area were the bulge is?
So if the case was reamed when it was straighter after it was expanded with a
larger OD reamer and then sized down would it work?
I'm thinking one of those Forster inside reamers ran in on a straight case
expanded might thin the entire neck area evenly.
If I'm correct the neck area is still tapered and the brass is thicker at the
heel of the bullet, yes or no? If so then we need the neck area the same
thickness the entire seating area.
If the neck was sized down and just the front half of the neck then expanded a
bit leaving the back half of the neck a smaller, could the rear half then
be reamed and then when the brass is FL sized back, the brass in the back would
be thinner and the entire could be rereamed resulting in straight wall
thickness for the entire neck?
IF the outside of the case was perfectly straight then a straight reamer
should give a perfectly straight inside neck wall and the neck thickness
should be the same all the way back. An initial expanding die consisting of a
straight hole in it and an expander ball / or slightly tapered mandrel should
yield straight necks that could then be reamed with an appropriate reamer in
the same die or just use a Forster inside reamer on trimming tool. This would
only need to straighten the first part of the case. The die would basically be
a neck sizing die.
The case do/will still have a little bit of taper in the neck area so ideally
it would get reamed v/s turned, but since I'm pressed for time I'm fine with
just turning the necks the couple thousands that it will take to get them to
chamber well. I could set up the compound and turn the necks with the taper,
but that sounds like an aggravation waiting to happen. There is roughly .0083"
of total taper per inch. On the .44 AMP die it is .0115" per inch of taper, so
the two just don't match up. I could likely measure the .44 AMP trim die to
get the dia. at the case mouth and use that dia. to make a reamer to make a
new reamer die with the correct taper and I likely will. I think a straight
cut at the neck just to get them to chamber would work in the short term, but
it would mean once it is fired that it may not hold the bullet bases as
tightly... I think.. But it would let me shoot it for now.
I think a Forster inside reamer of the correct size simply ran in on full
length pre-expanded cases would solve this. No reamer die involved.
Simply put if the OD of the case is sized to spec any inside reaming will
yield necks that are the same.
Does the chamber reamer cut a straight neck or does it taper from the case
mouth all the way back?
I'll have to fish it back out and measure it. The bottom .4" is tapered for
sure, then it looks straight and right at .427" IIRC. On the Redding reamer,
what holds the case true so one side isn't thicker than the other?
On a Forster inside reamer its piloted so you just chuck it in the trimmer an
run the reamer in like your trimming brass.
As I recall Forster does custom sizes as well as having standard choices of
reamers that will do fired unsized cases an one for sized cases in 44 cal.
They don't offer this standard in all calibers for some reason.
I don't have the the Forster reamer in 44 cal but I do have a extra trimming
tool you can borrow if you want. I was planning in getting the needed reamer
when we determined exactly what size would be desirable as this has a direct
affect on bullet tension. with this set up I think we could also do a
positive stop for the bullet In side the case so bullets would not set back
under recoil an feeding.
My planned steps to make brass was
1. Cut to size and possably trim to square the case mouth if needed.
Only the first 4 steps are more than standard reloading practices and won't be
needed on reloads. Step 2 is not needed if you wanted to just fire form the
brass in the chamber.
I was thinking again this morning (I had a few when I was posting last night
LOL) that maybe 7mm Mauser brass might work better here and the brass would be
thinner at the the 1.800" mark. On 7mm Mauser the shoulder starts at 1.752" so
if cut right at 1.800" there will be about .048" of shoulder left that would
need to be straightend. That likely would not be a big deal to do since your
using a mandrel to straigten the brass anyway. A tapered expander ball would
likely take care of it also in a sizing die.
I considered using 7mm Mauser or 257 Roberts brass initially when I designed
this round an just cutting it at 1.750" but figured since it was more
expensive and much harder to find cheap once fired and I wanted as much case
capacity on an AK round as possible, that using 30-06 or 270 brass was the
cheaper and easier way to go. I also wanted a bit thicker neck to insure
positive head spacing.
Outside turning is no big deal really on this as it will be very slight and
you're not turning into a sharp shoulder junction. It will also yield a
perfectly centered case in the chamber an should also give uniform neck
thickness as well. This will all help accuracy. It's a extra step but on a
bolt action were not talking doing a 1000 rounds like I would do on a AK.
If you had 50 rounds of brass made up it would likely be all you would ever
need in a lifetime for hunting.
I'm actually considering the situation here as a good thing as we can control
neck clearance to the chamber with the reamer dimensions you made.
If I could find 7.62x39 brass with too thick of a neck, I could get more
accuracy from AKs with a stock chamber an barrel.
http://www.forsterproducts.com/client_images/catalog19938/pages/files/Neck_Reamers_NR1000-001.pdf
the instructions for Forster inside reaming ^^^^^
http://www.forsterproducts.com/store.asp?pid=26888&catid=19938
Details on inside reaming products ^^^^ I was correct they have an after
sizing and after firing reamer for .430 bullets. They list a .4275 reamer
for cases after they're sized as an in-stock standard item.
I have a spare Forster case trimmer if you want to borrow it.
You would need a straight case or at least the neck area for this to work.
So it would seem that the .4275" reamer that I have with the .44 AMP set would
work fine if the die was for a 444BG. I'll see if I can center a couple cases
in the lathe and use that reamer. I expanded the cases up so they would stick
to the die walls better. Perhaps they should just be sized and see if the die
will still grab them tight enough for turning.
The reamer would be right if the case is not compressed in a die as it will
likely spring back.
The Forster setup cuts with the case out of a die.
What happens if you just run the reamer in a case chucked in a lathe to hold
it?
I have only done standard reamers on cases held in a die. The case mouth
needs to be square or the reamer will walk to one side.
On my home made 6mm BRK brass I inside ream to be able to get the pilot in and
I outside turn to get the cases concentric but I'm removing a lot of brass.
I wonder if a really heavy duty expander ball and rod would not swedge the
brass thinner in a full length die. Something has to give...
Took the .44 AMP case reamer and a sized 444BG case and chucked it up in the
lathe. Took a while to get it centered, but once set up it reamed the case
easy enough. Loaded up a 265 flex tip and measured it... 456." It slides right
into the chamber and falls out on its own. I'll look into the Forster reamer
as it has to be faster than setting it up in the lathe... unless I finally
added collets to it.
Also ordered an angle plate and 63/64 collet and picked up an emergency collet
to thread in case the standard collet still lets it turn a bit. Once those are
here, I suppose I can start making a whole bunch of chips come off that
blank... and I still need to make those lead bars like the guy in the video
was using to control chatter.
Glad to hear you got ammo to fit after reaming a sized round.
Would a 444 Marlin trim die work for using a standard reamer? Will a reamer
fit through the stem hole of a FL die?
Forster makes a trimmer that goes in a drill press also.
Maybe grind a standard reamer to go in your brand of trimmer?
I tried the 444 Marlin die and there is a restriction near the top that is
smaller than .427" so it is a no-go unless I wanted to get another one. I
really do like the reamer die, and wouldn't be opposed to making a reamer for
one. I've got a 6" chunk of 4140 barrel that could be used to make a die
blank. My Lyman trimmer is getting to the point where the clamping head needs
rebuilt or replaced as it no longer reliably holds cases tightly all the time.
So it might be a good time to just get a Forster trimmer. I picked up the
angle plate today, so depending on how the day goes perhaps chips tomorrow or
thurs... or perhaps more bow hunting
Any last minute pointers? I've got a 7/8" four flute and a couple 1" 6-flute
endmills.
Here's what happens when I hurry. Forgot the indexer is 24 positions an not
32, so it only has 6 flats. Good thing is it's early enough that all of that
sill still come off, so just consider it a test of the setup.
I like it just the way it is!
Maybe a bit more until the flats at 6- 8" longer!
Damn, Mike. I sort of like that look also. It would look really good on a
modern bolt action maybe in stainless. I wonder how the weight reduction is
compared to fluted?
Hmmm tapered flutes would look interesting also.
I really hope this comes out well.
Take your time keep the heat down. Be wide awake and rested when you get close
to the end LOL.
I'm loving this build. Wish you lived closer so I could watch this happen.
This might be a dumb question, but would tapering turning the barrel first
save some time or buying a pre tapered barrel that's heavy and then octagoning
it?
I'm staring at the picture an it took me a minute to realize what end was the
muzzle.
Just asking, not even suggesting.
I assume you have a power feed? (I hope so)
If you get it to where the muzzle just starts to connect in an octagon and
then stop it will look kick ass!
Think how it would look if you took a heavy tapered barrel an then cut flats
at a sharper angle so they almost touched at the muzzle an then got wider
toward the rear an then blended into a round near the receiver.
I don't want to hijack this thread but it's giving me some ideas. With flats
or flutes.
It's getting an octagon barrel. I'll let you guys figure out the half round
barrels. Likely it would of saved some time to turn a bit off in the lathe,
but this isn't bad listening to the radio watching the power feed move the
barrel along. Got it down to 1.070" at the muzzle. It's going to take a lot of
time to get it down to .760".
Many, many chips later it is down to .910" at the muzzle. Another . 075" needs
to come off each flat before it's done. The table was clean when I turned it
on today, and there was a soda can worth of chips I took off the table about
half way though.
Holescreek:
The pic makes it look better than it really is. RPM set at 295, 2.65" per
minute, and .015" depth of cut with a 7/8" 4-flute HSS Cleveland or Morse
endmill. I figure for taking the material off that's fine, as it sounds happy
to chug along making chips. Once I get a little close to final size I was
thinking of trying the 1" 6-flute endmills to see if it gives a better finish.
I tried using a couple end mill calculators, but they made no sense to me as I
didn't know what all the values were. So, I just went by feel/sound and what
seemed ok.
Have you tried it at .05" DOC or is it chattering? I've found that multiple
light cuts just dulls the edges faster for me.
I figured I'd get the business questions out of the way before Bob turns this
into just another prepper thread.
I'll try a little deeper, and perhaps slower feed and rpm. So far only about a
3/4" section of the endmill toward the bottom has been cutting. If it starts
acting dull I can always lower it to an unused area. Here's another question,
do more lighter cuts induce less stress in a part or fewer heavy ones? What
would you use for speeds and feeds on the 1" 6-flute since you have a similar
drill/mill? Never used a 6-flute and mostly just use 2-flute since they're
easy to sharpen.
I don't use my RF30 for any serious work, only light CNC stuff. You should be
able to leave the speed alone, maybe drop the feed to 2 IPM for a test. If
you're comfortable doing it the way it's already been working for you then
don't change now!
You aren't so much inducing stress by cutting, rather you're releasing it. The
trick is to figure out if it's moving at all and by how much so you can leave
enough stock for those .015" passes at the end to clean it up evenly all the
way around. If the setup would have allowed, I might have started with taking
.05" DOC and ended with the .015" passes to clean up any chatter. As with any
new setup it takes some time to figure out what you can get away with. I
usually figure out what my limits are when it's almost time to leave for work
and I'm part way through a cut and really push it to get it done.
With it set like it was I did try speeding up and slowing down the power feed
until it sounded the smoothest. I might have some time this weekend to finish
it up, or it may have to wait until Monday. Guess I'll need to figure out what
kind of dovetail cutter I'll need at some point so it has a front sight.
Got it down to where the idea was, 1" at the back and 3/4" at the front.
Thanks for the tips Holescreek, at 2" per minute and .050" feed it sounded and
cut smoother. I finished up with the 6 flute and it left a slightly smoother
finish. It will still need draw filed and sanded though. Now I'm thinking
.950"-.960" at the back and .740"-.730" at the front. My 444 Marlin is
.910"/.710" on a 22" round barrel.
Thanks guys, I should of weighed the barrel before so I know how much weight
was removed. The table has been cleaned of chips three times now.
Holescreek, Yes, just barely and likely it was too long as the gibs were
exposed at either end of the cut. If it were a 22" barrel don't think it would
of worked as I'm sure I would of run out of screw length. Still might take it
down a little more... Who's got decent HSS dovetail cutters reasonably priced?
Any of them that say "gunsmithing" seem to add $50 to the price.
I usually buy mine off eBay but have bought from Enco as well. Gotta watch the
angles though, gun stuff tends to be odd angles. If you hit a wall on
something unusual I can try to make a single flute cutter from a carbide blank
on my Deckel SO grinder. I used to know how to do it but its been a long time.
gunbum:
Thanks, I keep forgetting about them. I've been pretty happy with everything
from Shars except a set of indexable endmills, and my machine just isn't
ridgid enough for them so it's not really their fault.
For the front sight, will regular low temp solder be enough to hold it on? I
was thinking about using a flat bottom NECG base
http://www.newenglandcustomgun.com/Gun_Services/item_info.asp?Brand_id=4238&ST=Basic
Front Ramp - Flat#.Vie2DWrD-M- and then rust blue the barrel.
That's a good looking front base. I would use Brownell's Hi Force 44.
http://www.brownells.com/search/index.htm?k=hi+force+44&ksubmit=y
Melts at a really low temp and is supposed to be hot blue safe.
Thanks Rick. I spent the day watching YouTube videos on how to solder front
sights on and what setups they were using. High Force 44 came up several
times. Looks like I'll need to call Brownells and order some, a carding brush
and some rust blue.
For $20 I figured it wasn't worth it to buy a dovetail cutter and make one.
I'll have to call NECG and make sure I order the correct sight. The old one
was roughly .906" above centerline. I was wanting to go a little higher so the
rear sight could be raised a bit since the stock is meant for a scope and I
have to press my cheek pretty hard onto the comb to use the sights. Figure
1/8"-1/4" should do it... Or I could just scope it...
I went ahead and took the barrel down to .965" ahead of the tulip and .750" at
the muzzle. Looks the same and probably didn't make a bit of difference in the
weight, but I'll have a little less wood to remove. The riser block jig makes
a fine draw filing jig as well I made a few passes on each flat with a brand
spanking new Nicholson file that made lots of fine steel wool come off of the
barrel. Then I figured the rest should be done in the daylight. Here's a
before and after as well as a pic of the awesome pitted Italian Carcano barrel
someone altered to fit the Mauser. Must of lost a bet or something.
About 30 years ago I built a .50 T/C Hawken kit. I draw filed the barrel and
worked through finer grades of sandpaper to crocus cloth (under the file)
until the flats were reflective before having it hot blued. Nothing beats a
shiny hex barrel.
Rick Leslie:
I've been looking over your WTH build and thinking of just making a similar
front sight, so I haven't ordered that one yet. I've got basically 3 weeks
till deer season to get er done.
For the stock, likely I'll be getting a blank after deer season as the barrel
will leave the thinned area of the handguard too thin for my taste. I've found
one guy making 96% inletted ones reasonably.
My good friend and mentor (and much better machinist than I'll ever be) made a
site base for his Ruger as well. Although, he greatly improved on it. Here's a
few pics of his work.
That looks great! I ordered a 3/8" dovetail cutter (might still have to make a
blade) the solder/flux and a rust bluing supplies. I'm leaning towards having
the edges of the sight base roll over the edge of the flats to sort of help
lock it down a little more. The hooded front sight on my hawken is made that
way. I noticed that somewhere along the way it was hit hard enough to oval out
the hood and it never shifted where it hits. That sight is held on with a
single screw in a dovetail block.
Got the barrel polished out to 800 grit, the sharp edge at the muzzle broken
and crowned. The rust blue supplies and solder/flux came today so I suppose
it's time to start on the sight.
The ss carding brush takes the shine off of it so it will end up sort of a
satin finish. I ran it through the carding wheel once, then polished it up
again to see if it brought out any scratches as the instructions said. Sure
enough it did, so polished them out. There's still some minor scratches in it,
but I'm done sanding
You will find out that a shiny finish offers zero advantage when rust bluing
or browning, as a matter of fact I would suggest bead blasting it.
Try it on a scrap piece of metal, test both polished and blasted and see for
yourself what works best.
It won't end up shiny once the carding brush hits it. If you think it will
work better I'll hit it with the brush once more before putting the first coat
on. The instructions on it say to sand out to at least a 320 grit.
320 to remove scratches I can understand, I thought you were polishing
it...
The rougher it is the easier it "rusts".
I don't know why this crossed my mind today but relative to rust blueing, why
wouldn't you want the barrel already permanently attached to the receiver
before you started the process?
Still debating on bluing the receiver or not. The barrel was headspaced on the
receiver and a flat was partially machined for a reference point to machine
the other flats along with a witness mark. How hard is it gong to be to card
all the inside surfaces of the receiver?
I don't really know what carding is, I've never rust blued. I just know if I
was doing it I'd probably screw up the finish putting it back together.
It's brushing off the loose rust basically. I hope to cheat and got a carding
wheel which is like a big wire wheel only the brushes are .005" or so soft ss
bristles. Being a guy I touched the brush while it was spinning and unless it
grabbed you it would take a while to do any damage. Here's a video by Larry
that shows the process... Find it odd though that he's using a bluing product
that he doesn't sell.
https://youtu.be/vuP4m6L95K4
You may get away with putting it back together without damaging the finish
because is an octagon barrel, if it was round I would have definitely finish
it assembled...
You don't need to rust blue the insides you want them polished.
I would have waited to headspace after assembly.
Quote:
Mike even if is a few thou loose or tight after he gets it back to the mark he
had it at a second time its not a big deal. It's just a simple matter of
adjusting the brass length to the chamber. As long as he doesn't go over
1.800" its all good.
He has made gauges already so it would be nice if it all went according to
plan.
Now if this was standard round or a round that head spaced off the shoulder it
might matter.
Personaly I'd blue it all at once. If there is a way to not blue the inside
then don't if its OK now. I have never rust blued anything either.
I can't wait to hear you say it goes bang.
I lucked out setting the headspace off of the rifle using a depth micrometer
and go-gauge setting it for receiver ring to bolt face accounting for .005"
crush. With the barrel installed it would close on the go, and just start to
turn with the no-go. So back on the lathe and took off .002" off of the barrel
shoulder and chamber face. Closes up on go with just a hint of resistance, and
doesn't remotely close on the no-go. If I lose a thousandth or two I'll still
be good.
To torque the barrel back on my old steel plate/hardwood block with the barrel
wrapped in duct tape should work fine. Holds an AR15 barrel to 125ft-lbs just
fine. Should work on an octagon barrel even better. Not enough tape used in
these threads. After getting the barrel basically sanded it was wrapped in
blue painter's tape before being stuck through the headstock to crown it. Then
the area where the chuck would touch it was uncovered and wrapped in Pepsi can
aluminum and held in place with more tape! Left no marks on the barrel other
than a spiral where the tape overlapped that cleaned up with mineral spirits.
Decided just to make a front site to keep costs down. Cut a chunk of scrap
1/2" plate down to 1/2"x3/4"x3" and squared it up. I want the front sight
hooded like my hawken is so there is a 1" length of 1/2" tube that has a
crappy knurl job on it. The base of the ramp is just under .480" wide and the
top flat is around .320" wide so the edges wrap around the top flat a little
bit. Hopefully that'll give me a little more holding power. I'm still debating
on using a threaded bead or just a pin with a bead on it and retaining it with
either a set screw or pin. Tomorrow if there is time I'll run a 3/8" ball mill
down both sides to radius the sides and flute the area between the base and
hood. Then lots of filing, sanding and abrasive blasting the hood and ramp
incline.
I'm basically copying the sight on my CVA Hawken. It's a replacement because
I kept breaking off the brass bead on their blade sites every couple of years.
I've had this one on for close to 20 years and other than the hood is no
longer round it works fine. When the brass bead gets tarnished I push a pencil
eraser over it and spin it a few times. Polishes it right up. The quick and
dirty version of this one might just be a piece of brass rod with a turned
ball at the end and held in place with a crosspin.
Got it roughed out. Needs lots of sanding to remove the machine marks and
smooth it out. I kind of like the sight pushed all the way up, but normally
they're back away from the front sight.
It looks to far back in the bottom picture. how does it look when about a
1/8" back?
The site looks good.
Holescreek:
I used the measurement from centerline of the old barrel to top of the sight
blade, then made this one the same based off of the center of the hood to the
center of the barrel. If anything is off, it can always be remade and I'll be
out only a little bit of time. The rear is adjustable for windage and
elevation.
Man that looks good!
Sorry if you've already covered this, but how is the barrel (hood) held on?
Are you planning a post or blade?
I'm hoping to just solder the hood on at the same time as the ramp. If that
doesn't work, then solder on the base and use a screw in post to retain the
hood like the Hawken sight does. If the solder does hold, then just drill down
through the hood and insert a post into the base.
You can always hard solder the hood to the base, then soft solder the base to
the barrel.
Another solder question. I'm thinking about putting a sling swivel on the
bottom flat of the barrel. Is a .355"x 2" pad going to be enough to hold the
rifle or should I wrap it around the edge like the front sight?
I have never done any soldering but I have seen many custom Mausers with a
similar sized sling swivel soldered on...
Good, I thought so, but I've also seen them held on with screws. I'll mill one
out tomorrow with the E.E.Garvin mill from the late 1880's if all goes
well.
It won't be a problem. I have silver soldered stuff back together with more
strain on it with much less surface area. One of the springs in the driver's
seat of my Toyota was fixed with silver solder at least 8 years ago and its
held up fine to my not exactly skinny self ever since.
I want to keep my options open for a possible restock down the road, so no
screws.
Started on the swivel base. Got the Garvin put back together and started
making chips. If all goes well it'll get soldered on tomorrow.
Yep, it's down to the wire. Got the front sight soldered on. Not the prettiest
job, but functional. Smacked it several times with a hammer handle and the
hood popped off, but the base was good so a little more flux and solder and
the hood held up to the hammer handle test. Going to see if there is time
tonight to get the swivel base soldered on too after the kids' school
concert.
A little closer. The simple sling swivel base was mostly formed on a 1880's
E.E. Garvin horizontal mill. I'll likely take care of the stock next.
Stock mostly inletted but it needs to sink down a little more in the front.
Looks worse than it is because the top front edge tapers down a little so it
looks like the front needs to come down 1/8" when it is more like 1/16". Not
too bad but I cheated and used the mill to cut the sides and bottom. Should be
able to finish that up tomorrow and drill the front sight for a post. Then
it'll need some ammo, the rear sight put back on and eventually a mag spring
and follower. Headspace is still right where it was.
Still lots to do on it, but I feel confident that it can be finished up and
sighted in before the 15th... Probably will wait to rust blue it until after
season unless it can be done in 2-3 days. I've been looking at loads that push
a 265gr flex tip to 2000-2100fps and are lower pressure 38K-42k.
page 8
Just so when I bust the bead off on some brush, the brass front sight post is
.540" tall total. There, now I can make a second one or at least have the
length written down. I was also looking at small dremel ball hones and thought
they'd make a easy front sight post, just cut to length, drop in and tighten
the set screw.
I'm thrilled it worked out as planned.
I feel like a proud baby's daddy.
Yeah it kicks/ I designed the round for men to kill deer with. Not chase them
around in the dark looking for them after there shot. Hell just the
concussion should knock them over if you miss. This is a big game round if
loaded to higher pressures.
Maybe a recoil pad is in order? I figured on a brake when it was dreamed up for
an AK.
Scares me a little the think what a 65,000 PSI 2" version will feel like.
I really hope you get a buck to walk in front of it. This would be icing on
the cake.
I'd like to officially call the round the 44 BGM. You have done more than any
one to make it happen. Your name has (I insist) to be included in its name and
you deserve a ton of credit. The rifle is beautiful I'd love to have it.
As you suggested I'll call the longer version the 444 BG as it was my original
idea.
It should be noted to all that a guy who went by the name Gunter on Gunco was
the one who suggested I take the longer version and shrink it for a standard
AK magwell. We did a lot of work figuring years back figuring out a easy way
to make it. I feel it's fitting he got some credit. I wish I knew were he went
he would be very welcome here. Gunter did not like his ideas out on the net.
So if it's OK I'd like it to be a 44 BGM short for 44 Biggun, Gunter, Moleman.
I'll just call it a 44 Bobs Giant Magnum around my friends who are not on the
net LOL.
It also could be slang for 44 Biggun Michigan.
I truly think the round might have a commercial value in states that have the
same laws. I think a 44 BGM Handi Rifle would sell well in your state. Too bad
NEF is not making them and 44 mag barrels can't be obtained. :(
I think a Savage barrel in this caliber might sell in MI possibly. A .223
action with a .470 bolt head would be pretty inexpensive.
I also wonder if it will work in some lever actions that use the .470 bolt
like the Savage 99 in 300 Savage possibly as well as other bolt actions.
This round is way better than a 44 mag for deer.
So know you need a AK barrel and bolt action with a scope to see what it's
capable of. Back to the shop there is work to be done LOL.
I really like this build. Even if it was not a 44 BGM I would still like that
rifle.
After deer season we should do a thread just on the round were all the exact
details are shown on making it an possibly a reamer print.
Things like what expander, dies and inside reaming is needed. An order of the
simple steps it takes to get usable brass, all the ballistics from software
you generated, available bullet selection.
I want to see also how thick the necks would be of 7mm mauser brass cut just
forward of the rearward shoulder junction would be.
I also look forward when you get time to see how other bullets work out.
I had several people come over today at the range to ask what we were shooting
The range officer even came and stood behind me to watch me shoot giggling
saying that it looks like it kicks. Hunting though you'll never notice the
kick. If I do a lot more bench shooting with it I may look into getting a slip
on recoil pad or replacing the plastic one.
Moleman
Stock shape has a big effect on how the recoil feels too. My .416 RemMag hurts
my lower back off the bench, but because of the stock shape, it pulls away
from my face when shooting offhand. I can shoot it all day offhand.
In an attempt to finish a working magazine I made a follower and spring today.
The mill tried to eat the follower so I didn't finish it very nicely. I'll
likely make another one without the beaver chew marks, but for now this one
works! Used my high tech spring winder with at first 5/16" bolts to wind the
spring around (too big) and then 1/4" rods (good). Just wound it flat then
stretched it out to look like a spring. Then bake at 500 degrees for an hour.
Works good although because of the shape the gun only holds 4 rounds now.
Still working on this one. After hunting with it this year and seeing how bad
my eyes are getting, seeing the sights, it will end up with some sort of scope
on it. I sent the straight handled bolt body to (oddly enough) my wife's old t-
ball coach who is a retired tool and die maker. He is going to TIG weld on a
checkered bolt handle and jewel it. I'm leaning towards a Wisner type safety
and a old steel Weaver scope.
Moleman
June 27, 2015
1BIGGUN
June 27, 2015
308 Winchester Copper Solid Tip 150 2648 2593
Moleman
June 27, 2015
supbrah
June 27, 2015
Moleman
June 27, 2015
supbrah
June 27, 2015
mike928
June 27, 2015
Moleman
July 03, 2015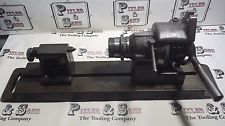
Holescreek
July 03, 2015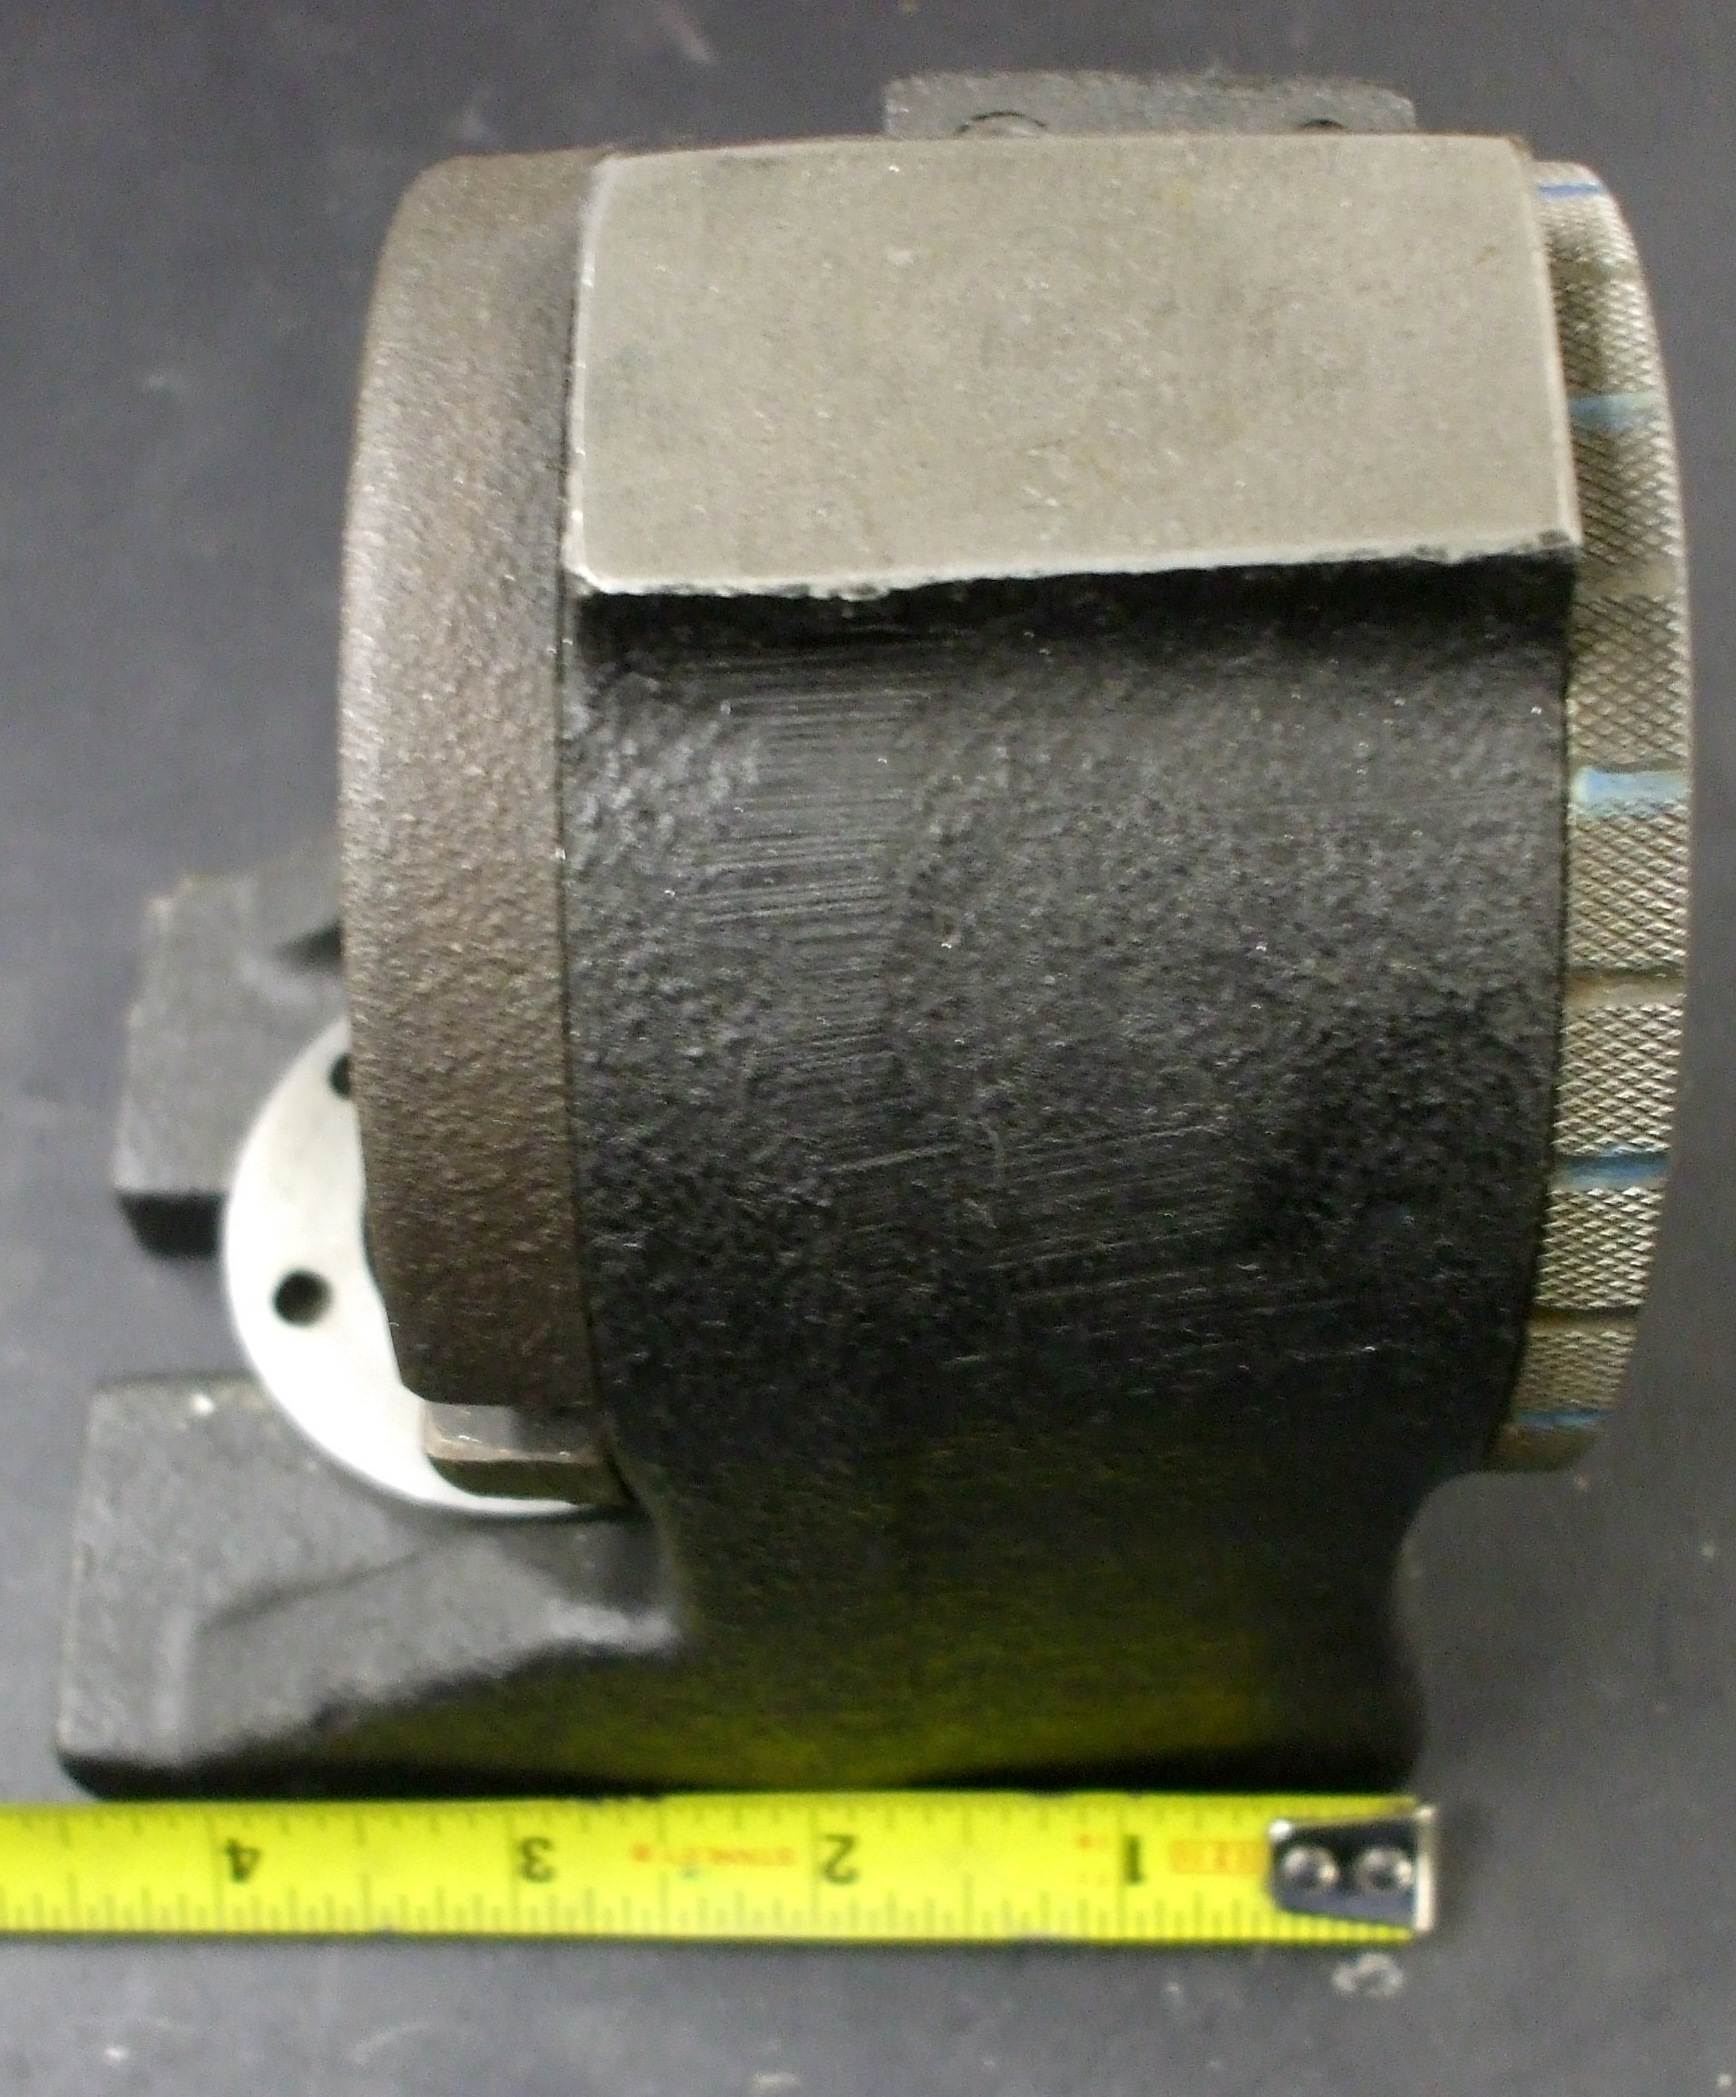
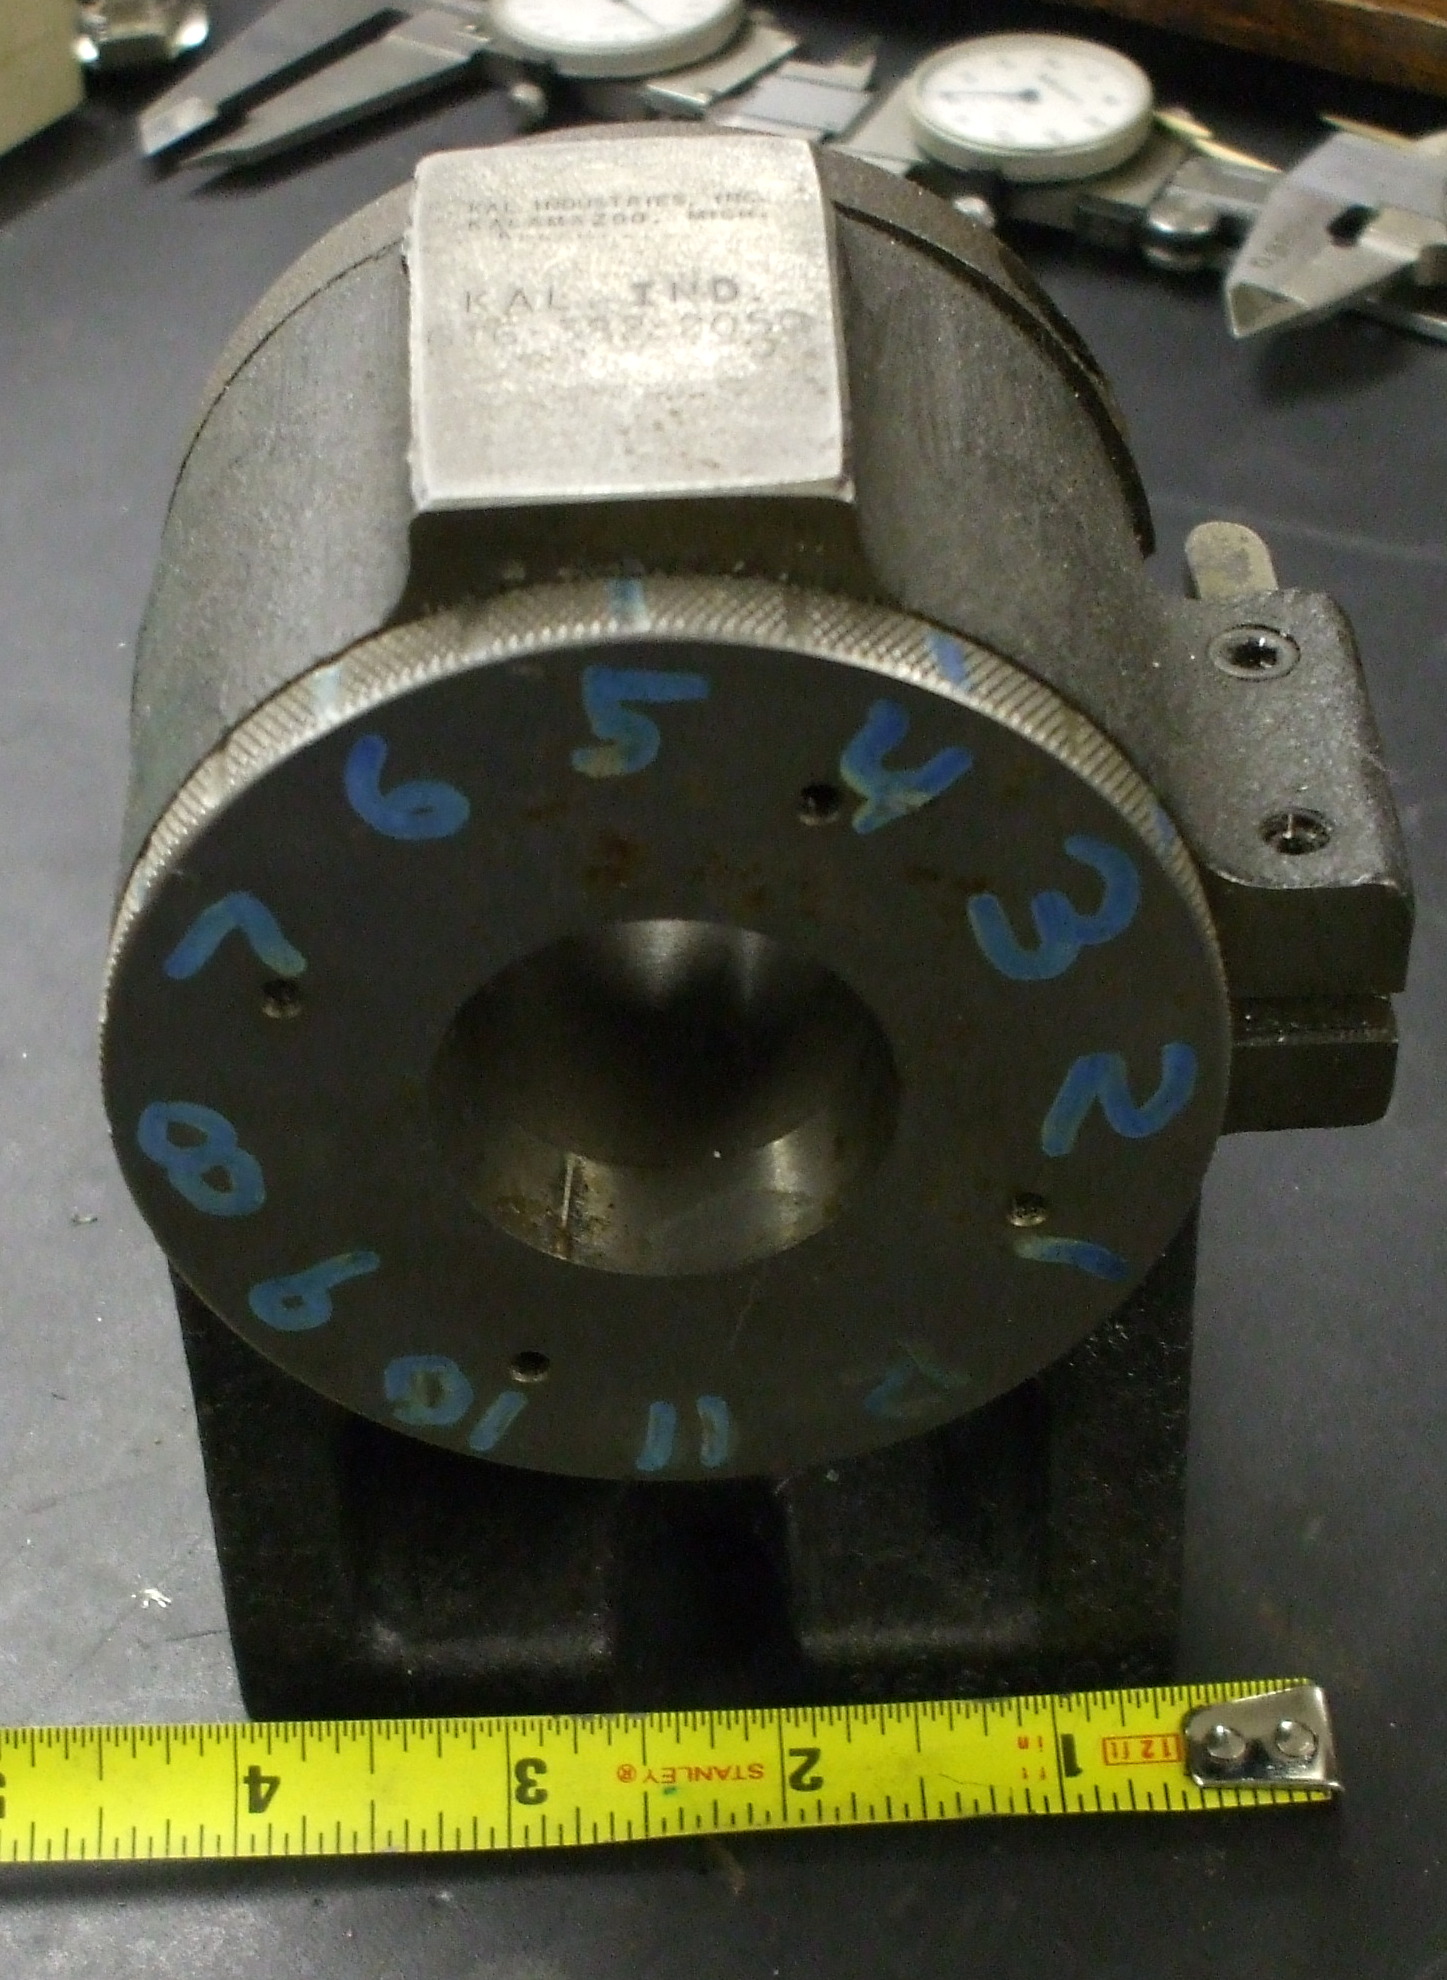


mike928
July 03, 2015
Moleman
July 03, 2015
Moleman
July 03, 2015
http://forums.nitroexpress.com/showflat.php?Cat=0&Number=210905&page=0&fpart=all&vc=1
1BIGGUN
July 03, 2015
Holescreek
July 03, 2015
How is holding that in a plate help with the travel limitation?
Rick Leslie
July 04, 2015
Moleman
July 04, 2015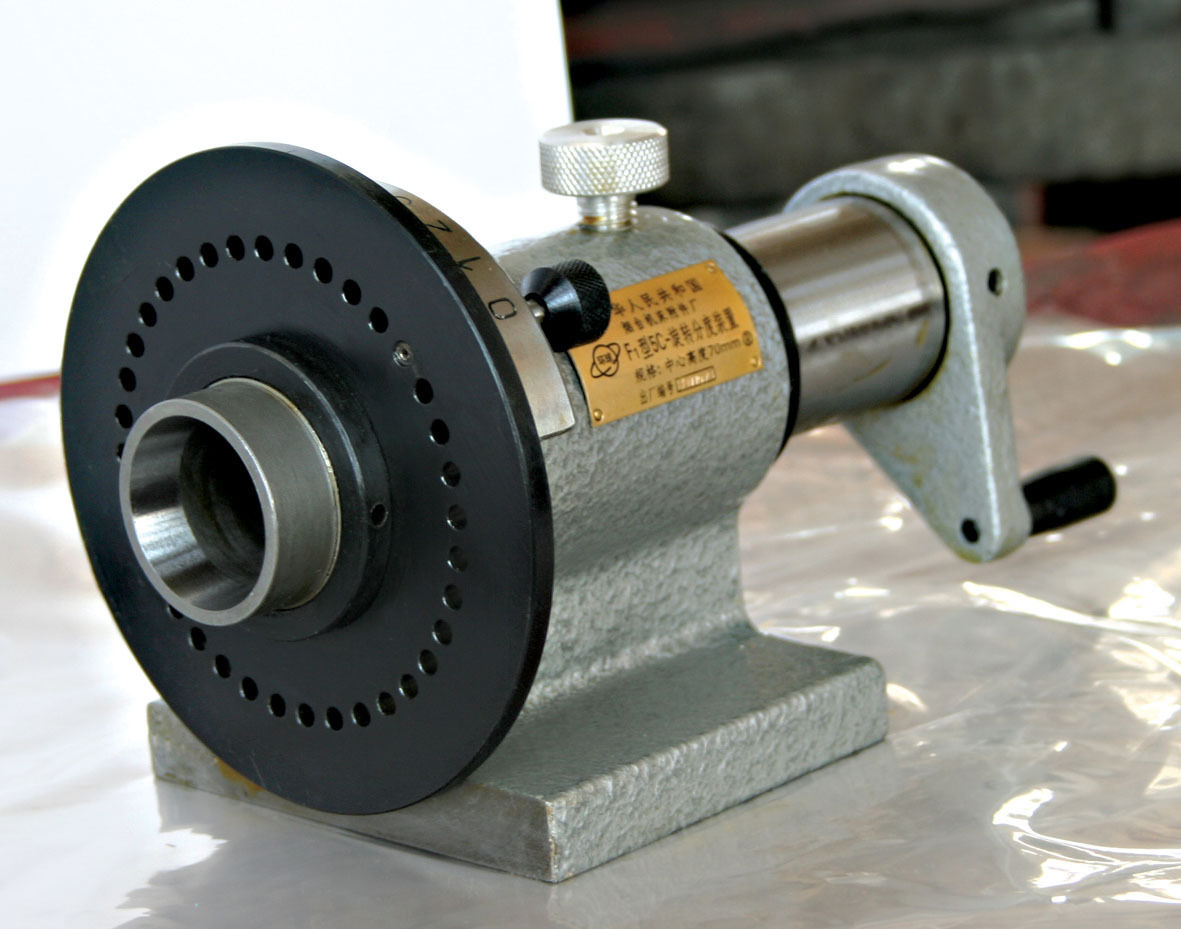
Holescreek
July 06, 2015
1BIGGUN
July 06, 2015
Moleman
July 06, 2015
mike928
July 06, 2015
Holescreek
July 06, 2015
You didn't like the dowel pin idea? You just want to buy a new tool!
1BIGGUN
July 06, 2015
Moleman
July 07, 2015
Holescreek
July 07, 2015
DAllen
July 07, 2015
Moleman
July 20, 2015
Holescreek
July 20, 2015
Would an emergency collet that was threaded with sr threads be better than
a collet on threads as far as holding goes?
Moleman
July 20, 2015
1BIGGUN
July 20, 2015
Holescreek
July 20, 2015
DAllen
July 20, 2015
Holescreek
July 20, 2015
Moleman
July 20, 2015
Holescreek
July 21, 2015
Moleman
July 21, 2015
Holescreek
July 21, 2015
Moleman
July 21, 2015
Holescreek
July 21, 2015
Moleman
July 23, 2015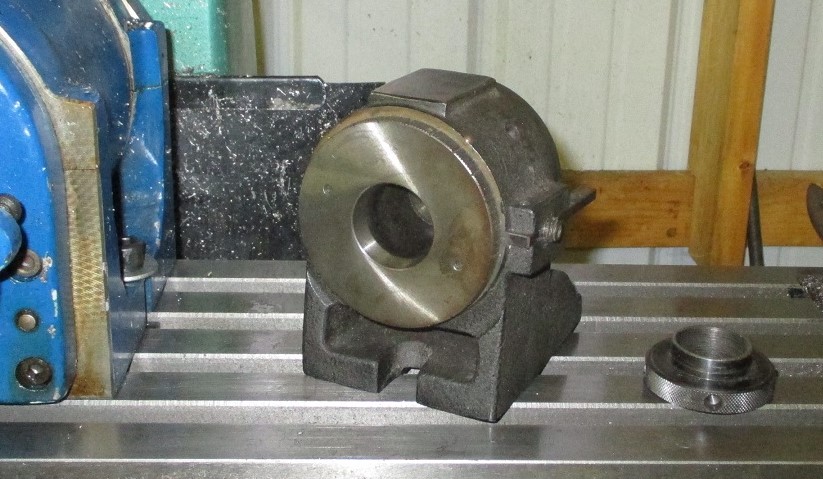
Holescreek
July 23, 2015
Moleman
July 23, 2015
Holescreek
July 23, 2015
Holescreek
July 23, 2015
Moleman
July 23, 2015
Rick Leslie
July 25, 2015
Moleman
July 25, 2015
Moleman
July 27, 2015

Boltlug
August 06, 2015
1BIGGUN
August 06, 2015
Boltlug
August 07, 2015
1BIGGUN
August 07, 2015
Moleman
August 14, 2015
Moleman
August 22, 2015
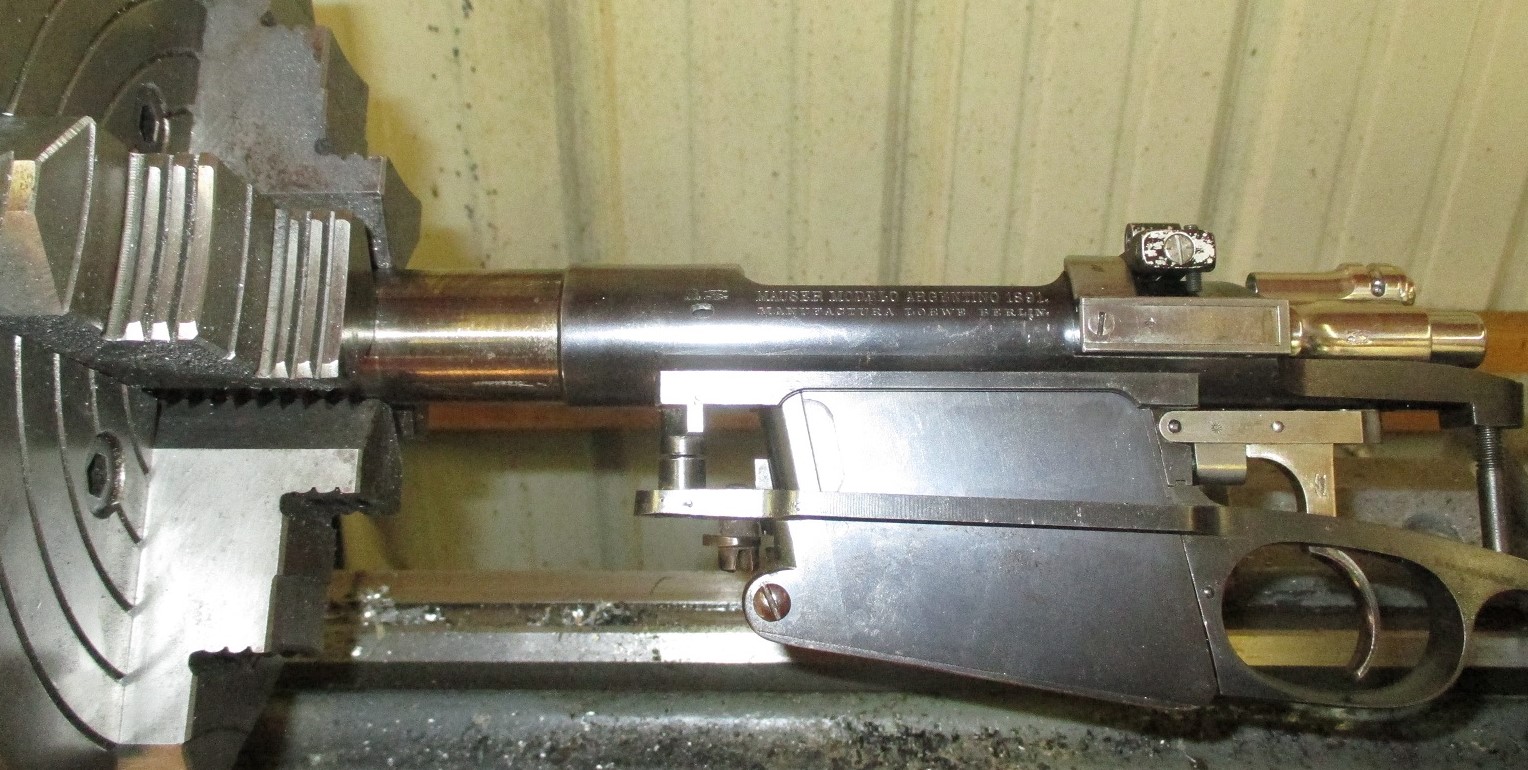
1BIGGUN
August 22, 2015
Moleman
August 22, 2015
Moleman
August 22, 2015
1BIGGUN
August 23, 2015
Moleman
August 23, 2015
1BIGGUN
August 23, 2015
Moleman
August 23, 2015

1BIGGUN
August 28, 2015
Moleman
August 28, 2015
1BIGGUN
August 28, 2015
Moleman
August 28, 2015


Started on reamer #2 today. It's ready for fluting. We'll have to see if I can
get this one done now that my sons rifle is ready.
Got it fluted today. Took me forever to get it squared up for some reason.
Hopefully I can get it hardened, sharpened and tested out tomorrow. Bob,
should be able to cut a chamber deeper than a 444 Marlin if you want. The
reamer tapers from .456" at the case mouth area to .471" at 1.8", then stays
the same diameter from there to the end of the flutes.

1BIGGUN
October 08, 2015
Moleman
October 08, 2015
1BIGGUN
October 09, 2015
The case reamer has a taper to it, so I think I just didn't ream it deep
enough is all.
Moleman
October 09, 2015
1BIGGUN
October 09, 2015
...
they have a 405 grain bullet on the bottom.
RW
October 09, 2015
Moleman
October 09, 2015
Moleman
October 10, 2015
1BIGGUN
October 10, 2015
Moleman
October 10, 2015
1BIGGUN
October 10, 2015
Moleman
October 10, 2015
1BIGGUN
October 11, 2015
2. Expand straight with a mandrel so cases don't have a initial hourglass
shape.
3. Full length size in a 444 Marlin die
4. Inside ream with a Forster set up or in a trim and ream die with
reamer.
*** neck of case should be straight not tapered when doing this. Might
require a neck die or some other step.
5. Trim to exact length for precise head spacing.
6. Deburr the case mouth an clean primer pockets
7. if needed expand the case mouth for bullet seating like a pistol round
8. prime
9. add powder charge
10. seat bullet and crimp if needed.
1BIGGUN
October 11, 2015
Moleman
October 11, 2015
1BIGGUN
October 11, 2015
Moleman
October 12, 2015

1BIGGUN
October 13, 2015
Moleman
October 14, 2015
Moleman
October 14, 2015

mike928
October 15, 2015
1BIGGUN
October 15, 2015
1BIGGUN
October 15, 2015
mike928
October 15, 2015
1BIGGUN
October 15, 2015
Moleman
October 15, 2015

The side cutting is looking really good. What RPM's are you running?
Holescreek
October 16, 2015
Moleman
October 16, 2015
Holescreek
October 16, 2015
Moleman
October 16, 2015
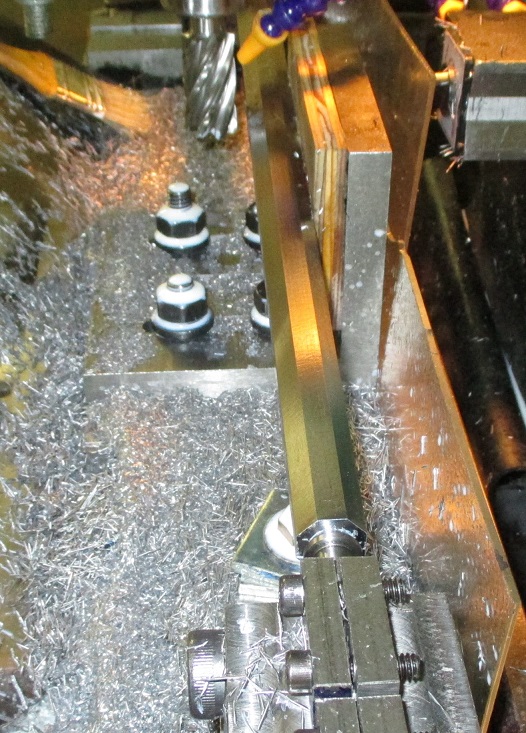
Holescreek
October 18, 2015
Moleman
October 18, 2015
Shars has inexpensive dovetail cutters.
Rick Leslie
October 21, 2015
Moleman
October 21, 2015, 10:32:49 PM »
Holescreek
October 21, 2015
Moleman
October 22, 2015
I would use Brownell's Hi Force 44.
Rick Leslie
October 24, 2015
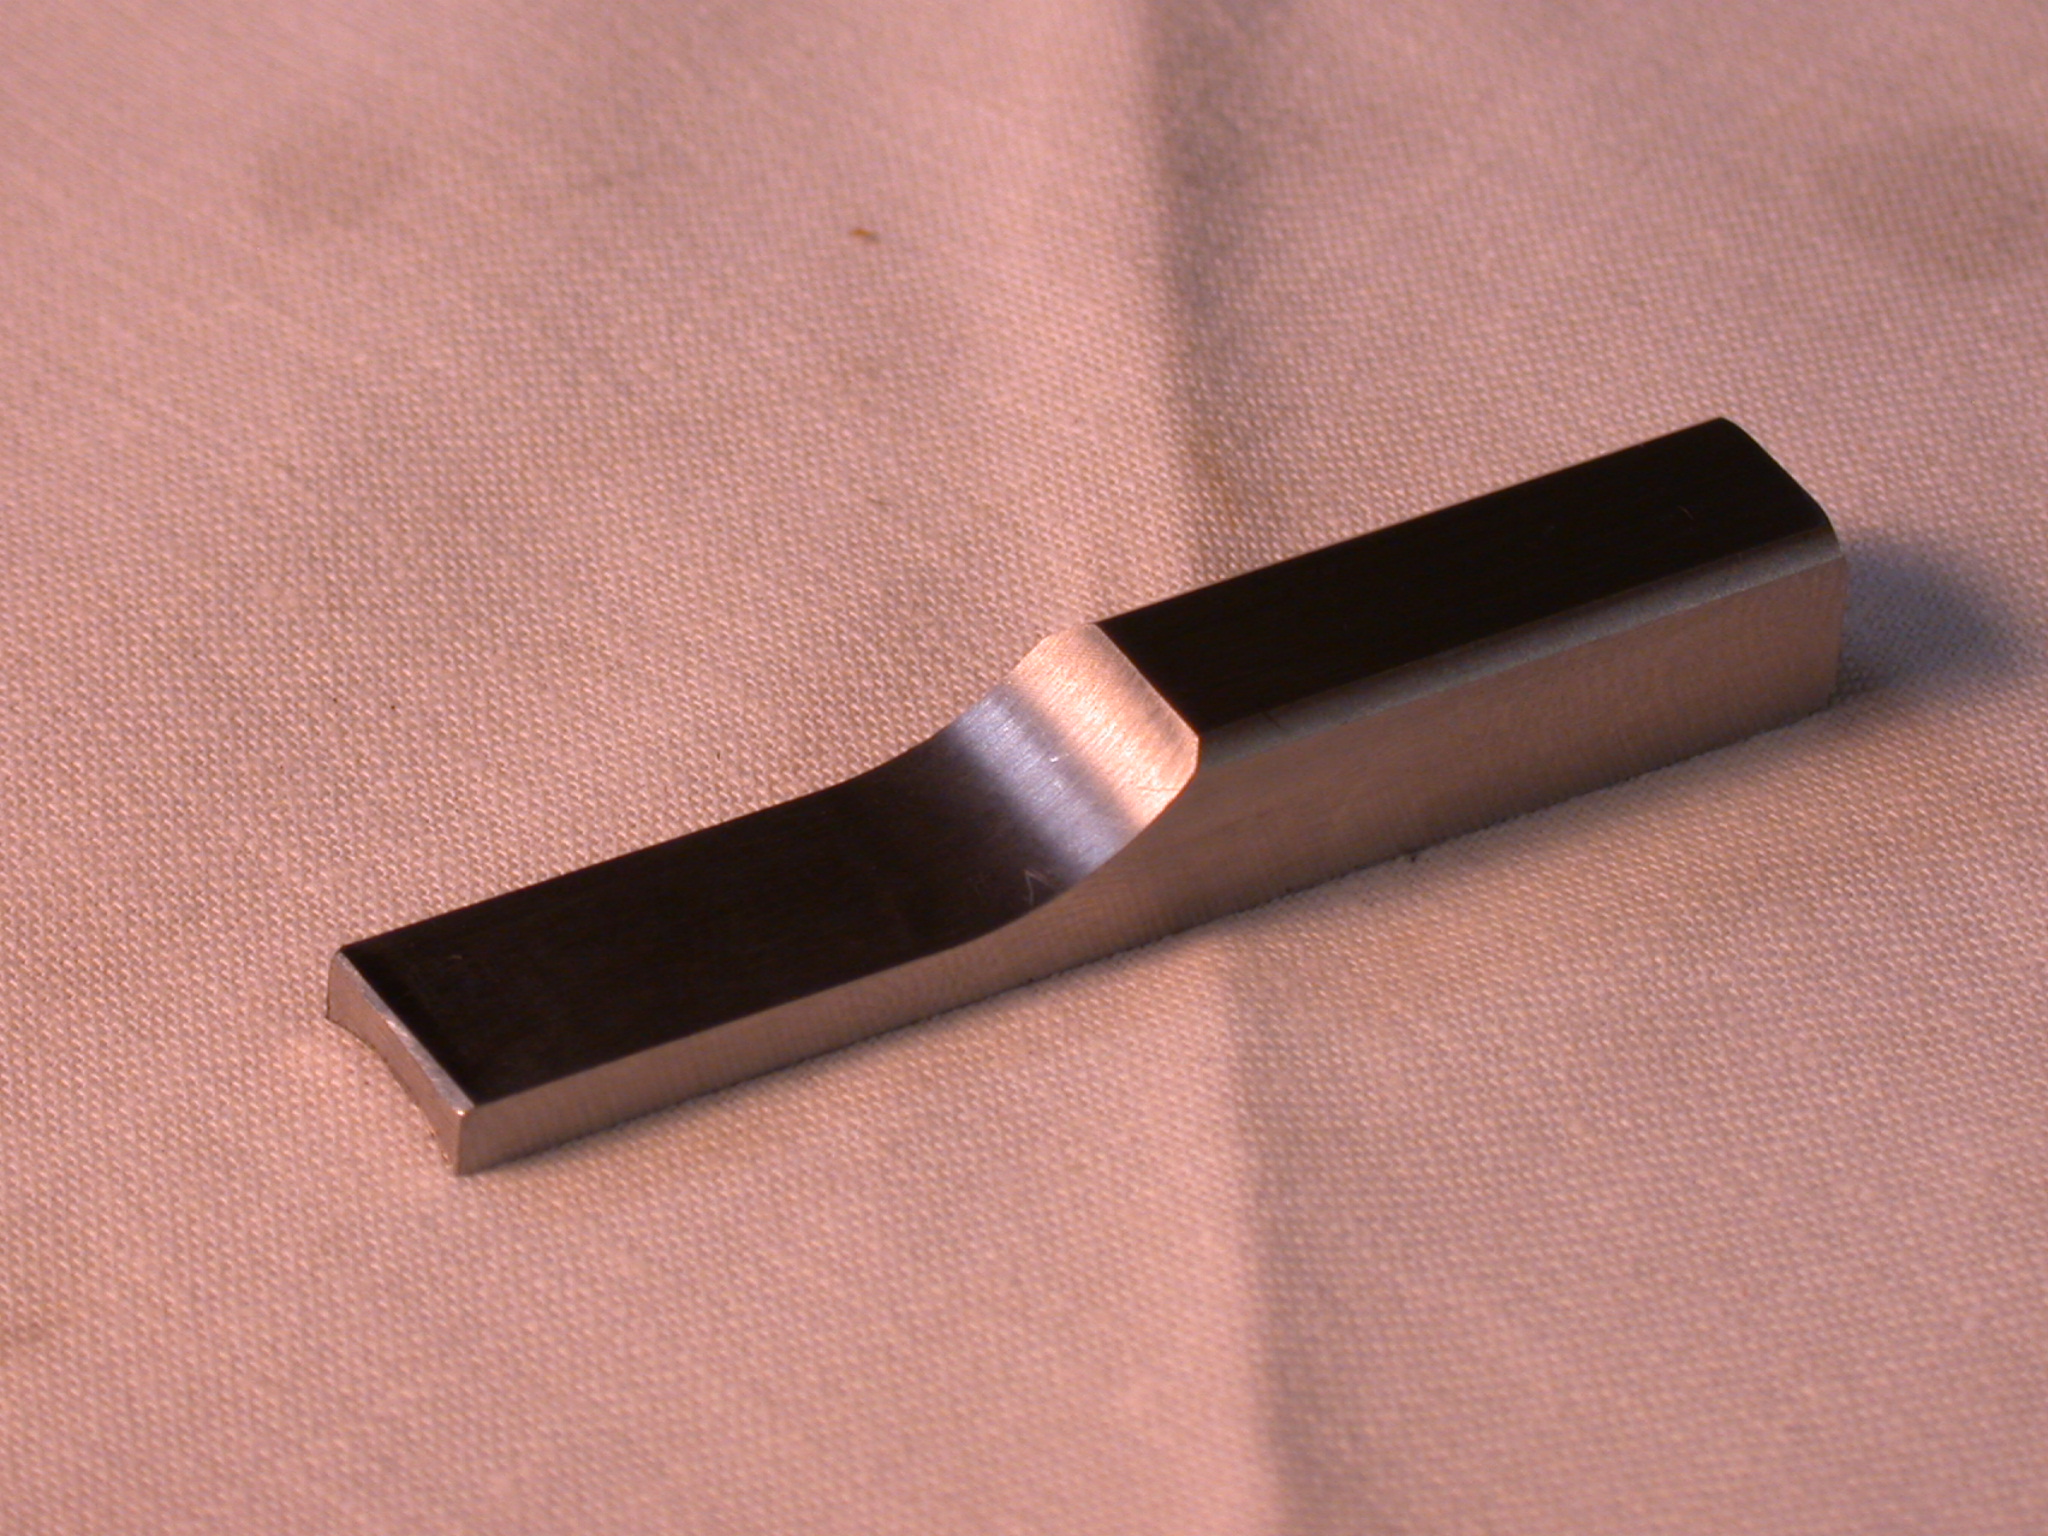
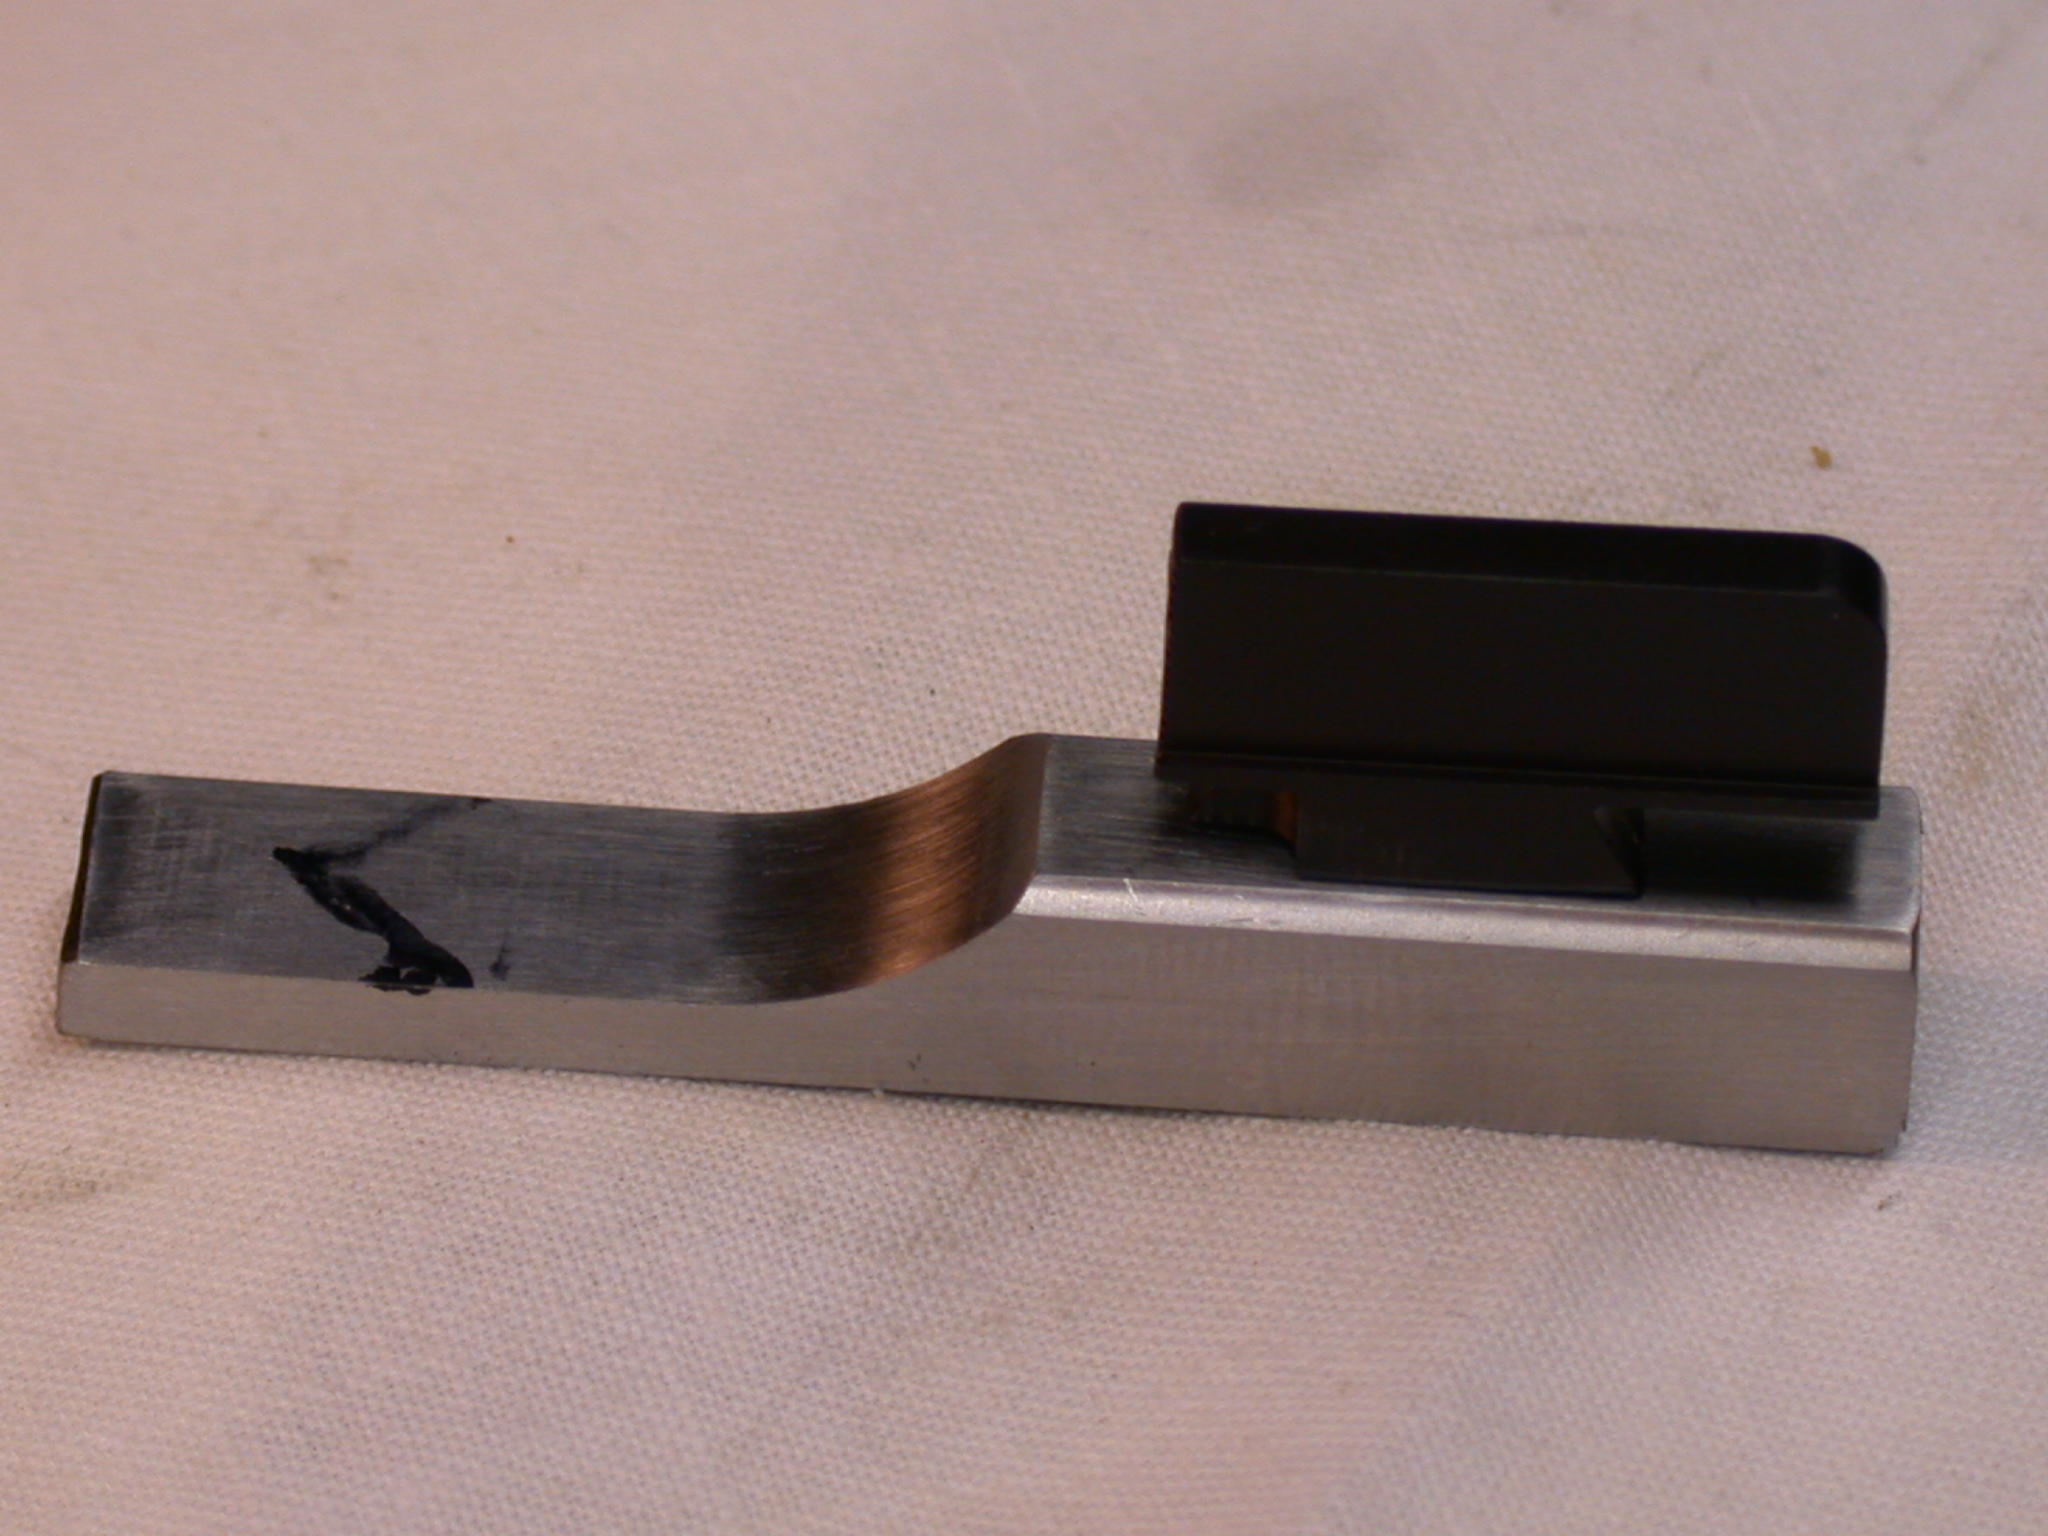
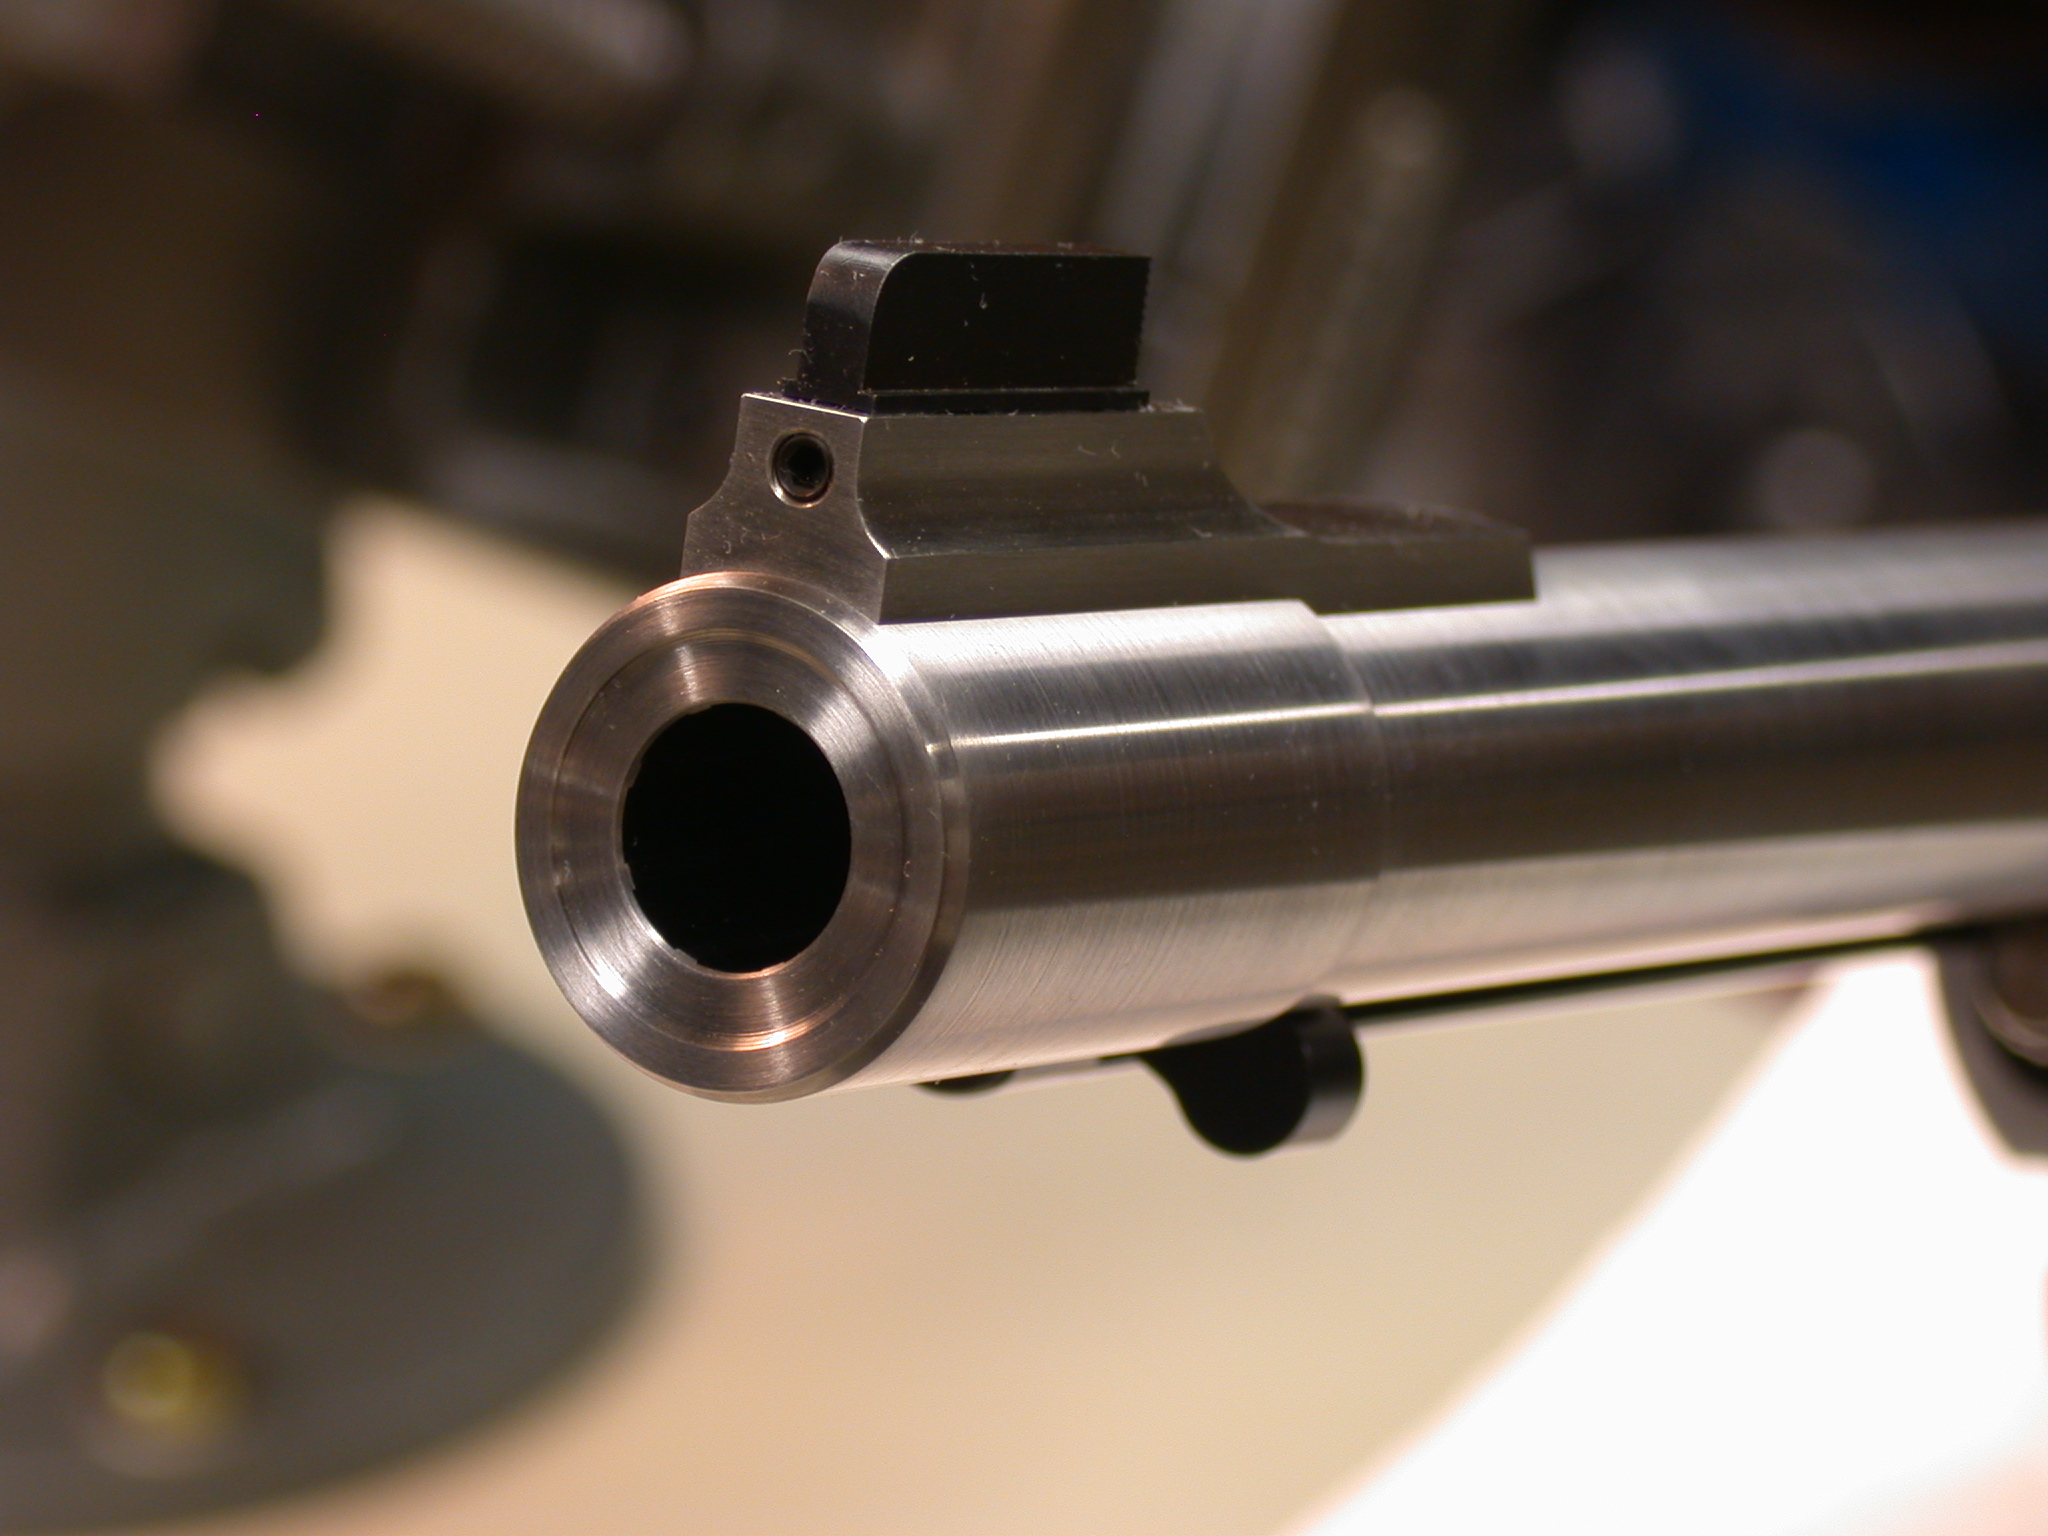

Moleman
October 24, 2015
mike928
October 28, 2015
Moleman
October 29, 2015
mike928
October 29, 2015
Holescreek
October 29, 2015
Moleman
October 29, 2015
Holescreek
October 29, 2015
Moleman
October 29, 2015
mike928
October 29, 2015
1BIGGUN
October 29, 2015
I would have waited to headspace after assembly.
Moleman
October 29, 2015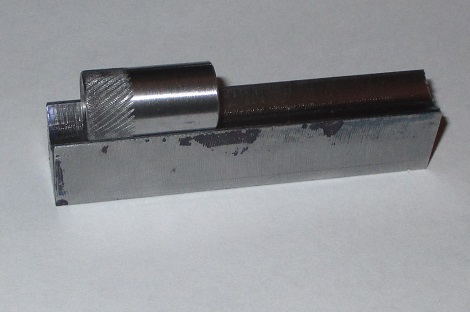


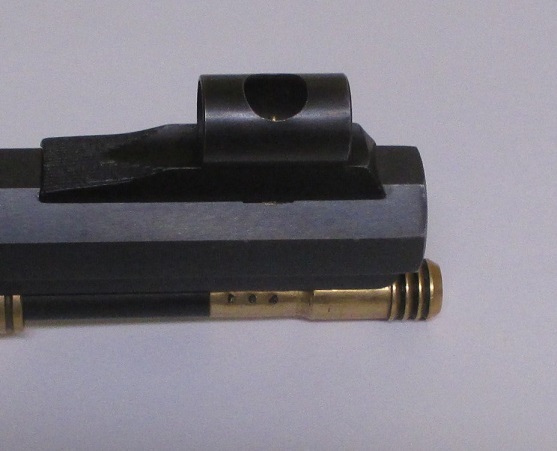


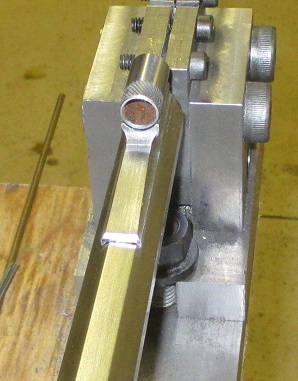

1BIGGUN
October 31, 2015
Moleman
October 31, 2015
How'd you determine the height?
Rick Leslie
November 01, 2015
Moleman
November 01, 2015
DAllen
November 02, 2015
Moleman
November 02, 2015
mike928
November 02, 2015
Moleman
November 02, 2015
RW
November 02, 2015
Moleman
November 02, 2015


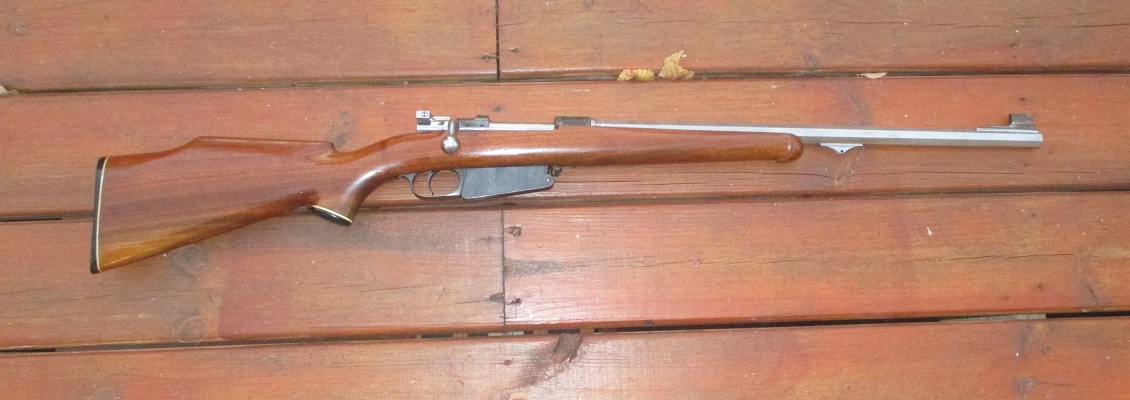
It's alive! And it kicks more than my 444 Marlin. Iron sights I was getting
about 2-3" which is not much more than what I can normally do. I left the
front sight at .090" wide and I think if it were narrower the groups might
shrink a little as the sights would be similar to my M1A and I can shoot it a
little better. I think I'll leave it as is for deer season or possibly cold
blue it until after deer season since it is sighted in and shooting well. 
1BIGGUN
November 07, 2015
Moleman
November 07, 2015
gunbum
November 07, 2015
I looked though the recoil calculators on QL and the 444 is supposed to have
more? That brings me back to bench shooting v/s standing as I don't think I've
shot the 444 Marlin off of a bench. It's not terrible, it just lets you know
it's been fired.
Moleman
November 13, 2015
