Thread: Misadventures in making 300 BO brass
Retrieved: 12/18/2014
Last Post: 04/25/2014
Here's a carry-over from my 300 Blackout project. http://www.weaponsguild.com/forum/index.php?topic=47909.0
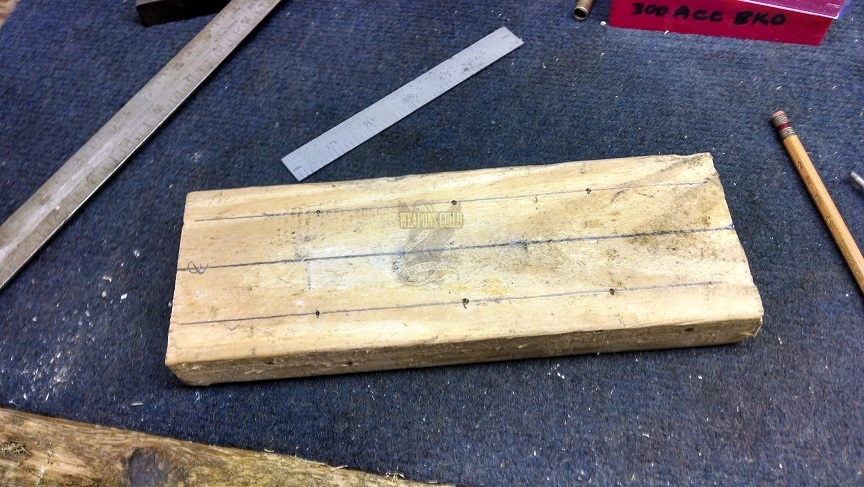
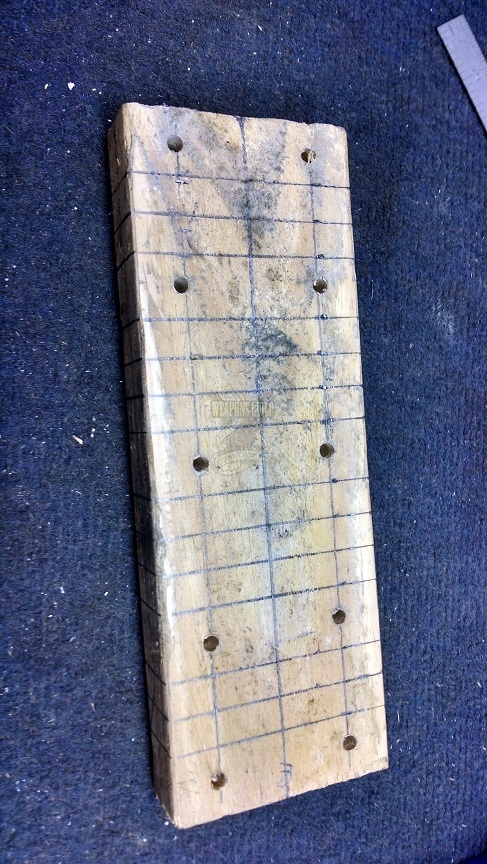
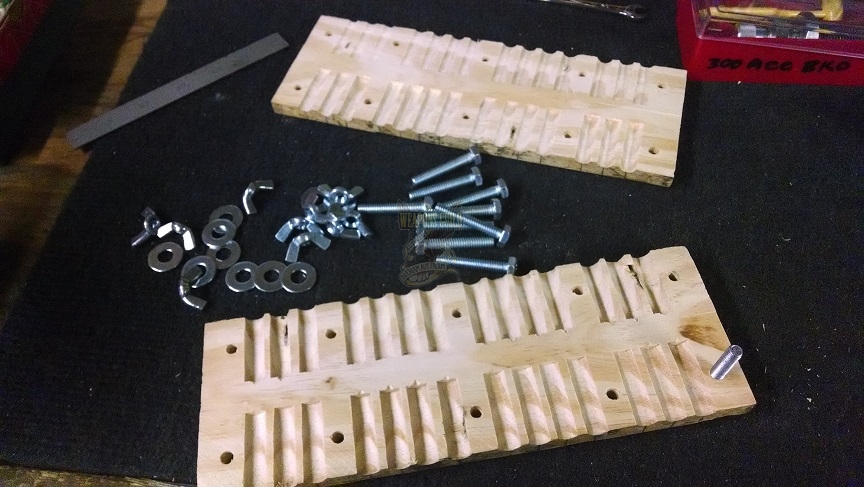
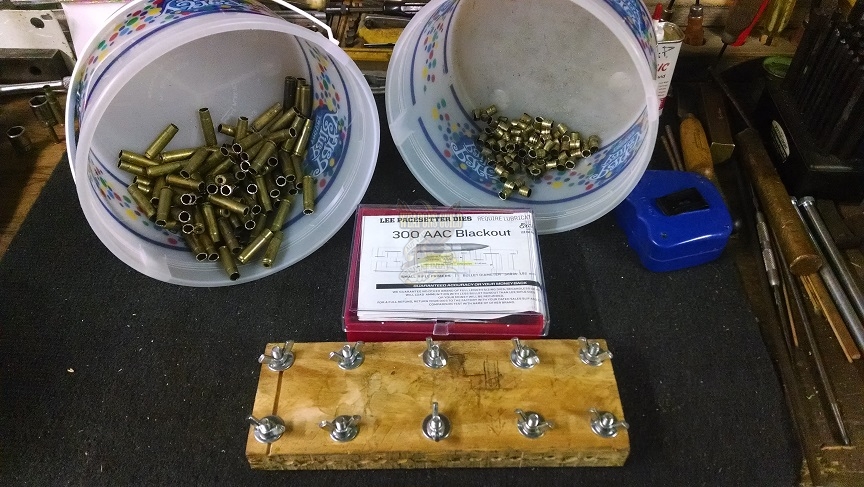
I ordered a set of Lee dies from Midway and will finally get a chance to use the case trimmer I snagged off the bay years ago. I decided to use the wood block method for trimming the brass to rough length. I was going with the HF mini chop saw, but I've got wood. Chop saw I don't got. So the first little jig I made was from some 1 1/2" x 3/4" scrap. I drilled the clamp holes first so they would line up when I split the fixture. Then I used a .375" Forstner (?) bit to cut the pockets to depth. That type of bit cuts a very nice hole. Lastly, I split the fixture down the middle.
When I went to trim the 5.56 brass, I found my fixture was too wimpy. The brass would turn when I tried to cut it. So back to the drawing board...
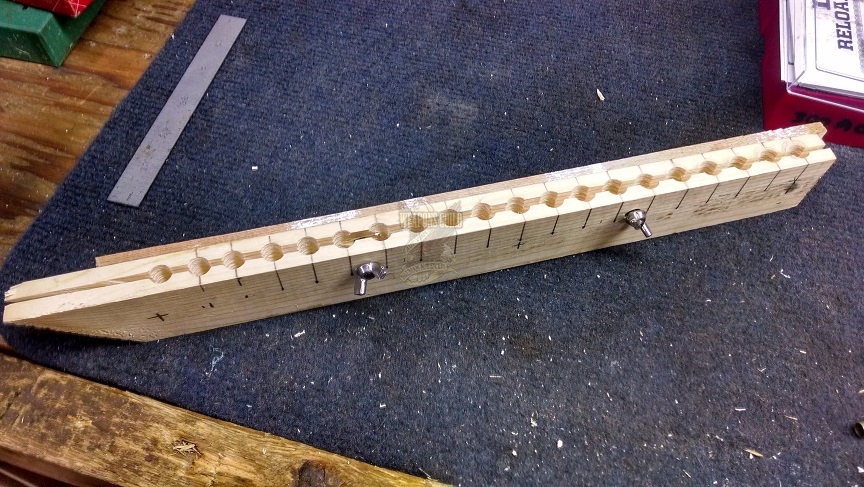
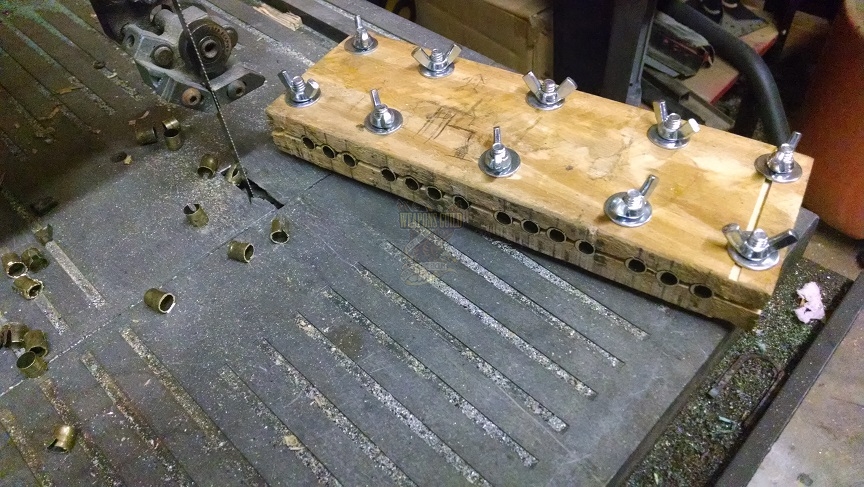
So I grabbed up a healthy hunk of pallet wood. This time I got creative with the arrangement. I decided to put holes on top and bottom, as well as upgrade the size and number of the clamping screws. So I carefully laid everything out and got busy.
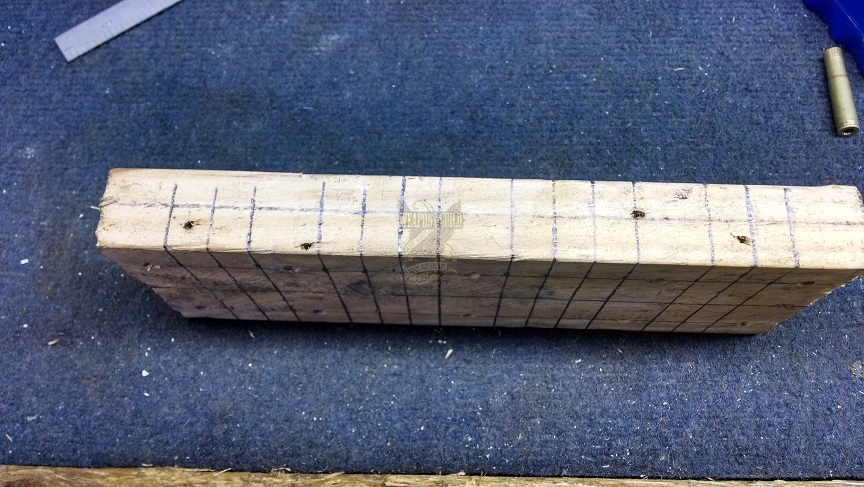
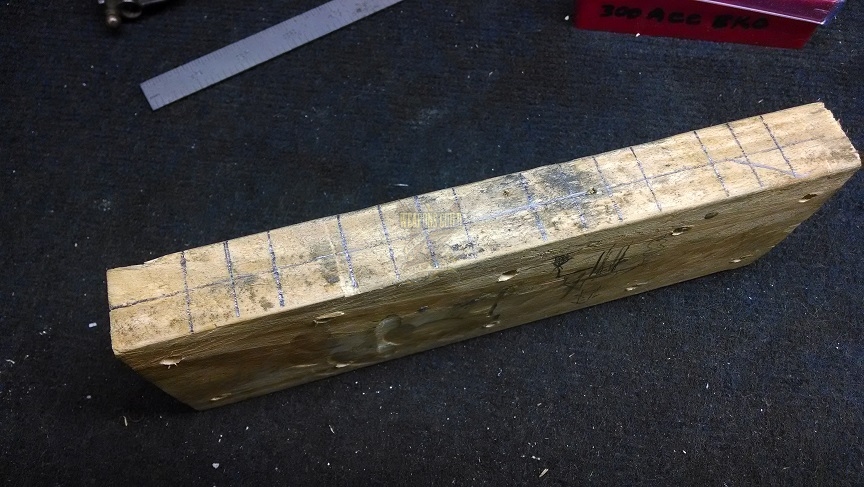
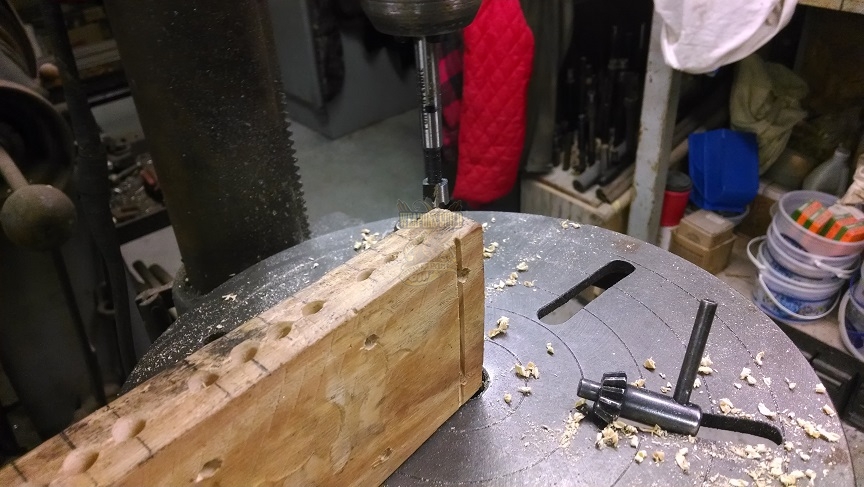
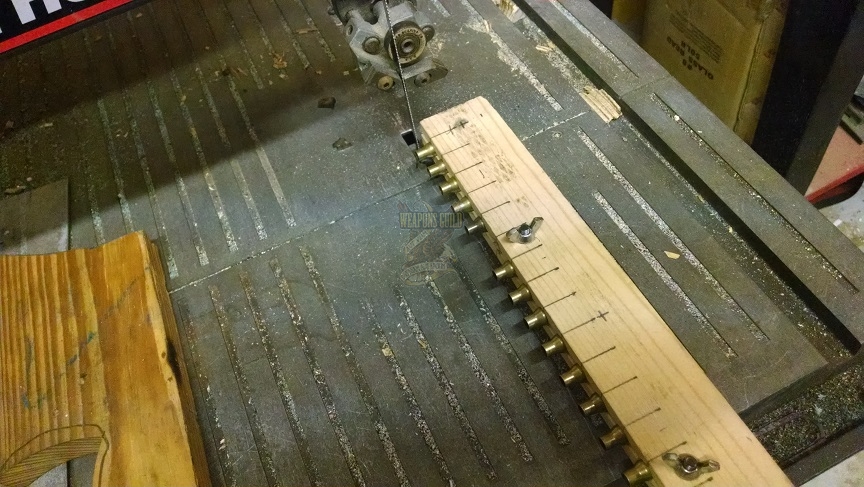
Once the case holes were drilled, I split the block on my table saw. Then I assembled the hardware and made a trial run.
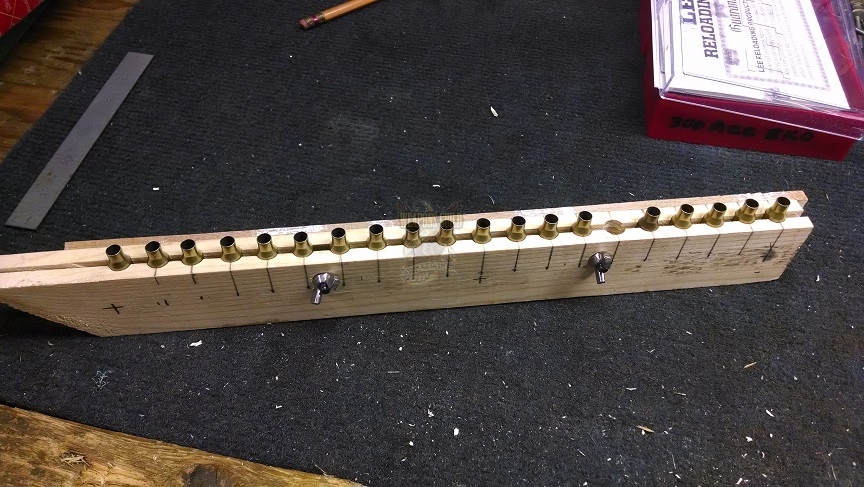
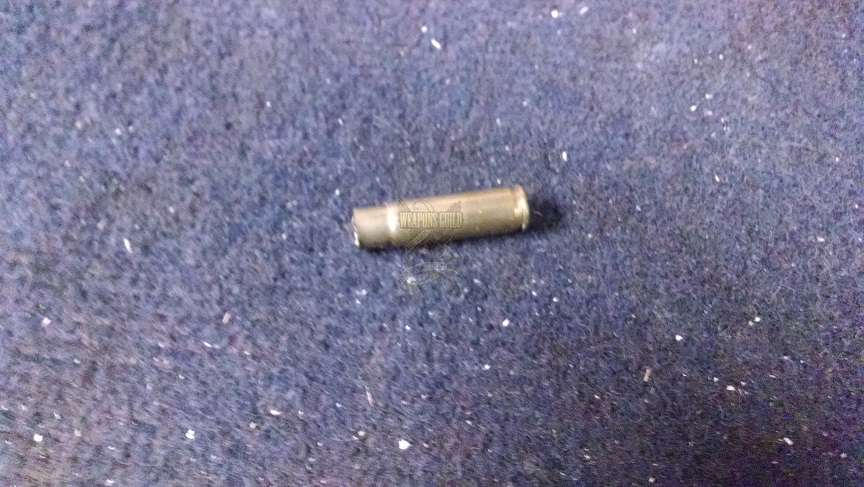
Yes, the case mouths are split, but the split stops above the cut line, so...
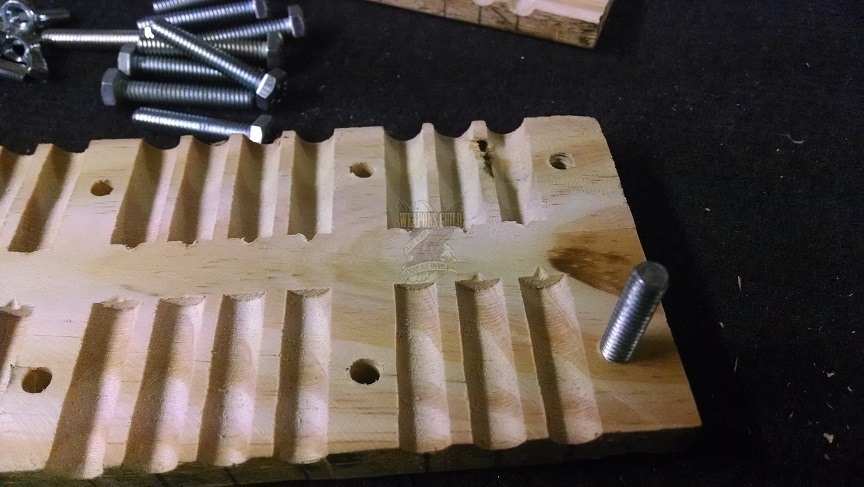
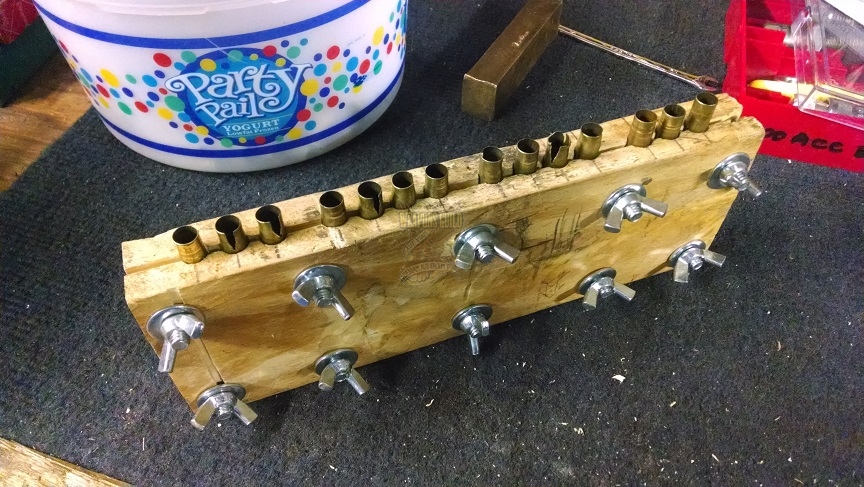
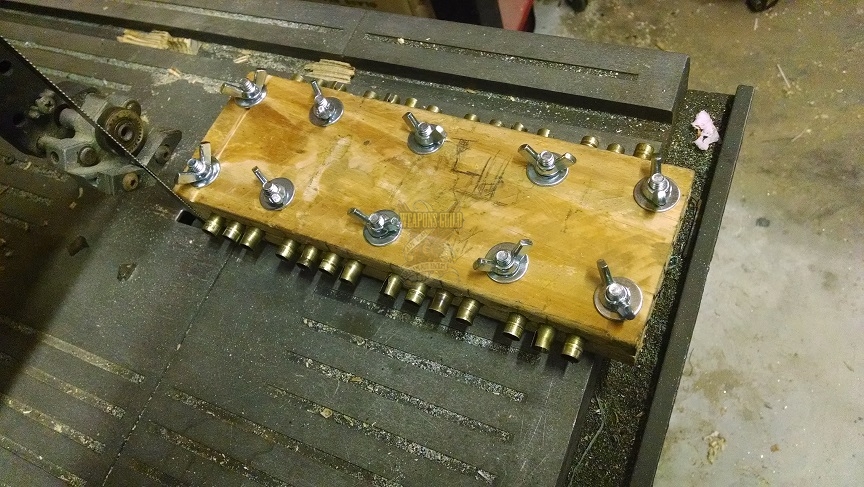
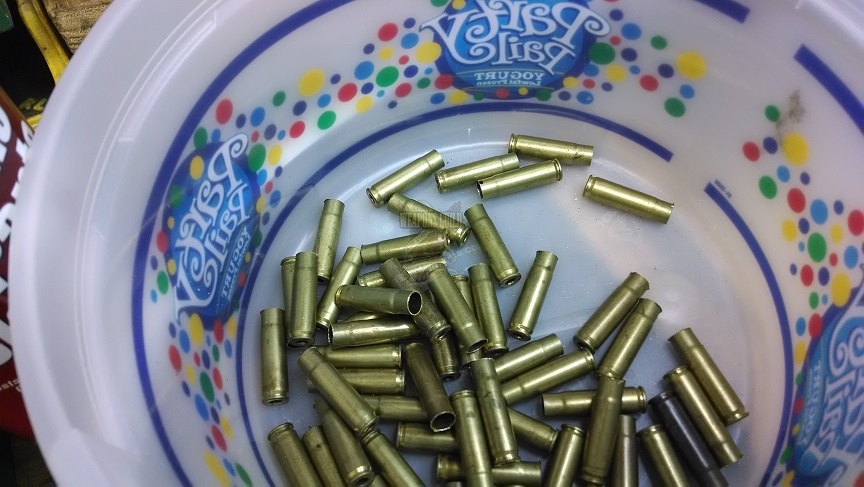
This set-up zipped right through the brass. 14 cases per side = 28 per run. It took me all of 10 minutes to cut 100 cases to length.
Next I trimmed to final length. That wasn't as bad as I had been led to believe either. Now the cases and my RCBS hand primer are on the kitchen table waiting on me to prime 'em up. Hopefully I'll be able to test fire this one soon.
Ted22
April 18, 2014
Much better than my setup... I copied a guy off of YouTube, used epoxy to hold on the HF chop saw. Works great, but if you go too fast your fingers meet the blade :(
pamrick
April 18, 2014
I was originally going with that type of set-up but soon realized the wood is just as fast and I didn't have to spring for the HF chop saw. I did have a concern about my digits as well, but in the end it was all about the Benjamins. (Or should I say the Washingtons?) :D
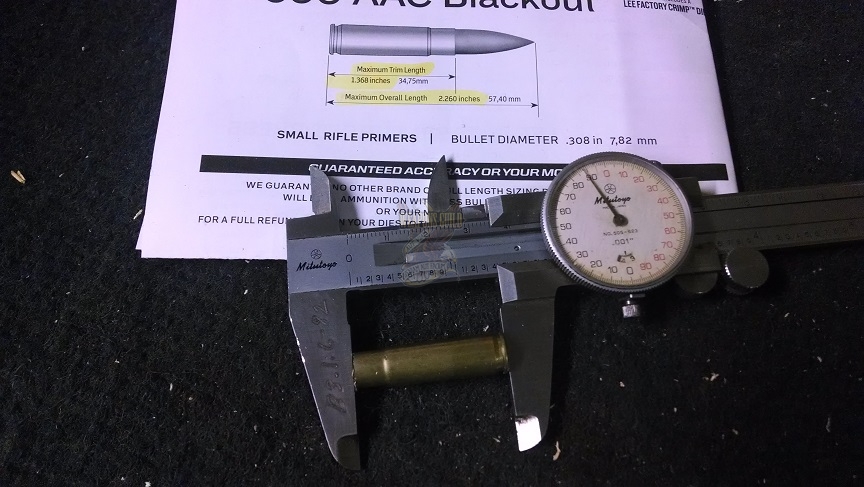
I still have to deepen the pockets a little more in the blocks. My brass came out about .050" to .075" too short. It doesn't affect the loads though. I popped a few behind the shop to be sure. Headspace is good and it functions, just won't quite kick out the empties. No prob though. These were loads I found on the BO site using 2400 pistol powder. I paired it with some of StooperZero's cast bullets. I know, it violates an AR reloading protocol by using cast bullets, but I wanted to see how it would shoot with powder and bullets that you're not supposed to use. ;D
Ted22
April 18, 2014
Bullets seat way deep, pretty sure you'll be good. I cut mine long, trimming took forever!
pamrick
April 18, 2014
Yeah, trimming is definitely a pain. I'll be looking into how to speed that process up next. When resizing/forming, do you form then trim, or trim first then form?
I got a lot of split necks by forming first. Luckily they didn't split far enough to ruin the brass.
StooperZero
April 18, 2014
I just size the .223 brass and toss them in my Lyman trimmer with the power drill adapter. About 9 a minute.
madbear
April 18, 2014
I have a RCBS trimmer and I took the crank handle off and just chuck up my cordless brill and it works great. The shank on the trimmer was too big for my drill so I stuck it in my lathe and turned ot down to fit.
You could put a bolt in the end cut off the head and chuck it up, but beware it could break if you don't support the drill. Don't me how I know. :D
pamrick
April 18, 2014
The cordless drill route will probably be next. I was thinking of a way to set it up in the drill press, but there's too many obstacles to overcome to be a viable alternative. So it's probably going to be up to Mr. Dewalt and friends. :P
1biggun
April 18, 2014
I use a drill with a cord for my brass triming. NO waiting for a battery to charge. I use a Forster trimmer with a couple nut were the handle used to be a nut driver socket in the drill it allows a little misalignment.
I'm cuttting 308 brass down for a 6mm BRX not a 300 BO.
lndncr2
April 18, 2014
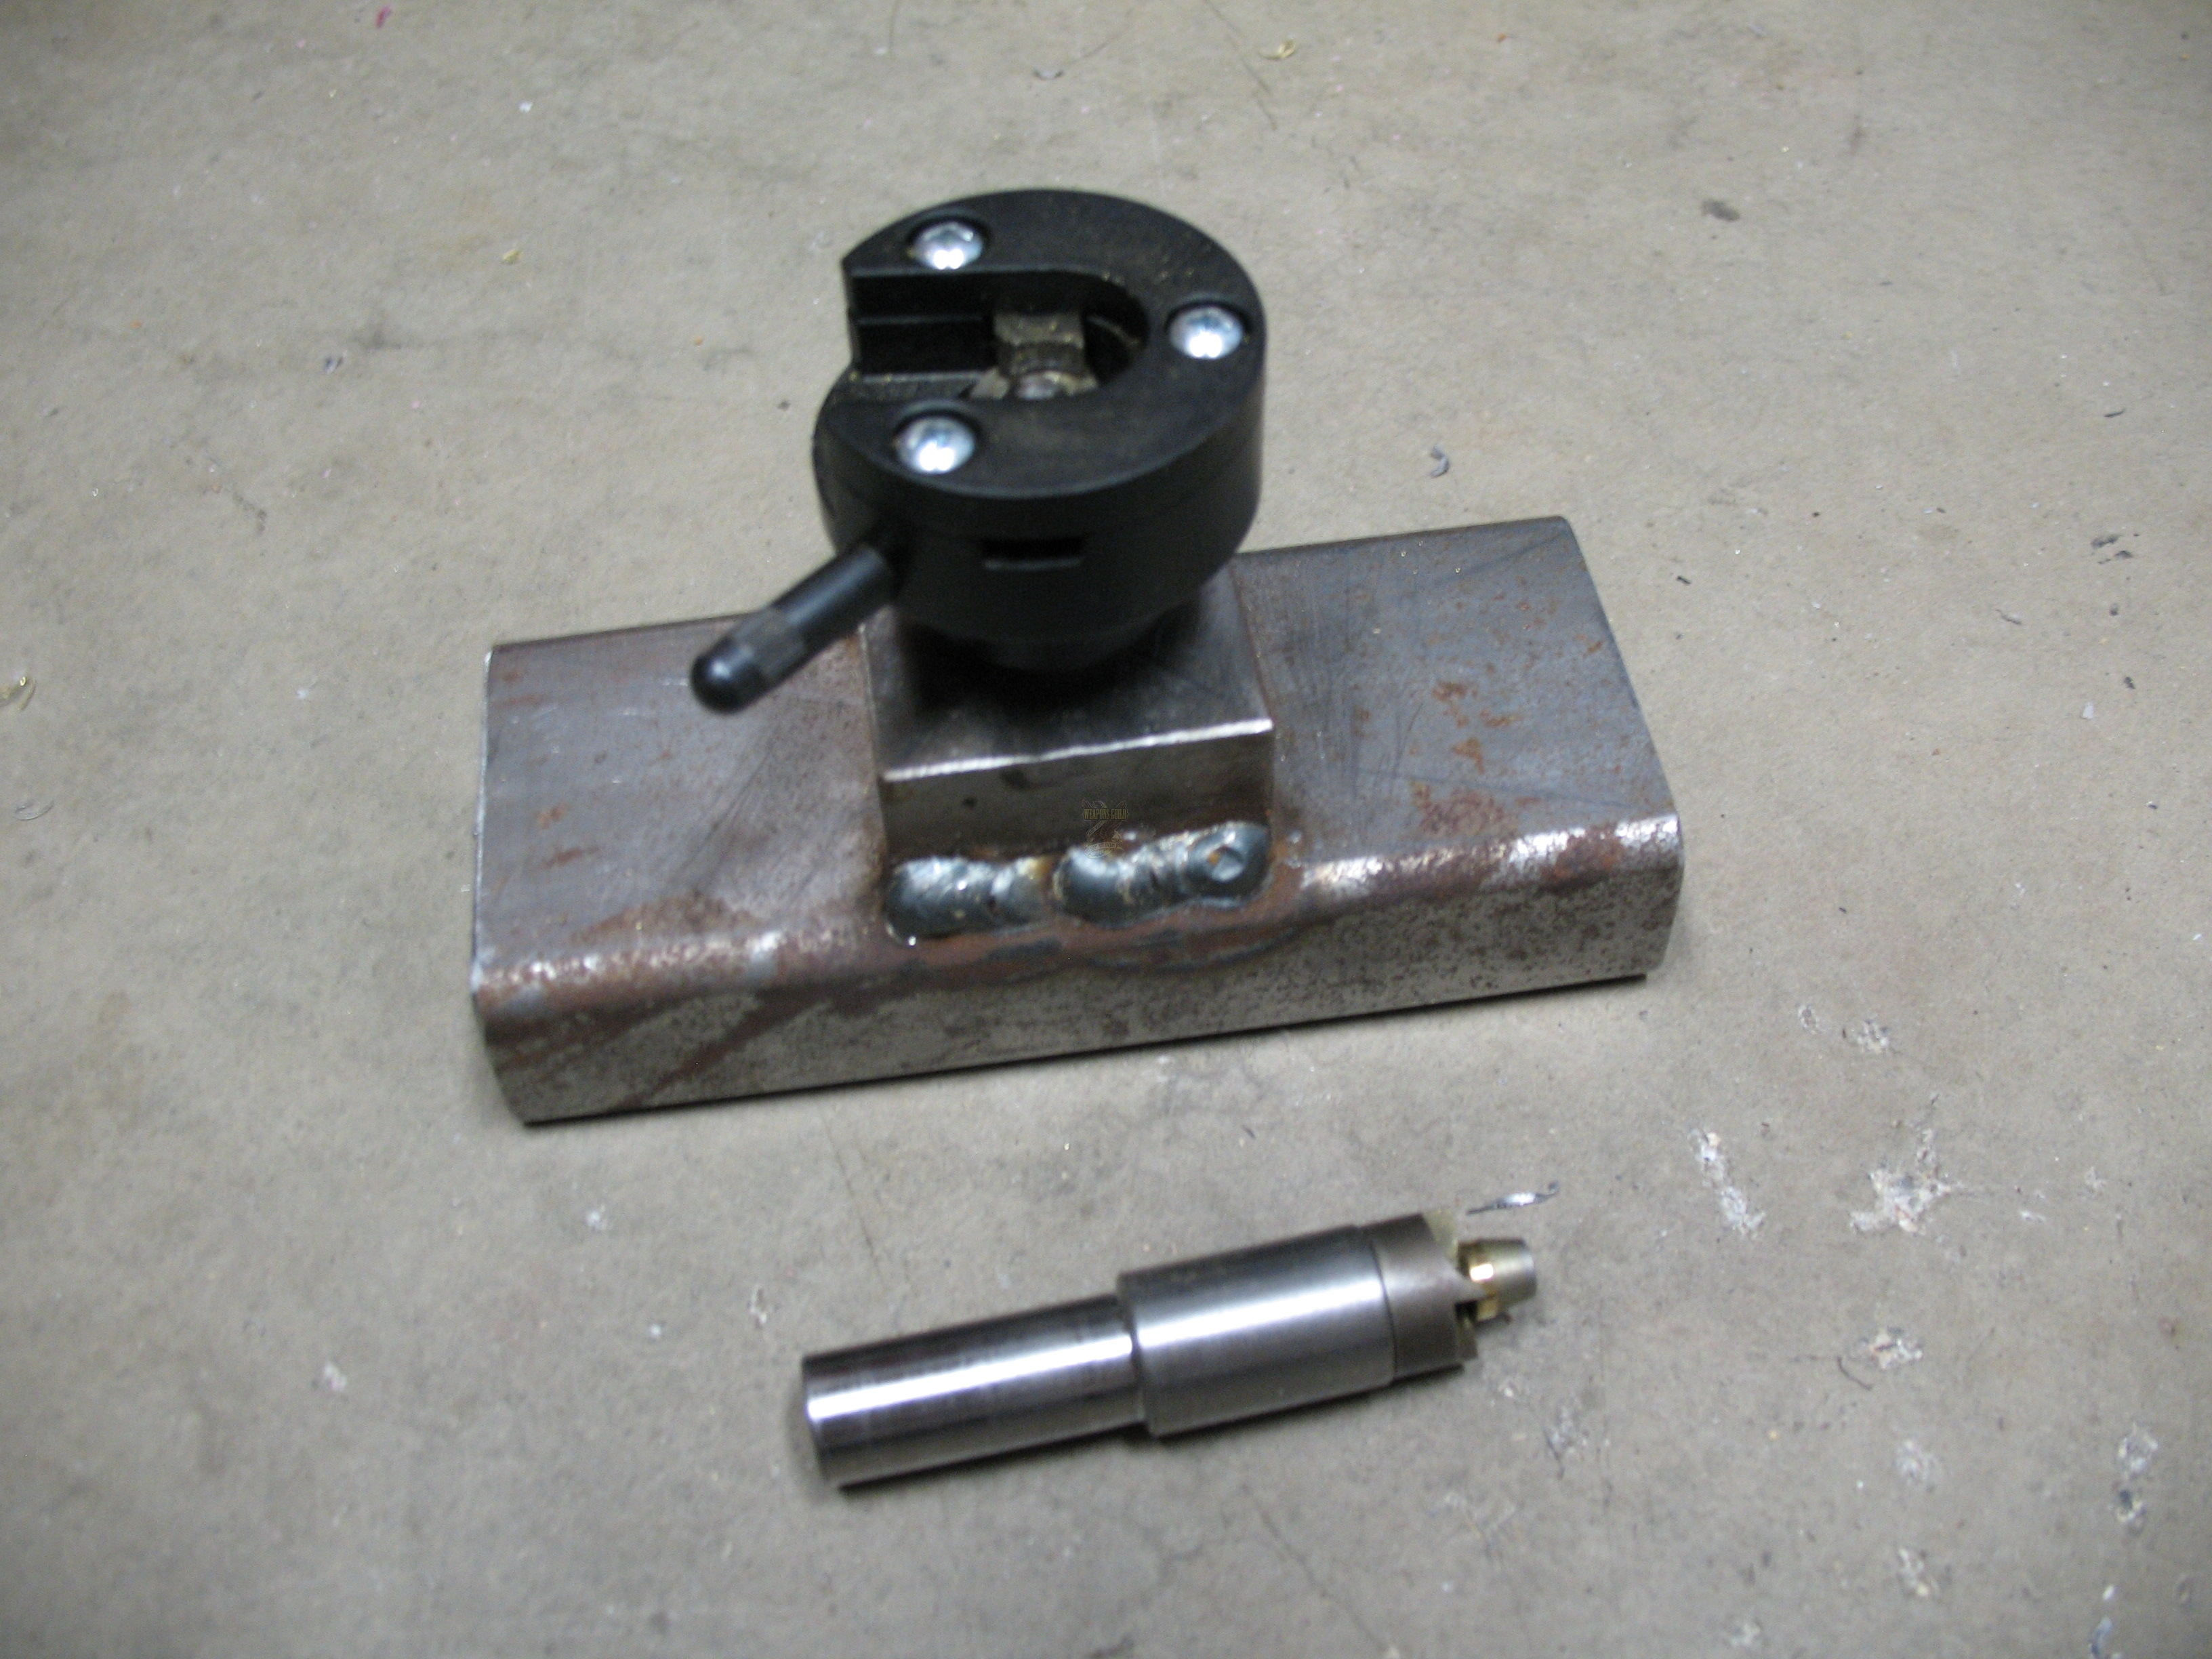
Borrowed the shell holder and cutter head from my Lyman trimmer. Fabricated parts from the scrap bin. Use this in mini mill, drill press should work fine. Found the idea on a machinist web site.
pamrick
April 18, 2014
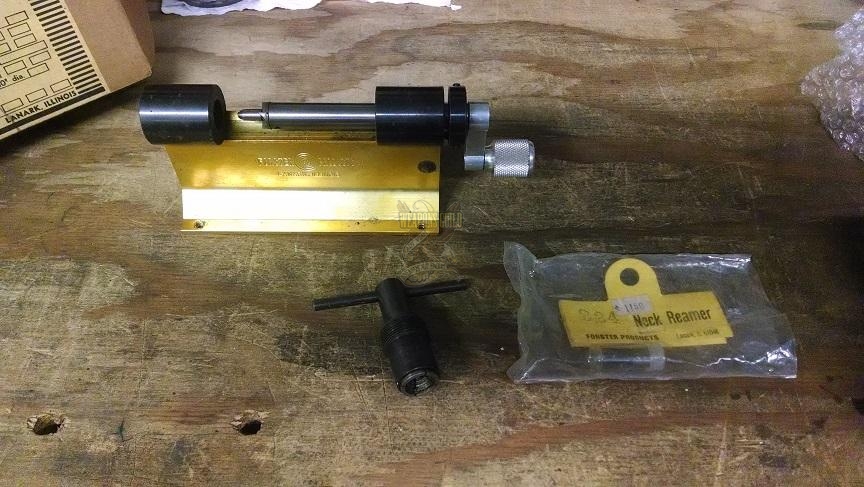
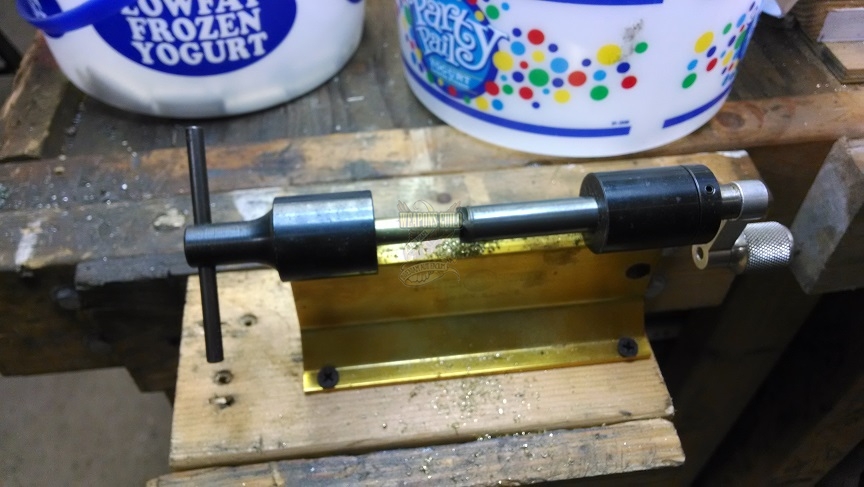
The quick release shell holder would speed things up for sure. I bought a Forster trimmer on an online auction site years ago for beans, just got around to using it. If I didn't have it already, I would do something like lndncr2. Looks like a cool set-up.
Ted22
April 18, 2014
Quote from: pamrick on April 18, 2014, 10:44:30 AM
Yeah, trimming is definitely a pain. I'll be looking into how to speed that
process up next. When resizing/forming, do you form then trim, or trim first
then form?
I got a lot of split necks by forming first. Luckily they didn't split far enough to ruin the brass.
Loaded my first 500 with .223 blank brass... Guy was throwing it out since "it can't be reloaded" :D
I cleaned in a 5 gal bucket with soap/water (and an old sander tied to
side)
Trimmed
Resized/deprimed
Removed swedge
Trimmed
Loaded
In hindsight much easier and cheaper to:
Buy on line
Load
wdoyle1980
April 19, 2014
A little while back I converted a small pile of 223 brass to 300AAC. Did stage 1 forming through 300AAC die w/o the decapper pin. Ran them through a CTS case trimmer chucked in my 4x5 hobby lathe to take down from the original 223 case mouth to finished length. Deburred/chamfered then re-ran through die with the capper/neck size pin in the die. The CTS trimmer uses a fatty endmill to cut and hand-feeding the cases into the trimmer, it just EATS the brass. probably the best $50 spent on the 300AAC gear.
I was using the 2400 powder also to make some subsonics for my little 300 Handi-rifle. They shot well with 220gr cast wheel weights.
copper_head
April 19, 2014
Didn't see anyone mention annealing their brass. I just scanned, I could have missed it. I found that I had to anneal mine because it tended to spring back some after going through the blackout die.
pamrick
April 19, 2014
Annealing hasn't been mentioned but I know it's probably needed. I need to get a casting pot soon (need one anyway) then I can anneal. Mine have a springback issue as well. The case mouths seem t be a bit too small. But the whole idea was to get shooting as cheaply as possible. That I was able to do with what I had on hand. Please keep the suggestions and comments coming. At some point I plan to build a mag fed suppressed bolt gun so I plan on shooting more 300 stuff. Maybe even a BO AR pistol... ;D
Ted22
April 19, 2014
Why'd you have to mention that... I'm sure it does need it... and I have failed to do it as well, in fact I have never done it. I thought you did it with a propane torch... can/should you do it with a casting pot?
pamrick
April 19, 2014
Any heat source that warms the necks and cools them slowly softens the brass and removes the brittleness. Propane, Mapp gas works. Lead pots work too. I mentioned the lead pot because 1) I need one anyway and 2) when annealing with lead, you simply dip the neck in the molten lead, hold it until it gets warm and remove it. No flame, no fuss no muss. Now, I'm recalling the operations from memory so if I missed anything, please remind me.
madbear
April 19, 2014
I have been hand loading or a while now. (maybe 1 year) I haven't annealed any of my brass which is reformed 5.56. They have been working ok so far.
I have seen some videos and read where the necks were heated and then dropped in water which seemed backwards to me. So you should heat the neck and just let them cool naturally?
copper_head
April 19, 2014
I set my brass in a pan of water and run along the tops with an acetylene heating tip.
pamrick
April 19, 2014
Annealing to me has always been heat and cool slowly. Very slowly. I do recall seeing a cute little 'annealing machine' that held the brass up for the torch and then tipped them over into a pan of water. To me that should quench the brass and make it brittle, but IDK. I have also heard of doing it like copperhead and let the water act as a heat sink (?) but there again, IDK. I've never annealed either, even after 40+ years of reloading. (Yep, started when I was about 13.)
elmacgyver0
April 19, 2014
With steel this is correct, however brass is not steel and the correct way to anneal it is to heat it and quench it in water. Yes I know it does not seem right but trust me on this, one of the few things I do know, it will become butter soft.
madbear
April 19, 2014
Yea copper_ head's method makes sense to me. I have been thinking about annealing for a long time but never had any issues with the cases so why bother. I think I might have seen the same video, just didn't add up. ???
So if I need to anneal any brass thats the method I'll use.
pamrick
April 19, 2014
Thanks for clearing up the annealing mystery. I knew I had seen the quenching step, but I didn't think about the metallurgical difference between steel and brass. So do I need to quench with the lead bath as well?
copper_head
April 19, 2014
I first annealed 22-250 back in the day because I loaded them so many times. If I didn't the necks would split.
scooter
April 19, 2014
I anneal all the brass I am reforming for 300 blk out. Makes it easy to work and no cracks. I heat with torch and quench in water.
Softens it right up nicely.
wdoyle1980
April 24, 2014
Yeah - I skipped the annealing part in my description, I kinda thought it was a 'given'. Used one of those Bernzomatic propane/air torches. Put cases in steel baking pan w/ water 1/2 up the case. Applied torch to the top- ish area of the case until the top 1/2 got dark red, removed torch, let cool. nice and soft.
pamrick
April 24, 2014
No quenching?
wdoyle1980
April 24, 2014
Does just tipping them over into the water count?
After contorting/cutting/sizing, I re-annealed the mouth/neck/shoulder area by heating and quenching. yes. However, I read in places that [heating + air cooling] and [heating + quenching] are the same with regards to brass. ::shrug::
pamrick
April 25, 2014
Thanks. I guess brass is a funny material.
t.l.a.r. eng
April 25, 2014
Brass is a funny metal as it doesn't follow traditional rules of annealing. To soften brass it must be heated, then quenched in water, opposite steel.
Heating brass red hot and letting it cool naturally makes it softer than if it has been work hardened, but to truly make brass dead soft, heat then quench in water. :P
pamrick
April 25, 2014
I'll anneal on the next batch. I did get out to the range yesterday and ran about 40 rounds through it. Couldn't hit dirt if I dropped it, but it was fun to shoot.
About half the rounds ejected and reset the hammer like normal, about 10 ejected, reset the hammer but failed to pick up the next round and the rest failed or partially ejected. My load was 150 gr. gas check lead over 15 gr. of 2400 and standard small rifle primers.
You could almost see the bullets in flight (:D) but they packed quite a thud on the 100 yard dirt bank. :P