I would like to know how everyone else steaks them in there??? I don't want to buy no tools, so any idea on an effective home made set up??
I've seen a pair of vice grips modified with a "tooth" on one jaw, and the other jaw relieved for the plunger tube.
Highly detailed blueprint attached.
Wow, l am liking the highly detailed blueprint, looks like the same engineer also drew the print in the slide fitting article a few threads below this one.
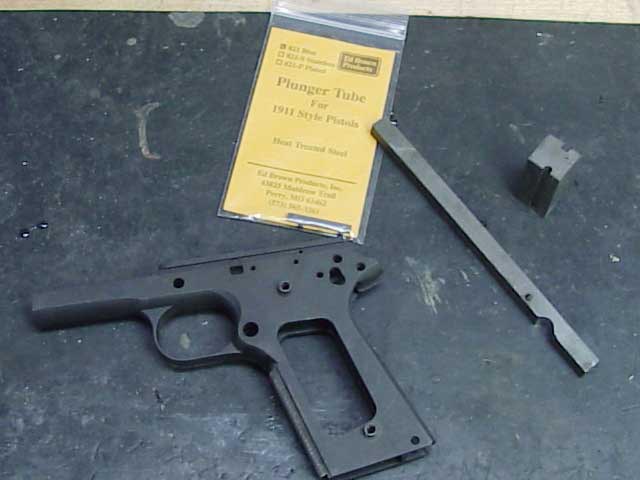
As you can see in the photos below, this could also be easily made if you have access to a milling machine to releive the block for the plunger tube. Next put staking rod in magwell and nestle expander thingamajigee in plunger tube arm and wallop it with a hammer to expand it from the backside. Not difficult.

The tools used by 'the hoggster' are by far the best!
I think they are a Tom Wilson design, no longer manufactured.
At any rate, if the studs of the tube are not long enough, no method will truly secure the tube.
The Caspian tubes are the best I've found.
Current Colt's have MIM plunger tubes with studs about
1/32nd of an inch too short!
I silver-solder tubes to the frame for other smiffs, but find this to be distasteful for several reasons.
I use a pair of Ken Hallock Chinese pliers with a slot ground in one jaw and a pointed set screw in the other. These have never worked the greatest by themselves. My best results have been acheived using a home made slotted block like the one in the picture and the jaw from the Hallock pliers with the pointed set screw, a vice and a hammer. Also it helps to chamfer the top of the holes inside the frame with dremel burr. Brownells used to sell a tricky little dovetail you could stick through a plunger tube hole and then fit in your dremel. I wish I would have bought one as they no longer sell them. The only fancy or supposed extra quality and length tube I have ever tried is a Rock River and I will say the it is precision and the studs are long. It staked in so well on my CMC that taking it out without damaging it was pretty tough. No light could be seen between the flats and when I later removed it I discovered the parkerizing solution couldn't even sneak under it to the frame.
Quicky lesson in 1911ology for newer builders. If you can hold the gun up to the light and see light shining through the dovetails or between the plunger tube keep practicing cause you ain't there yet. Although, don't despair to terribly if you do see some light as I looked at a couple of 800 dollar stainless XSE colts about a week ago and felt much better about the worst job I ever did.
Well I tried the plyer method with only OK results... I think I better order a extra plunger tube and those little pins. And the spring.
I lost one spring and a pin... It was plain luck I found both! Then I realize I can clip them into the spring before I put them in there (as I had turned down the one pin so it woulf fit from the other way!
If the studs on a new plunger tube seem not long enough:
Are the frame holes to accept these studs countersunk on the inside? This is necessary to allow room for the stud metal to flow and not create a mag well obstruction.
See Jerry Kuhnhausen's excellent Colt .45 Auto manuals, this is explained in detail.
I don't think the holes are countersunk, but the studs did not stick out anyway.
But thats the least of my problems with the gun anyway. I think I need to do some seriouse feed ramp work with the barrel... and the triger don't want to return forward to easy... oh and sometimes the hammer just falls to half cock... and it does not want to eject on the last shot... except with 230 grain fmj it works fine with them, except the trigger part.
Hats off to all 1911 builders for having the brains to get good parts and not second rate parts, oh and to have the paitence with the thing.
If you plan on doing more than 2 frames, the Brownells tool based on the Vise Grip will more than pay for itself.
The Nowlin tube has extra length stakes also. Don't forget to chamfer the inside holes a bit for the crimp to go.
If it's a steel frame, silver solder the tube on. If it's an alloy frame, use Acraglas gel. A decent set of stocks has a relief cut at the top that holds it on, anyway.
Would the acid paste in silver solder corrode the frame??
You can also use Loctite red, but be careful - this stuff can get messy. it's always best to do it right; this is just a fix for out-of spec parts or frames. Be sure to countersink the holes in the frame from the inside (magwell). Without that done - you're pissn' in the breeze 'cause there's no where for the studs to expand.
Another trick i've used is to take a very fine knife file or the like - and file a slight notch on the end of the studs- this will help them spread with ease, but I use Loctite along with that just to be safe, for staking - there are several creative ways to do it, but none are better that the tools already noted by others. I'm sure you have enough by now to get a good idea of what to do.
Hang in there - you'll love that gun in the end.
Yeah, although it seems to be staying in there surprisingly, and I fired 100 plus full power loads!
Thats without any grips on. LOL.