
The way you get rid of creep is to stone a primary and secondary angle in your sear, lower your hammer hooks to .020in, then if necessary adjust the sear spring. Your sear already has a primary angle on it, that is the angle that mates with the hammer hooks, but we will restone it using a good fine stone of your choosing. I personally use a xfine ceramic stone from Brownells, and water as a lubricant. Place your sear in your sear jig, like in (fig 1).
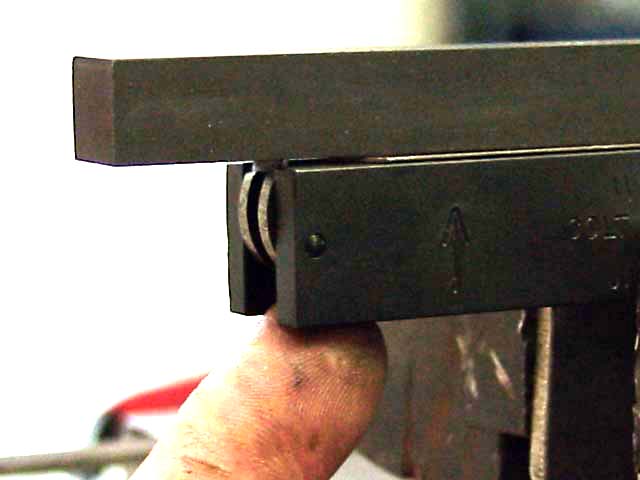
I personally use a Wilson's sear jig. It is simple, it works, and you will not have to sell your gun to afford one. The sear must be held in place with the finger of one hand as can be seen in (Fig 1). This keeps the sear from hinging away from the stone on the return stroke. Under the stone I use a .020 feeler gauge, in order not to wear out the sear jig (fig 2).
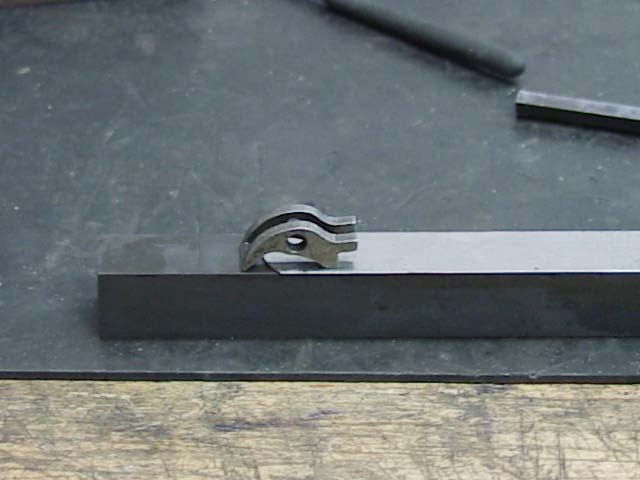
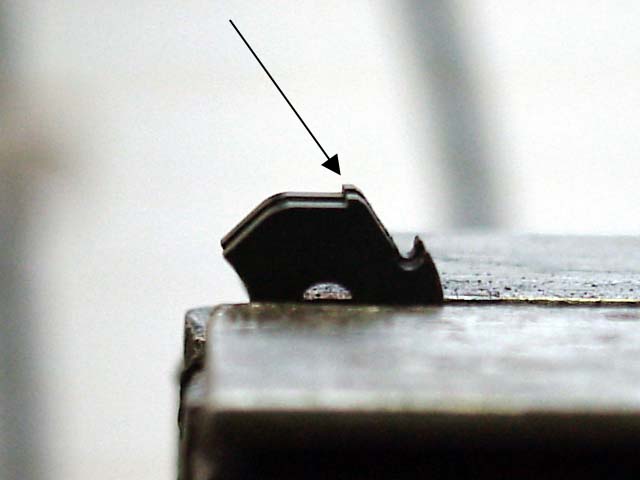
A picture of me polishing the primary angle is in (Fig 3). Once the primary angle is finished we will move onto the secondary angle. I use a medium indiana stone with a little oil for lube for the next step. Position sear on top of stone with feeler gauge in place as in (fig 4)
and lightly move sear and feeler gauge back and forth untill a second angle is cut onto your sear. I want the new angle to be about as thick as the feeler gauge is at .020. Go slowly here, and check progress often to ensure you are not putting too much pressure on one side or the other. The new angle should be the same width across the whole face of the sear. Next, hit it with the fine stone in the same manner.
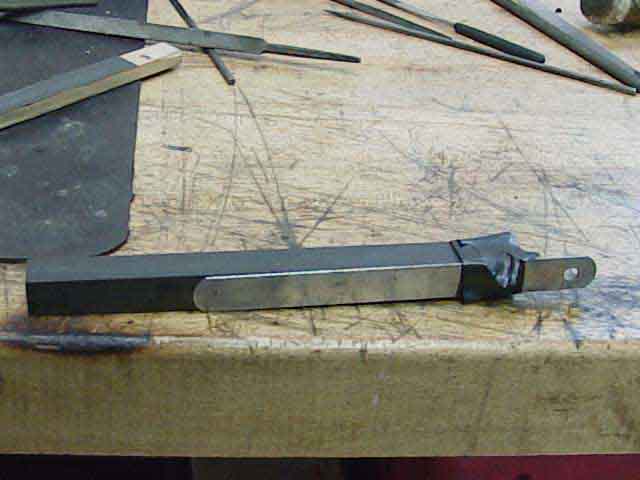
Next, lightly put the sear nose down on a fine ceramic stone and lightly roll sear to break the sharp edge between the primary and secondary angle; go lightly here. Now the sear is complete and we can move onto the Hammer. Put hammer in vise as in (fig 5), you will notice in pic-5 that I show an arrow pointing to the hammer hooks, this is the part we will work on next. Hold your .020 feeler gauge up to your hammer hooks and see if they are taller than gauge. If so, file or stone with coarse stone untill hooks are .020 tall.
Warning: A little pressure goes a long way. I use an extremely fine file for this, if you don't have one use a STONE!
Remember, you can't put material back. Next lets make sure the hooks are perfectly square. Put a fine stone in padded vise jaws and set hammer on top. Now this part is alittle tricky; slowly move hammer back and forth on top of stone, putting pressure on the 90deg. engagement area. Ensure you dont let the hammer walk or move when sliding it back and forth. this is not for the faint of heart. What you are trying to do is polish the hooks so the engagement area where the sear nestles will break cleanly.
Lets move on to the mainspring, or as some call it the hammer spring. I usually replace the stock 23lb spring with an 18lb spring; it will help your trigger pull a little. Next, polish the face of your disconnector with a med- fine stone, so that it rides on the rear or your trigger bar with no hickups.
The sear spring is the last item that needs attention. There are three arms to your sear spring, one facing back towards you, and two facing slightly forward. Well the odd one facing back is for your grip safety; don't mess with it unless your grip safety is returning weakly, then bend it back slightly.
This is a trial and error process. The middle arm is for the disconnector and trigger return, and the last arm is for the sear pressure against the hammer.
Now, after stoning the sear and hammer, you should reassemble gun, and dry fire, if trigger is still slightly too heavy, but there is no creep, then we will bend the sear arm and the disconn. arm slighly to the rear towards the grip safety.
A little goes a long way here. A little note here: Don't dry fire lower without slide in place, otherwise your hammer could break off or shear. Once the trigger pull is sufficient, do a function test.
Next pull slide off again, and push down on disconnector, ensure it aggresively pops back up. Trigger should also easily return back to its reset position after it is pulled to the rear and released, if not your disconnector arm on the sear spring was bent too far back.
Lastly, cock hammer with your thumb; does the sear engage snappily on the hammer hooks? I guess that might take a little practice to understand. The last thing to do is to adjust your overtravel screw on your trigger, if it has one. It is adjusted by completely removing, then applying blue loctite to the screw and installing almost all the way in. Also install your mag release, as that is what the overtravel screw stops on. Re-assemble complete handgun, cock hammer and attempt to pull trigger. If hammer does not drop, then overtravel screw is in too much. Unscrew a 1/4 turn at a time, until hammer drops when trigger is pulled. Then turn screw out another 1/4 to 1/2 turn. Lastly, with trigger pulled to the rear, move hammer up and down with your thumb and ensure you don't feel the sear binding on the half-cock notch as the hammer is moving up and down. If so, back out set screw another 1/4 turn. Now let loctite dry and you are done.
One note of concern for overtravel trigger screw on a Colt series 80 trigger: Once you have adjusted the overtravel set screw on the trigger, ensure you are pulling the trigger far enough to the rear to engage the firing pin safety. If not, the hammer will fall, but the firing pin will not be realeased to hit the primer. Test by putting a pencil in you barrel, eraser first, and holding up when dry firing. Pencil should be thrown from barrel by firing pin. If not then unscrew overtravel screw until firing pin safety is disengaging when hammer is falling.
Lastly, when test firing load only 1 round in mag when firing, then two, then three and so on, until gun proves it will not go full auto. This should wrap up the trigger job. Oh I almost forgot; I use a RCBS trigger pull gauge from Brownells, and I usually go for about a 4lb trigger job, that is the norm. Good luck