Some assembly required (my 1911 build)
Or "How I lost my mind and decided that I would stake my life (potentially) on a gun I built myself"
Part 1: "A little history."
My first 1911 was a Norinco, bought maybe 15 years ago. After I butchered the frame tangs (using a bench grinder and Dremel), I fitted a Wilson beavertail, extended slide stop and extended thumb safety. I liked shooting it, but it wasn't my favorite.
Fast forward 10 years when I dug that Nork out of the safe where it had been residing, unshot, for many years. "Wow, that gun is the most comfortable one I own. It just fits my hand like it was molded." Back into the safe it went. (Repeat story on and off for 5 years).
Fast forward to late Dec. '07. The wife and I were at a company Christmas party in downtown Denver. As we were going back to my truck (in an underground parking lot), some suspicious characters were following us in a slow moving Suburban.
Nothing happened, but it scared the heck out of us and we decided that CCW permits would be a good thing. We would have been in trouble if those guys were up to no good.
Now I subscribe to the philosophy that bigger bullets work better. (I think it is a crying shame that the army uses a carbine round for it's "battle rifle" and 9mm for pistols)
That being said, a .44 mag is a mite too big to carry concealed, but many people carry a full sized 1911... so .45ACP it is.
"Hummmm" I said, "That old Nork would work just fine, weld up the frame tangs, fit a new beavertail, I'm SET"
That was working fine, until I decided that I would weld a little on the rails to tighten up that slide / frame slop.
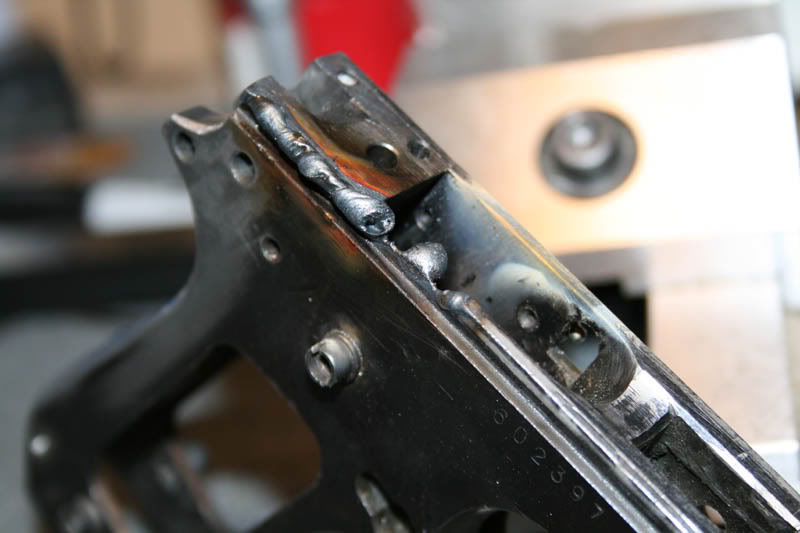
5 minutes later, I'm looking at Foster Industries to get a "scratch & dent" Caspian frame.
I've lurked here for a while, and read back through the archives for a year, so I decided that building a 1911 from scratch is within my capabilities.
(Whether is will function, look nice, and last a long time are yet to be determined.)
End of part one.
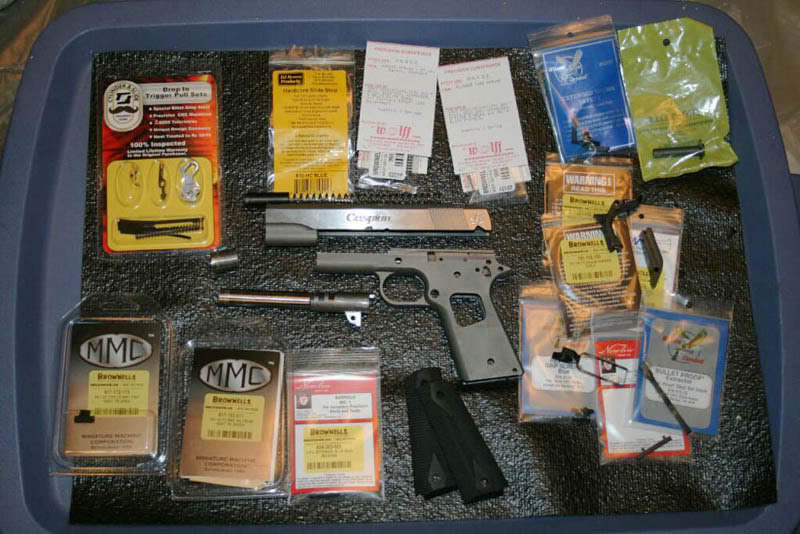
Part 2: "Gentlemen!..Start!..Your!..Credit Cards!"
(Part 2 of this thread brought to you by Brownells)
"We have everything you need for your 1911 project*"
(*not really their slogan, I just thought it was funny)
A quick peruse of the Foster Industries website shows a good deal on gub'ment frames, buy one at $127.58, get one at 50% off.
Easy to convince the Wife that two is better than one at that price. "But Honey, I'm paying for shipping already, I may as well get the second at 1/2 off. It only makes sense."
A quick phone call to Foster, and two were on the way!
Um, well, no, not really. It actually took two weeks, and that was WITH next day air shipping.
Seems that a USPS first class letter (my dealer's FFL) from Colorado to Vermont takes 8 days to get there. (and they wonder why nobody sends letters anymore)
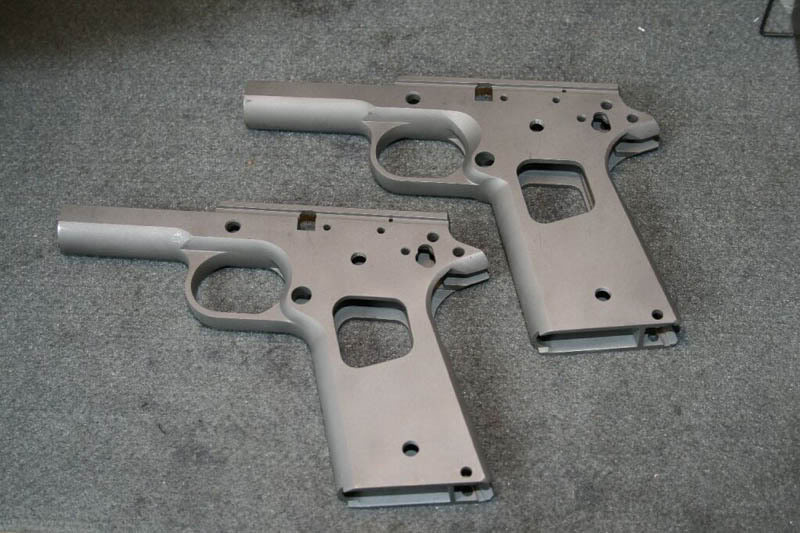
Scratch, not too bad.
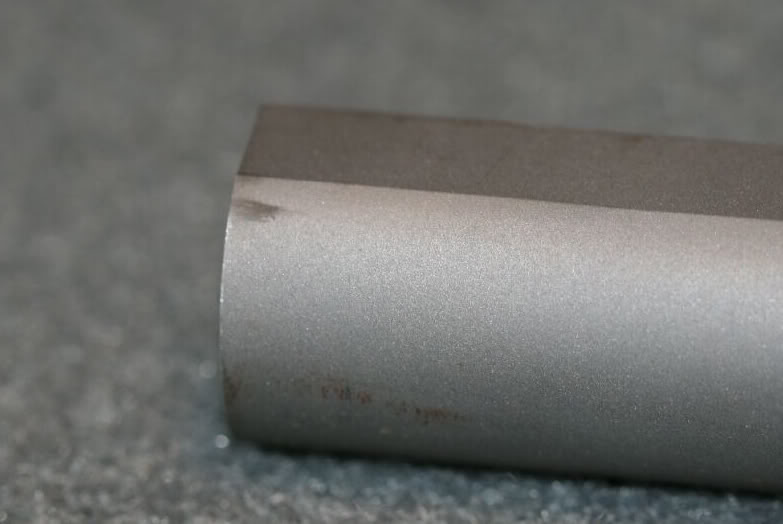
More scratches. I can live with that.
Because this will be my carry gun, a little scratch or two doesn't hurt my feelings one bit.
End of part 2, thanks for playing along at home.
Tomorrow, slide to frame fitting.
Time to put something together, or "Let's hope I'm better at filing than welding"
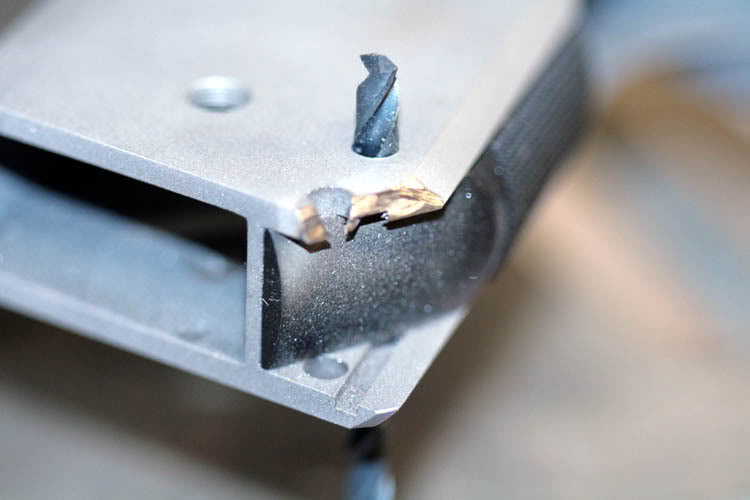
Welcome on board and keep us in the loop. Oh, and that frame on the first post, is still usable. The fact that there is a piece of the frame rails missing, doesn't mean it's unusable.
Hey. The beginning 'bead' looks pretty good; BUT, if it was me I would park that welder in the corner & have another beer with a little contemplation in why did I do that. I'm sure you'll have fun on putting one together from scratch. Get the Kuhnhausen books; they are very good!!
John, I'm glad to hear that the frame is not junk. I'm going to keep it and maybe have Accurails installed. I'm sure the frame has lost some strength, but I believe that it should still be okay for light loads.
But because this build is for my personal defense pistol, I'm not going to trust it for that.
Quote:
...a little contemplation in why did I do that.
I kept thinking about how loose it was side to side. I had peened the rails, so it was good up and down, but I couldn't peen the rails enough to move then sideways into the slide. I was thinking I could add a "little" metal to the rails to tighten that up.
I welded the tangs to fit a new beavertail, and they came out great, but the rail was just too thin at the power level I had set.
Quote:
Get the Kuhnhausen books; they are very good!
Actually, I only have the second Kuhnhausen book. The AGI videos are very indepth, building it should be no problem.
Making it run after assembly, (troubleshoot) that will be a whole 'nother kettle of fish.
As for the frame, well, that missing part hasn't done much to make the frame less strong. Check out a Para LDA frame next time you see one. Almost half of the right-side rail is gone. No problem at all.
SSSHHHHHHHH! Don't tell the Wife!
That's how I got two new frames, thinking that one was scrap (or at least would take some $$$$ for Accurails).
Now I can build three!
Hey, gotta pay for all these special tools I bought, right?
Looks like you chose some great parts for your build. Take your time and have fun, try not to get in a hurry. Here's a Link I found from this forum that I thought was pretty cool.
http://how-i-did-it.org/1911-project/index.html
Yep, been there.
That's why I bought quality, brand name parts. I read about all the trouble he had, and the duplicate parts he had to buy.
how-i-did-it.org is what finally pushed me over the edge to building one.
I could have gone out and bought a new Kimber, but something that I will carry everyday, I want that to be built by me.
Working on the frame to slide fit today, I'll post an update later.
Part 3: "Ain't no going back now"
Saturday I fit the frame & slide. Talk about a looooooooong day.
I think it took me 5 or 6 hours to get them together.
I only used hand tools, (files, sandpaper, & lapping compound).
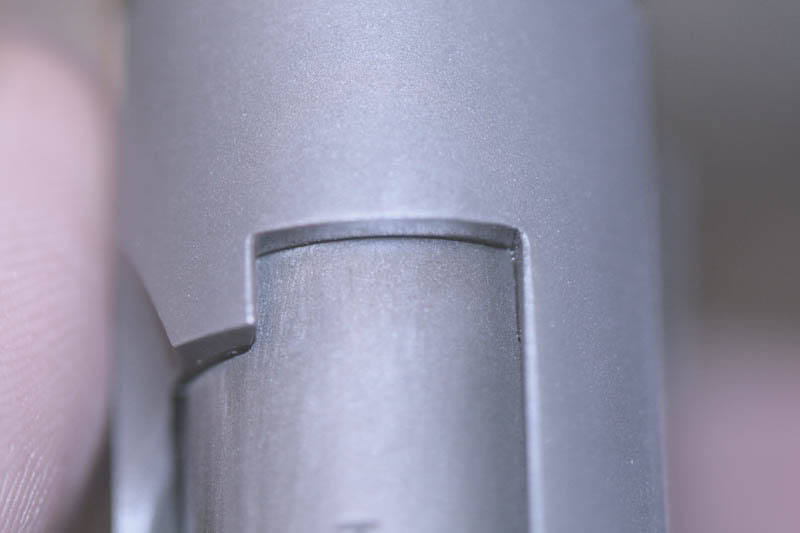
I primarily used a draw file method, but as you can see by this picture,
I kind of cut a swale in the magazine well area.

It is not to bad, so I'm not going to worry about it. In hindsight, I should have used a straight edge to keep everything level.
Today, (Sunday) I fit the barrel, but I still have to upload and edit those pictures, so more on that tomorrow.
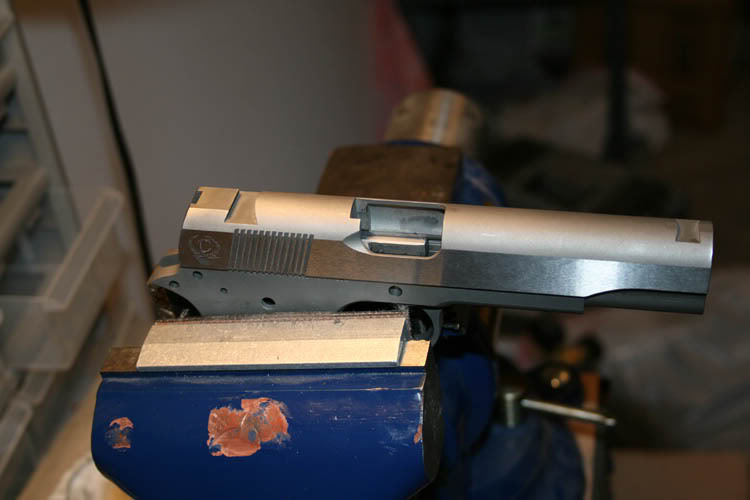
It's beginning to look like something.
Part 4: "Full speed ahead"
Or "I really should have read the instructions first"
Sunday I fit the barrel to the slide/frame.
I started w/ a Kart NM "hard fit" barrel in .45ACP.
The hard fit part means that the hood and bottom lugs are oversize and will need fitting. (It may need to be finish reamed, but I'm waiting on the "go/no- go" gauges to determine that).
First step: Cutting the hood to fit the slide
Actually this should have been the second step.
First step SHOULD have been "measure the lug spacing and adjust the lugs as necessary". However, the AGI videos say nothing about this, so I just breezed past this step.
I have a plan to minimize this mistake, but more about that later.
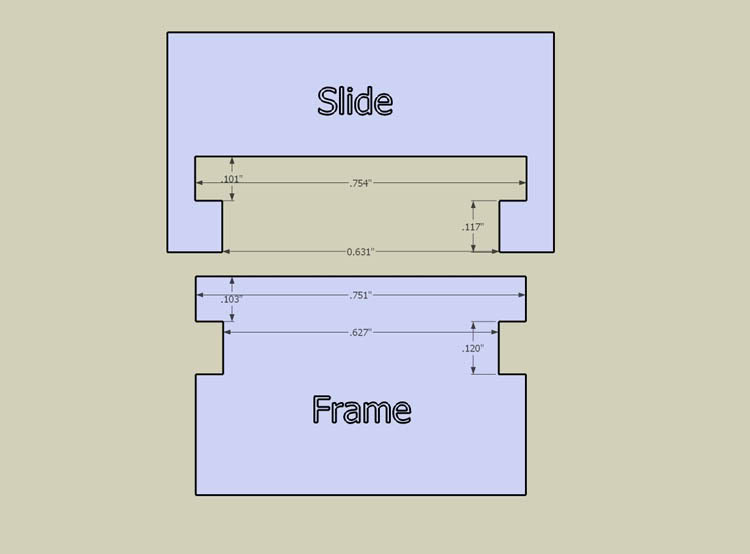
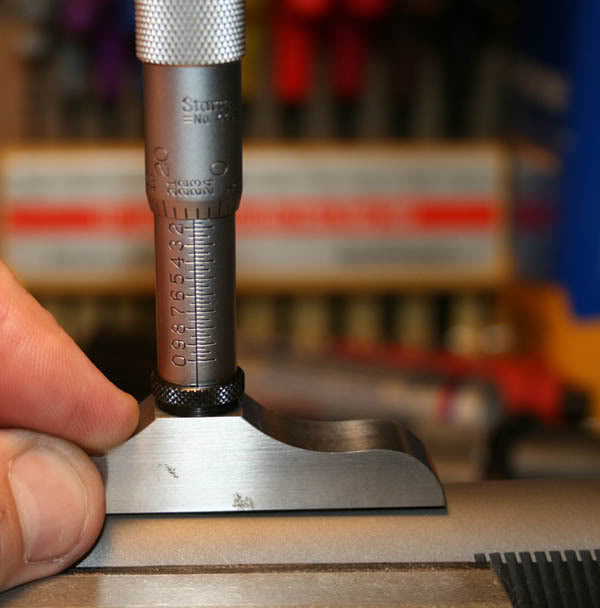
Hood / slide dimensions:
A little filing later:
It fits a lot closer than it looks.
I will open the fit up when I set the lug spacing & headspace later.
I ordered some Cerrosafe to cast the slide lugs, so I will adjust the barrel lugs later. I don't have a lot of adjustment, but I got a little.
I need to spend a minute talking about tools. Everybody knows about files and what not, so I'm not gonna spend any time on those.
However, I had to use a "barrel alignment" tool on this (and other) step. I got mine from Brownells, and it is critical to keeping the barrel centered and straight in the slide.
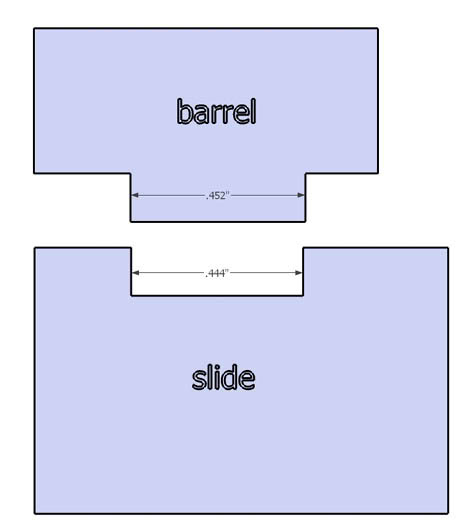
I fit the busing next, and it was simply a matter of filing and sanding the bushing on a lathe until it fit the slide. I am using the Briley bushing because I like the thought of a absolutly zero bind system. This may be a waste of money, but, heck, it's MY money.
I bought the oversized bushing, fitting mandrel, and a .581" ring.
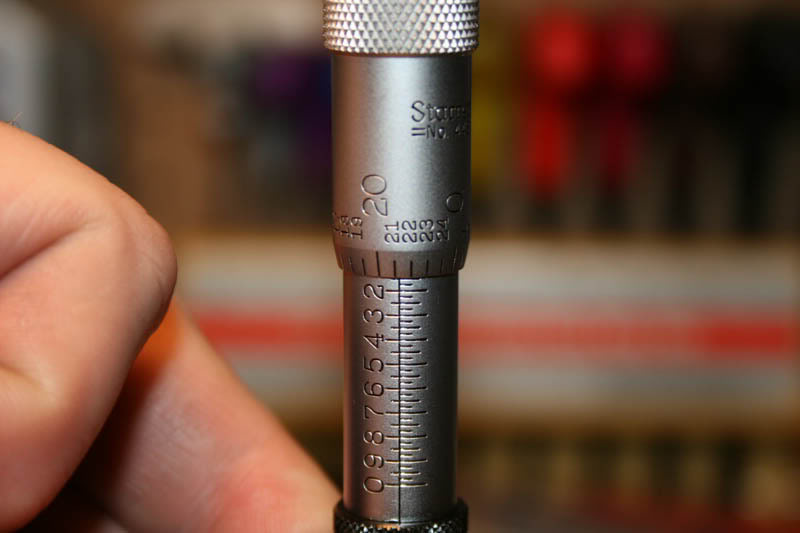
Next step was to get the lockup. This was when there was no memory card in the camera, but it was a lot of "mark the barrel, insert into slide, tap lightly, remove barrel, gently file shiny marks, repeat".
I finished w/ about .052" lockup
Out of lockup:
In lockup:
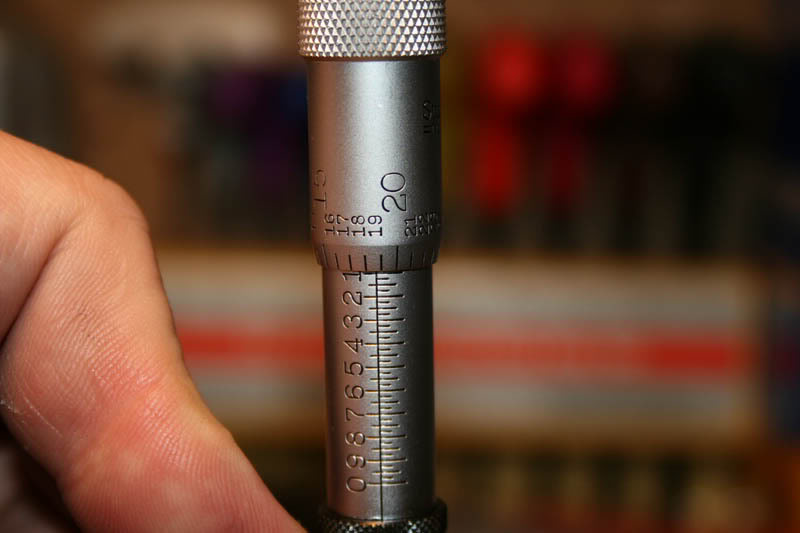
As you can see, can't get it any higher.
All you need to do is get over the fear of messing up. Accept that you will ruin the frame and will have to buy another one, and that will free you to get started.
That's what I always do. I fully expected to ruin this barrel while fitting it. I was mentally prepared to order another one if I had to.
Quote:
My biggest problem is that I'm my own worst critic and I don't wish to mess
up that bad. (and I would) It would bug me for way too long.
I learned this from my father who spent many years owning his own custom cabinet shop.
1.You will mess up.
2. Nobody is perfect. Accept your mistakes, try to not make the same ones again.
3. You will ALWAYS be your own worst critic. Nobody will even see the little things that will bug the stuffing out of you.
Heck, if you don't like the finished product, sell it and start over.
All you gotta do is accept that 1. mistakes will be made, 2. money will be spent, 3. time will be wasted.
If nobody will fire you for #1, and #'s 2 & 3 are your own, heck, it's all good!
Part 5: Don't ruin it now
Or: "I sure wish I had a 3/16" round file, oh wait, a 5/32" chainsaw file is pretty close"
Fitting the bottom lugs.
First thing I needed was these two tools: the barrel alignment block, and the barrel holder tool thingy (I don't know what it's called)
Next was the Brownels handy-dandy super manual lug cutting kit.
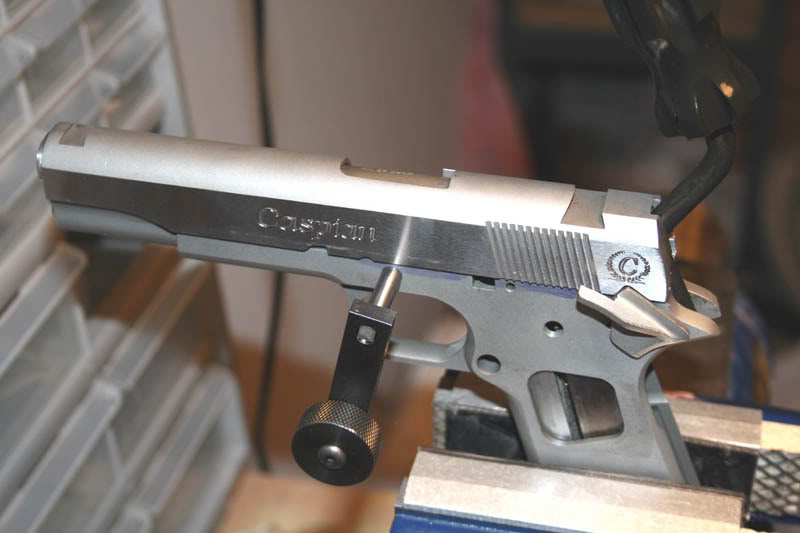
You gotta watch out for this:
Cut the lugs until the slide and safety meet.
Don't worry about the rear of the slide to frame fit.
Next was measure and install the link (#5 .288"), fit the slide stop pin, and put it all together.
Measuring the lockup now: seems to have lost about .001"
It appears to lock and unlock correctly, rightsideup and upside down. The barrel does not push down to the frame saddle, so I don't think it is riding the link. I need to get some wire feeler gauges, but visually, unlocking looks good.
I haven't checked the VIS yet, but so far-y so good-y.
Probably won't have a major update until next weekend. Hopefully I will get the mainspring housing (bobtail style) and beavertail fit by then.
Quote:
I belive you most of the hard parts whooped
Let's not be too hasty... I have some major issues yet to solve.
I'm going to Cerrosafe cast the slide lugs tonight to check the lug spacing.
That is going to determine how long this pistol will last.
After that, I still have to get the barrel to fall far enough to clear the slide. That will be a big challenge I'm afraid.
I also ordered the wrong beavertail safety, so more $$$$ and time have been wasted.
I sure wish that there was a store you could go into and look at all these different parts before you buy them... I need a Wilson/Ed Brown/EGW factory outlet in Denver.
I had good luck with my build years ago, and I didn't EVEN know what I was doing! You should have much better luck. One thought; do what Kuhnhausen says when first doing a test-fire - only load 1-2 rounds at a time until it proves itself. I had hammer follow-thru when the slide went down - thankfully it was empty! That told me that I was no expert on fitting hammer & sear... Good luck!
Part 6: Fitting the barrel.
Or: "It's the last .001" that kills ya"
I spent MANY hours getting the barrel to drop far enough to clear the slide.
I had to file the "bowtie" completely off the frame and then file some more to get the VIS (Vertical Impact Surface) moved far enough back to get clearance.
This picture is looking down and slightly backwards on the frame.
The VIS is outlined in red-ish color.
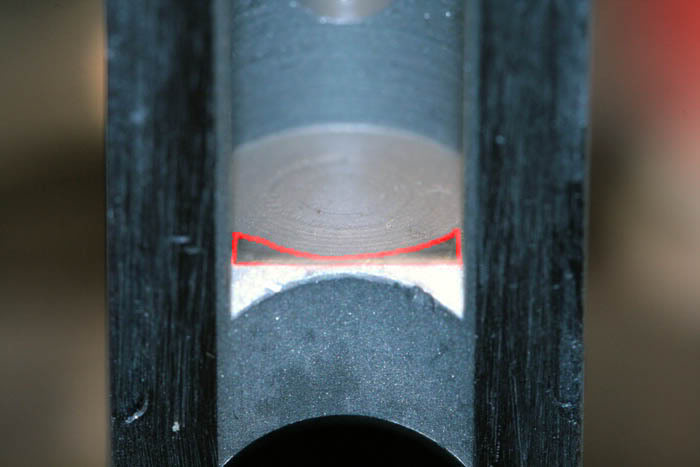
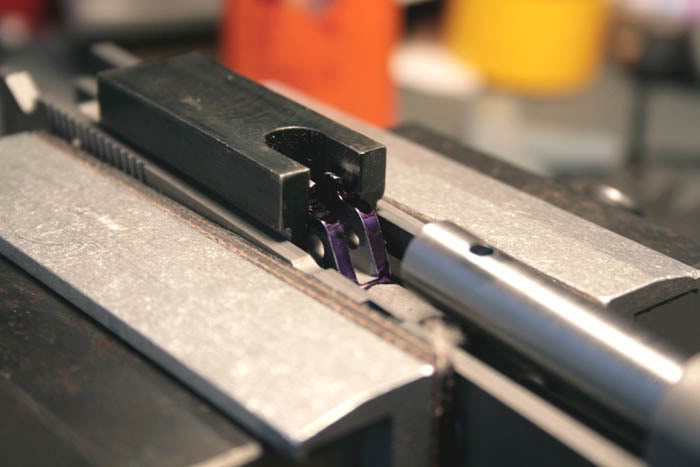
Following the Schuemann directions, I used a spring to push the barrel up while I held it back against the VIS to check for barrel drop...
My handy-dandy test spring (a few coils from an old action / recoil spring),
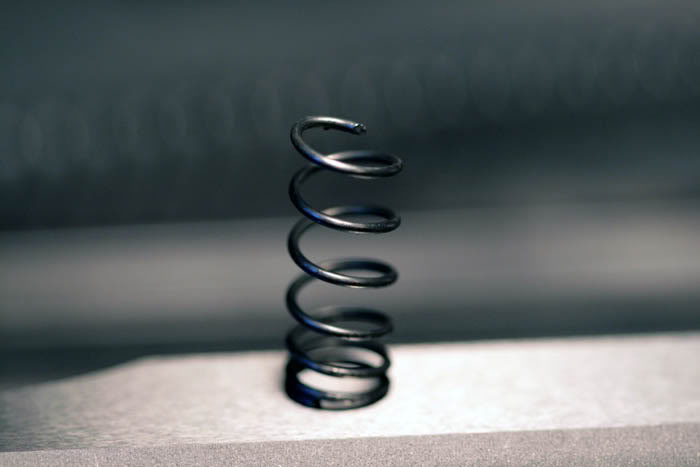
I determined that drop clearance was no good.
![]()
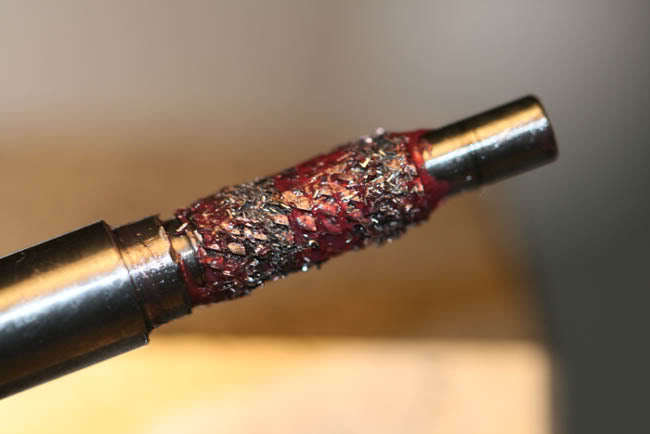
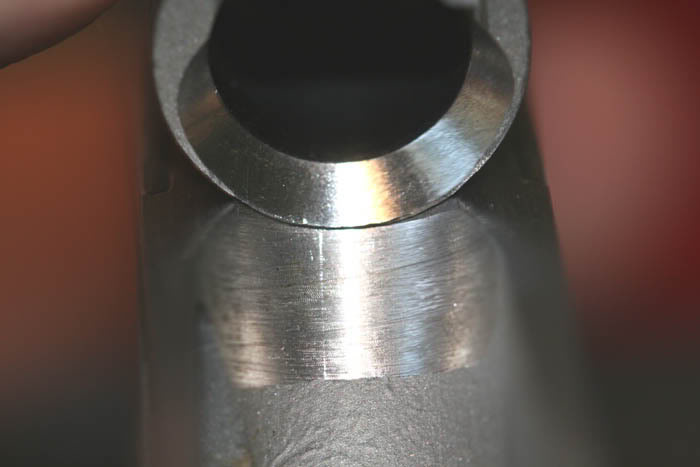
After filing the VIS bowtie flat, and then a little more, (and a few thou's off the barrel feet), I managed to wrangle about .0095" (or so) drop clearance.
![]()
I was sure to keep the barrel and VIS contact good by using machinist blue, and racking the slide with vigor.
http://forum.m1911.org/showthread.php?t=26615
With moving the VIS back, now I ran into improper barrel/frame gap.
This had to be cured, so out came the file, sandpaper, and Dremel (for final polishing only! ...well, maybe a little cutting too).
I was VERY careful to only file the bottom of the barrel ramp, steepening it, but not shortening it (chamber-wise). I also gave it a little bit of "ramp" at the chamber mouth to allow clearance of the cartridge (thanks go to 1911Tuner for the clarification of the proper function of that radius).
Part 6 continued.
Last night I was fitting the beavertail (a slow tedious process), and I decided to see if this thing would feed rounds.
No go. Hard three point jam (stem bind) using "hardball" type reloads.
Colt OEM Checkmate 7 round magazine from Brownells. No extractor.
Brass marks on the very top of the frame ramp, right in the middle of the barrel "ramp" and at the rollover point into the chamber.
I only had one round loaded in mag.
Chamber checked for length, go gauge will go into lockup, no-go will not.
As I was looking the parts over, contemplating throwing everything into the scrap pile, giving all my possessions away and stripping naked to wander the streets as a raving lunatic, I discovered that the barrel would not drop any more because it is riding the inside of the slide...
Soooooo I was thinking, if I relieved that point of contact, dropped the frame saddle, and changed to the next shorter barrel link, that these steps would give me more barrel / slide drop clearance, drop the barrel faster, and give me a straighter shot into the chamber.
I will sit down this evening and do some measurements to try to figure out what is out of spec (if anything) and proceed from there.
Am I on the right track, or hunting blindly?
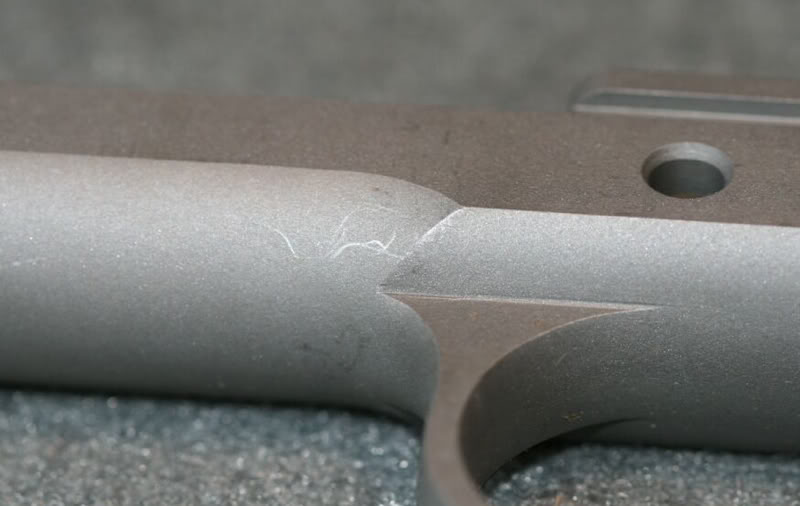
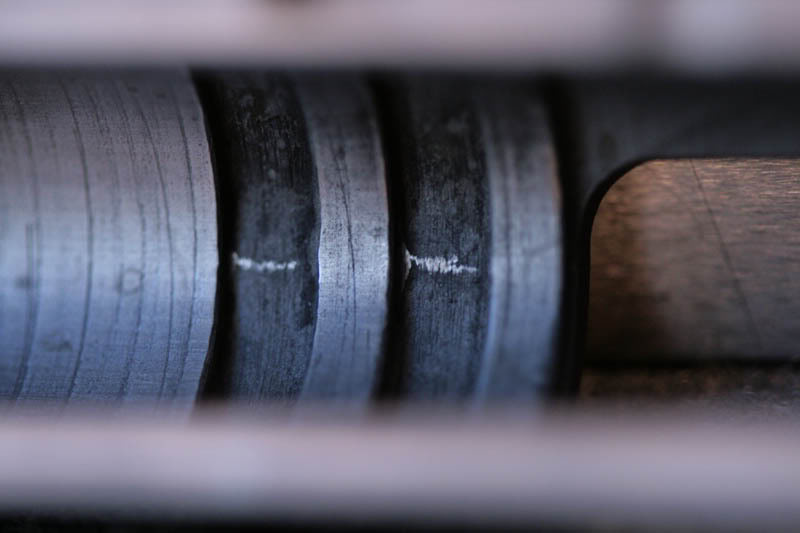
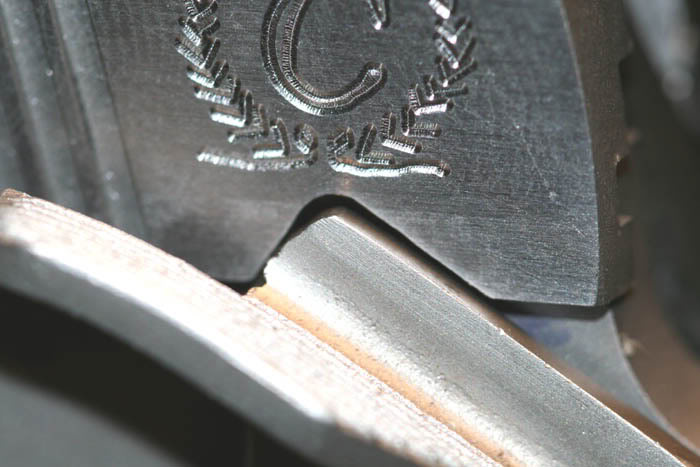
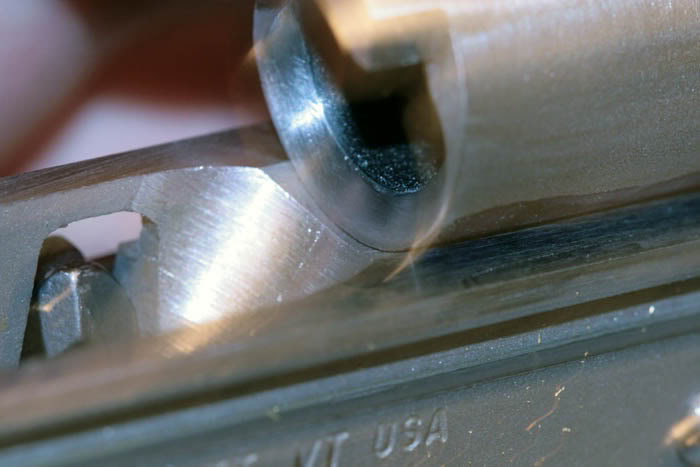
A CLEW!
Very sharp crease, I'm thinking I need to roll the barrel ramp a *little* more into the chamber.
Gotta go to work, more later.
Hopefully somebody will chime in here with advice? Anybody? Hello?
Clue: brass marks at the middle of the barrel's ramp: That means the feeding round is pushing the barrel forward and up, thus creating the 3-point jam. The round should barely touch the barrel's ramp on its top edge. Actually, the barrel's ramp is not a ramp, but a clearance cut, so that the round can skip it and go (almsot) directly in the chamber.
Solution? I would wait until Tuner jumps in, I think you need to move the barrel's ramp a little forward. That's something drastic, and I do not feel very confident in suggesting it. Tuner is much more experienced than me on these matters, so wait for him. Another thought is to lower the frame's bed a little more, but as I said, I am not a gunsmith (nor an armorer).
Quote:
Solution? I would wait until Tuner jumps in
That's the plan at this point.
First step will be take some measurements to try to determine what is wrong.
Second step will be to ease the barrel ramp (the clearance radius at the very top corner).
Third to that will be a cleaning up of the frame ramp and breach face to give them a little less friction (not a polish, just enough to smooth the high spots).
These three steps will be basic, "finishing" type steps. However, I'm pretty sure that they will not cure this 3-point jam issue.
Does anybody know what that clearance radius should be? I don't see that called out on the blueprints from the tech section.
Do not polish anything until Tuner is around, you frame ramp looks fine. You can make things worst if you polish the feed ramp.
Tuner is the expert, but I have an idea.. Did you bevel the lower edges of the hood? That crease could be the brass hitting lower rear edge of hood; (it's in the Kuhnhausen book). But it still seems like something else is wrong, too
I had missed that post about filing off the VIS. I sincerely hope that you haven't ruined your frame.
Quote:
Did you bevel the lower edges of the hood?That crease could be the brass
hitting lower rear edge of hood;(it's in the Kuhnhausen book).But, it still
seems like something else is wrong,too.
Nope, that mark is from hitting the ledge at the chamber mouth. I was marking the top of the round as it was in the mag.
Quote:
I had missed that post about filing off the VIS. I sincerely hope that you
haven't ruined your frame.
I don't think so. I just took the VIS back a few thou's to get better barrel drop. It's hard to take of too much using only a file (no power tools for that!)
I *slightly* eased the radius at the mouth last night. It appears to be feeding correctly now. I will have to test it under power, but I'm 90% sure that is the issue.
I found the correct radius for that clearance cut, FYI it is .02". I haven't dug out the radius gauges yet, but I'm pretty sure that I am close to that dimension now.
I hope to get live rounds out of it this weekend before I put the finish on it, but that may be optimistic.
Quote:
What kind of finish are you going to go with?
Manganese phosphate parkerizing w/ Dura Coat top layer. I figure that will be "bullet-proof" for a carry gun. (I HATE hard chrome)
John nailed this one... again. (He's gettin' pretty good at this.)
When you re-established the correct gap at the barrel ramp and blended it at the bottom... you left the ramp in the way of the bullet. Remember... the whole ramp should be a clearance. The bullet nose misses the bottom of the ramp... but the top is still takin' a hit. Wham. 3-Point Jam. A hard one, by the looks of it.
So, you'll have to recontour the angle and lose a little case head support. With a good quality, fit-required barrel, it shouldn't be an issue as long as you don't go too far with it. Because of the relatvely low working pressures, the .45 ACP is pretty forgiving of a little indiscrepancy there... but take it slow because it does have its limits, generous though they may be.
But first! Check the frame ramp angle to see that it's within proper spec. 31-31.5 degrees is what you want it to be. You can get away with 30.5 degrees with a little barrel adjustment but you may be forced into using a tapered-lip magazine design such as the CMI "Hybrid" 7-rounder. The Tripp Cobra is also showing great promise in compensating for bad frame ramp geometry, so that's also an option.
You also may find that taking a few thousandths out of the barrel bed to get the barrel to sit lower in the frame during the feed is necessary. Easy does it there. .003-.005 inch is about as far as you can go. You can also take an additional like amount from the bottom of the barrel radius behind the lower lug. I prefer to take the bare minimum from both areas instead of all that's needed from just one.
Johnny, I thought about letting the barrel drop a little more, but if the top of the barrel ramp is in the round's path lowering the barrel without recontouring that ramp, may make things worst. The barrel is not dropping down parallel to its axis, so if you allow it to drop down more, it may cause the top of the ramp get more in the way of the feeding round. Or is that difference negligible?
Quote:
The barrel is not dropping down parallel to its axis, so if you allow it to
drop down more, it may cause the top of the ramp get more in the way of the
feeding round. Or is that difference negligible?
Correct, but once in a while, I've found that... after moving the ramp forward all that I dare... the round still taps the ramp just below the corner. The gun feeds well, but it does it with that "Ka-Chunk" that drives me up the wall and 'round the bend. Lowering the bed to drop the barrel is normally the last thing on the tweak list.
Ka-Chunk... even in a pistol that's reliable... means that the bullet is being set back... the lug corners are takin' a hit, and that eventually... it'll cause a RTB issue. Maybe not today, and maybe not tomorrow... but one day for sure.
Okay... I was in a little rush on that last post, so I thought I'd come back and expound a little on ramp geometry fine-tweakin'.
The barrel to bed relationship is of less consequence than the barrel to magazine relationship. As long as the corner at the top of the ramp is clean and well-defined... when the bullet nose glances off and up... it's started in the right direction. This, assuming of course, that the frame ramp angle is good. If it begins in the correct orientation... it'll follow that path. The trouble comes when the corner is rolled or radiused, and lets the bullet nose follow the radius and straight onto the barrel ramp.
Removing a few thousandths from the bottom of the barrel changes the ramp to ramp geometry, and lowers the top of the barrel ramp in relation to the corner of the feed ramp.
I have checked the ramp, and it is in spec. (I used a machinist protractor).
I plan on using the Colt OEM 7rd from Checkmate. I bought them from Brownells, I believe you have said in the past that these are the correct "hybrid" design.
Quote:
So, you'll have to recontour the angle and lose a little case head support.
With a good quality, fit-required barrel, it shouldn't be an issue as long as
you don't go too far with it.
I suspect will have to move it further forwards as you suggest. Test feeding from slide lock w/ no extractor still gives a mark in the middle of the barrel "ramp". From looking at fed rounds, it appears the round is making contact with the frame and barrel ramps simultaneously, leading me to suspect the barrel should be moved forward. But more contemplation on that before cutting.
Quote:
The trouble comes when the corner is rolled or radiused, and lets the
bullet nose follow the radius and straight onto the barrel ramp.
Nope, sharp as a knife.
Quote:
The gun feeds well, but it does it with that "Ka-Chunk" that drives me up
the wall and 'round the bend.
It does have a "ka-chunk", (but not as bad as my Kimber). I want to get that "swoosh" sound you have described.
This will all wait until I test it under power, hopefully sometime this week.
Part 7: It's Dremel time!
Or: "Now I know why custom pistols cost $4,000"
Last week I started to fit the bobtail housing. My vertical mill is in pieces, so this had to be done on a drill press. Setting up the jig the first time was hair raising , but the second time was easy-peesy.
Don't even think about trying this without centerdrills and a good quality drill set.

Like my housing pin?
centerdrilling.jpg">
Should have used some cutting oil....
Dremel w/ cutoff wheel.
Frame and bobtail blended. (by hand)
Part 7 continued
Or: "I'm really getting bored with this"
Fitting the beavertail safety is a long, and time consuming process. I figure that I have about 10 hours total in fitting the beavertail, bobtail, and the rear frame to slide fit. Most of that (7 hours maybe) in fitting the bearvertail alone.
FYI, the Ed Brown "Memory Groove" and the Wilson beavertails do not use the same fitting jig (Wilson). I bought the Wilson jig for the Norinco (see page one), but decided that I liked the Ed Brown better. Problem was, I had cut and rough filed the frame tangs before I checked the Ed Brown. HUGE GAPS.
I had to order another Wilson Beavertail to fit the already cut frame.
Lesson learned: order the same fitting jig as safety.
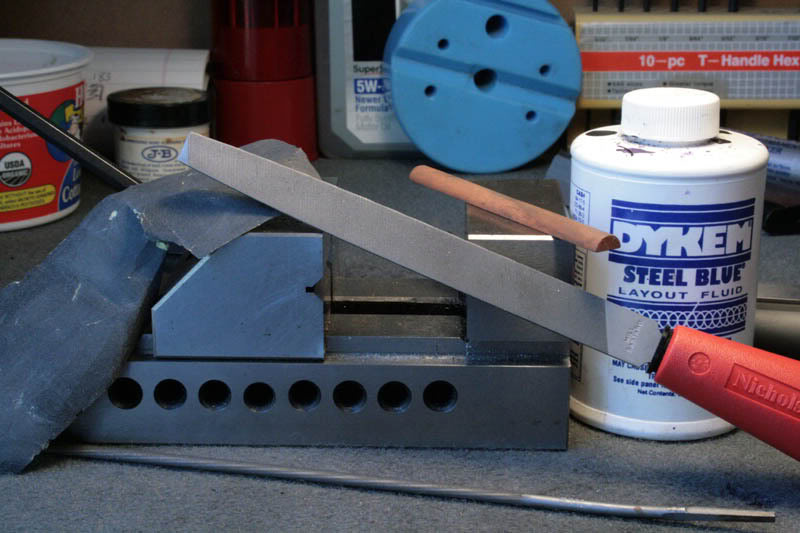
These are the tools I used (plus Dremel for rough cut). Round file, flat file, half round stone, machinist vice, sandpaper, and Dykem blue. (Didn't use the benchblock, it was just in the picture )
Dremel cut:

Filing:
I guess I need to explain this picture. I had to use two safetys because I was creeping up on the final fit. I would mark the frame tangs w/ machinist blue and then wiggled the beavertail to mark the Dykem. But because I couldn't get the safety all the way in, I had to use one from each side, this kept everything square.
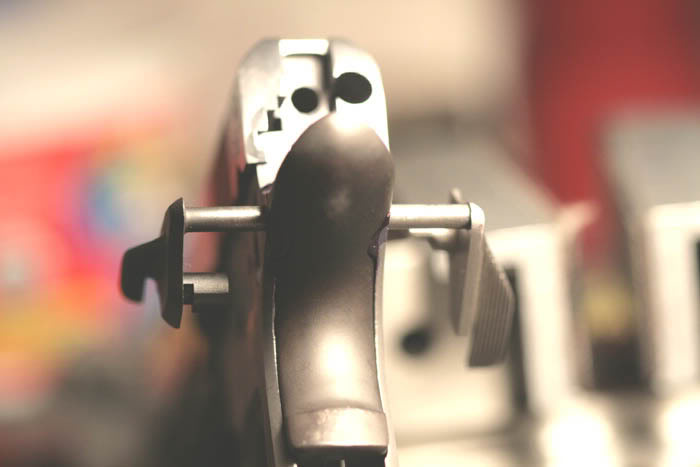
Here you can see the end of the thumb safety. It sure looks like it didn't fill out the mold correctly...
It's a Wilson, and I assume that they use MIM parts. I will probably just take a little off the end, and call it good.
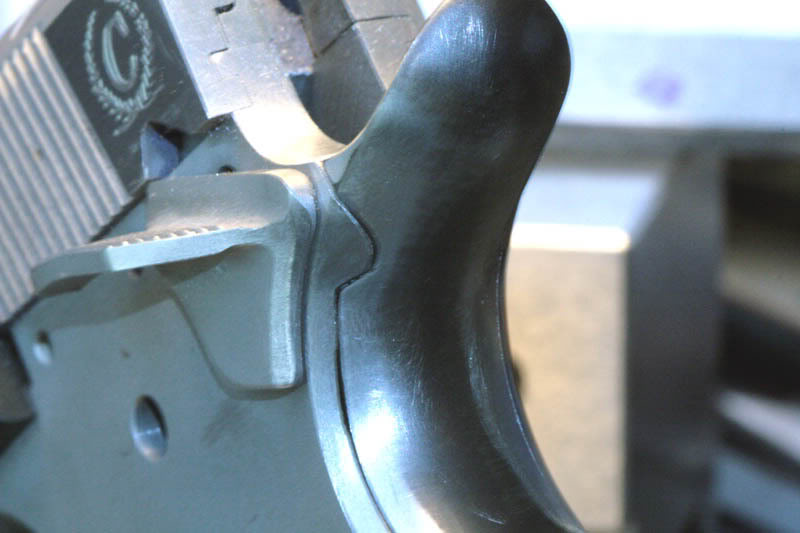
Using this tool I kept the beavertail in the "out / safe" position so I could shape the top frame tangs.

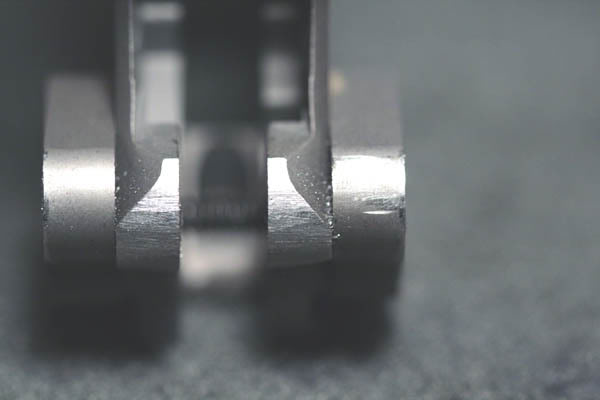
Here you can see the beavertail final fit, as well as the fitted extractor (oversize EGW) and the final frame to slide fit.
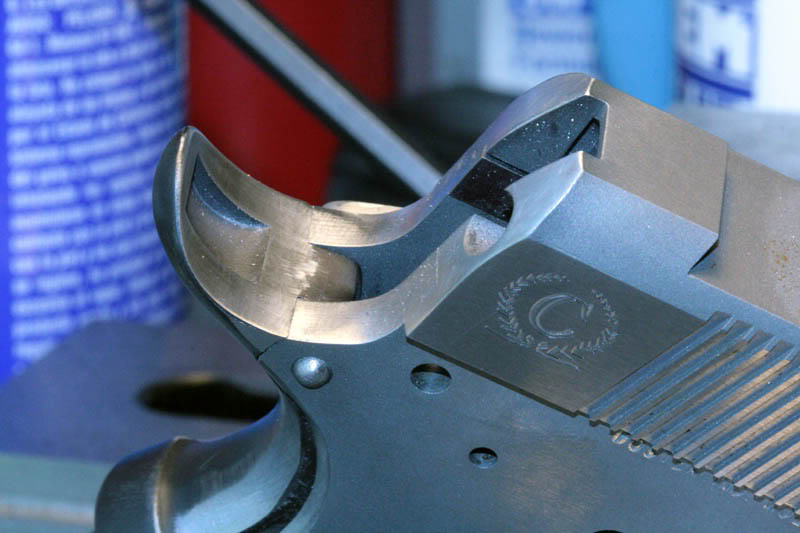
I then held the safety in the "firing" position, and fit the bottom to the frame.
If you look close, you can make out the trigger track in the frame.
Quote:
Sorry you had to find out the hard way that Brown and Wilson beavertails
don't share the same jig
Meh. I'll get an Ed Brown jig for the other Caspian frame (I got two, remember?). I only lost some time and a little money for shipping to get the new Wilson safety.
Super Fit
What tool did you use to final fit the beavertail to the top of the frame. It looks perfect. Well done.
Quote:
What tool did you use to final fit the beavertail to the top of the
frame.
Dremel to rough shape, 3/32" chainsaw file (it's the only round file I have), half round abrasive stone, 220 grit sandpaper.
Nothing but elbow grease after that.
Quote:
Did you by that BTGS tool from John Harrison, so you could work on it while
it was pushed in/out? How much did it cost?
Yes, bought from Brownells $38.95.
Works great. A real 'smith probably has a home built tool or some other trick for this, but I'm lazy. If I had to build all of the tools that I need, I would pretty soon give up the whole project.
The project has come to another stop (sort of, but that is a last minute suprise for you! )
I just fit the EGW oversize firing pin stop, and discovered that the Caspian slide I have fits 9mm firing pins, not 45.
So I guess I will have to drop another order to Brownells or MidwayUsa for a 9mm firing pin.
I was thinking that I was going to get to live test tomorrow
Sharps4070ss, I've been following your build with a lot of interest as I am considering jumping into a 1911 build myself. I have a few questions, though. Maybe my ignorance will be revealed in my questions, but its worth it if I learn something.
You mentioned that you did not realize until late that Caspian uses 9mm firing pin port sizes in their .45 slides. Does that mean that you did not use a barrel-firing pin port alignment gauge when you fit your barrel for vertical lock-up? I haven't used one, but my guess is that the .45 barrel-firing pin port alignment gauge would not allow the tip to fall into the 9mm firing pin port. Did you consider firing pin port location when you fit your barrel for vertical lock-up? If so, where does you firing pin strike in relation to bore axis?
Now I'm going to post a theory which might really reveal my ignorance. Maybe someone with experience will enlighten me if I'm wrong (likely). I'm thinking that your firing pin port is below your bore axis. I suspect that you didn't consider firing port alignment when you fit the barrel vertically and that's why you ended up with .052" vertical lug engagement. I think if you had, you may have ended up around .045" lug engagement. Now here is where I really go out on a limb. Maybe with less vertical engagement, your barrel would have linked down quicker (because you would have needed a shorter link) and you would not have needed to set back your VIS so much.
OK, let me have it.
Quote:
Does that mean that you did not use a barrel-firing pin port alignment
gauge when you fit your barrel for vertical lock-up?
No I did not.
Quote:
Did you consider firing pin port location when you fit your barrel for
vertical lock-up?
Nope
IMHO vertical lockup is more important than center strike firing pin. A few thou's (in this case .007) lower firing pin strike doesn't bother me a bit.
As long as it hits the primer.
You are correct, I should have checked that, but I'm am taking on faith that everthing will be fine. If not, I'll figure out how to fix it. I can still install a shorter link and recut the barrel bottom feet. Nothing I have done negates that option.
Quote:
Now I'm going to post a theory which might really reveal my ignorance.
Everything you say is true, but more lockup is better IMHO. I only moved the VIS back about .009" MAXIMUM. (maybe .004" of that on the frame).
I have enough material in the barrel to move that ramp forward some if I need to.
It's all good.

The tool to center the barrel and firing pin Has a pin for both sizes of firing pins.
Nitpick Mode On:
There is no vertical lockup. There is vertical engagement. The barrel engages vertically, but locks horizontally.
Nitpick Mode Off:
What locks the barrel horizontally? The end of the Barrel hood plus the sides of the hood? And... what's the difference between lock-up and engagement...?
Quote:
What locks the barrel horizontally?
The breech doesn't lock until the gun is fired. I fought for years tryin' to explain that... and then one fine day, whilst perusing photocopies of Browning's original patents... I found the exact description of when, how, and in what direction it locks.
Before firing, the gun is simply in battery... held there by spring tension, or... if tightly fitted... the wedging action of forcing it into battery against frictional resistance.
Go stand in front of a door that opens away from you. Place your hand against the door, about a foot high and directly above the knob. Push hard... and try to turn the knob.
Quote:
There is no vertical lockup. There is vertical engagement.
Linguistic correction duly noted.
I will banish the term "vertical lockup" forever.
Ahhh... Pretty clever.
The added pressure makes it almost impossible (depending on the skill of your carpenter!) to open the door! The same principal is in play when the pressure from firing the gun are exerted between the barrel and the lugs... correct?
Part 8: Live fire
Or: "Make sure you have 911 on speed dial"
Went to range this morning to function test.
Everything went as hoped.
Nothing blew up, and it fed round nose as well as Speer Gold Dot hollow points without a hickup. (or as Tuner has said "like a turkey, it just gobbled everthing up")
I was getting some brass marks on the barrel ramp, so I steepened it, but didn't move it back into the chamber. I can detect no brass marks after firing this morning.
I will have to strip the gun to make sure there is no lug crashing, but the Schuemann test (hopefully) has shown that will not be a problem.
I swapped the Briley bushing out for an EGW "melt" bushing last night.
The Briley ring was just tight enough that the slide was pulling the barrel into a three point jam when it was RTB'ing.
No pictures of this, it is a pretty simple process. I bought an adjustable reamer. So reaming the ID and turning the OD was pretty straightforward.
This weekend I hope to get the last few things finished (soften the slide edges and shape the bottom of the trigger guard), then sandblast, parkerize, Duracoat, and install sights.
With any luck and some hard work, this project will be completed by Monday (5/12)
Stay tuned for final pictures
Quote:
What/who's parts did you use for the Fire control group?
Cylinder & Slide Tactical II trigger pull kit.
http://www.brownells.com/aspx/NS/st...S&s=12767#12767
It's nice and crisp, and they advertise 4lbs, which I assume is accurate.
The trigger has a nice crisp break. In fact, it feels so nice, I'm not going to worry about "truth in advertising". I don't care if it is 10lbs, I ain't going to adjust it one lick.
I had another thought about this barrel ramp. Because I "steepened" it (made it more vertical), this gun will probably never feed SWC type rounds. (I'm just guessing here)
Frankly I don't care, it seems to take the Speer "flying ashtray" just fine (I stopped at the range again at lunch and shot another three mags). Because this is my carry gun, as long as it swallows those, that will be good enough for me.
If it'll feed the flying ashtray I'd almost be willing to bet it'll feed SWC's so long as you're using the parallel feed lip mags with SWC's.
I'm using the Colt OEM 7rds from Checkmate, everybody calls those the "hybrid" style.
As soon as I get it completely finished, I'll be able to give it a real workout and see what it feeds.
Without a plunger tube, it kind of wears on the thumb to keep the slide stop down and in position. Plus I have to bevel the bottom of the slide on the right side. Because I have such a high grip and fat hands, the slide cuts my thumb when I shoot.
I've heard of the Checkmate hybrid feed lip mags but won't be trying them for myself until I can spare the cash. I found out the hard way for myself that I don't need to use the tapered GI style mags with SWC's.
You're doing a great job on your build, keep us posted.
BTW: I've passed thru Denver a couple of times in past years on my way up to Brenkenridge, that's beautiful country up there.
My unaltered USGI pistols ranging from 1916 production to 1945, and acouple of old Commercial Colts will feed the Speer 200-grain "Flying Ashtray" and the H&G #68 SWC from the USGI or the "Hybrid" lip magazines as readily as they'll feed hardball.
Part 10: Changin' color
Or: "Honey, you still got the number for 911, right?"
Unfortunatly this post is kind of anticlimatic. It was not much work, but a lot of changes.
Last weekend I sandblasted, parkerized, and painted.
I started by giving the gun a through cleaning (remember, I have test fired it).
Next step was a blast of brake cleaner to shoot the gunk out.
Next was a drenching in acetone, then sandblasting.
I then dropped the parts into a bowl of almost boiling water to soak, heat up, and to remove the dust.
Chemicals used:
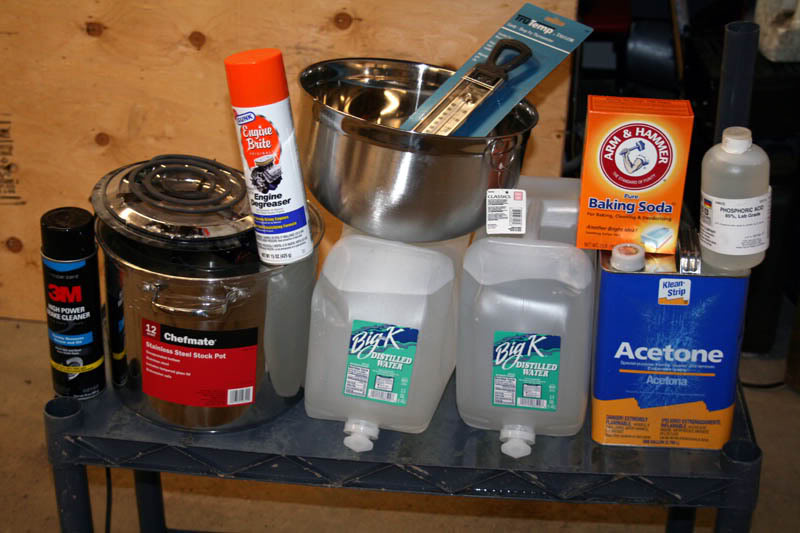
Acid bought from an internet chemical supply house.

Heat the acid, distilled water, and manganese dioxide (bought from a pottery store) to 190F.
Drop in a steel wool biscuit (cleaned in acetone and hot water), insert parts, wait. Any of you who had done this will notice that my reaction is a little too vigorous.
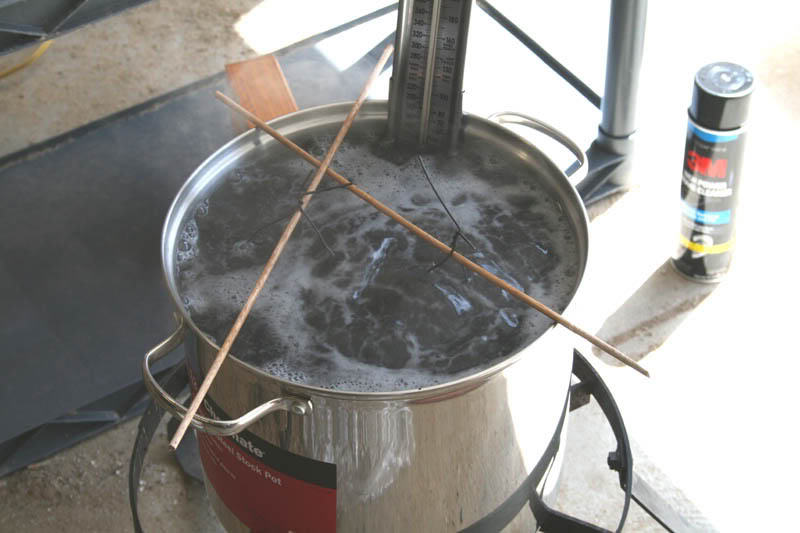
I forgot that the reaction increases in strength the hotter the solution. Long story short, I had TOO MUCH acid in the pot.
I realized this before any parts went in, so I was very carefull to keep constant watch on the process.
It is pretty frightening to drop expensive parts into acid, but ya gotta do what ya gotta do.
After the acid dip, I pulled the parts out and dropped them back into the hot water bath. A quick swish, then out of the water and flooded with acetone. A quick dry, then painted with Gun Coat.
I was in such a hurry, getting the parts out of the acid, rinsed, acetoned, then painted, I took no pictures of these steps.
Quote:
It almost seemed to me that you were making your own park mix (because of
the added steel wool to the boiling mixture)
Yes, I used a "home-brew" parkerizing formula I found online.
24:1 distilled water to phosphoric acid
1/3 cup manganese dioxide
1 steel wool biscuit
Heat water, acid, and manganese to 190° F
Add steel wool, wait until gone, add parts, wait until done, remove and rinse.
Everybody says that this is not as good as a "professional" kit, but since I painted over it anyway, I didn't care if it was slightly blotchy (which it wasn't).
I wanted a rough surface for the paint to grab, so I could have just sandblasted and painted. But since I will be carrying this gun, a coating under the paint will give another layer of protection.
What is the purpose of the steel wool biscuit?
As I understand it (somebody correct me if I'm wrong) the steel wool "activates" the forming of crystals in the acid solution so they can be deposited on the part instead of using the metal from the gun to start the crystals.
From Wikipedia
"Phosphating solutions are based on phosphoric acid, which attacks the
surface of the substrate and caused some of the metal atoms to go into
solution. This neutralizes the acid solution in a thin zone along the metal-
bath interface, resulting in a lower solubility of the metal phosphates and
the subsequent precipitation of them onto the surface of the workpiece by
electrostatic forces."
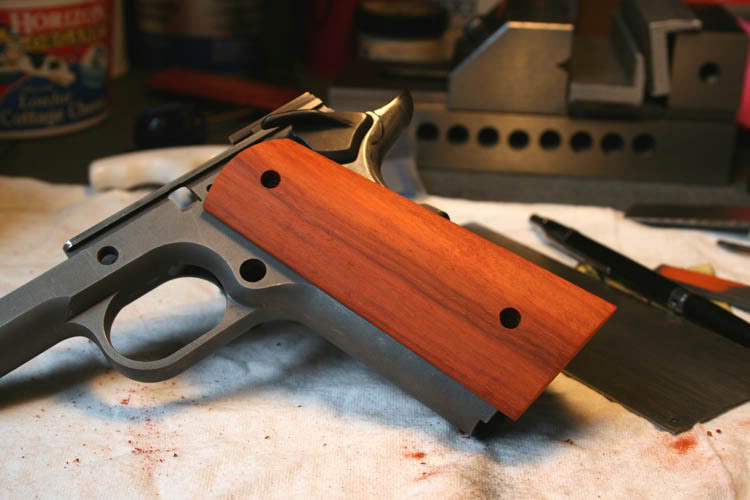
Part 11: Let's get a grip.
My secret suprise for this project has been custom made grips.
I've had a large stack of Padauk in the attic of my garage for about 10 years, waiting it be built into a compound bow case.
Well, I ain't never gonna make that, so I might as well use it for something else. (yes that is snow in the background, we've had 8 inches of snow in the last two days).
![]()
I stuck the grips to the wood with double sided tape.
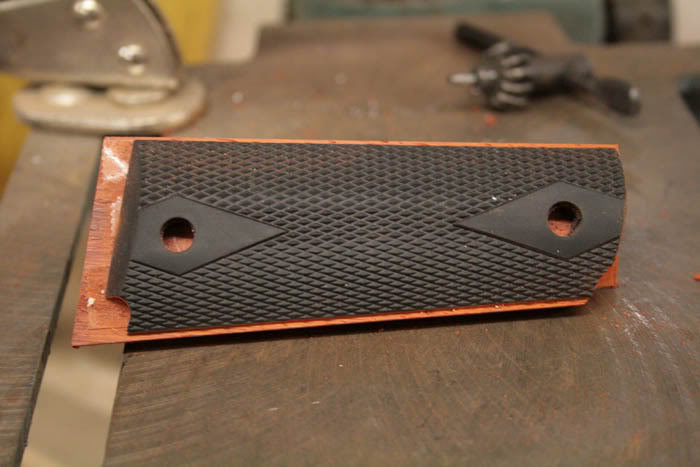
Drilled the holes.
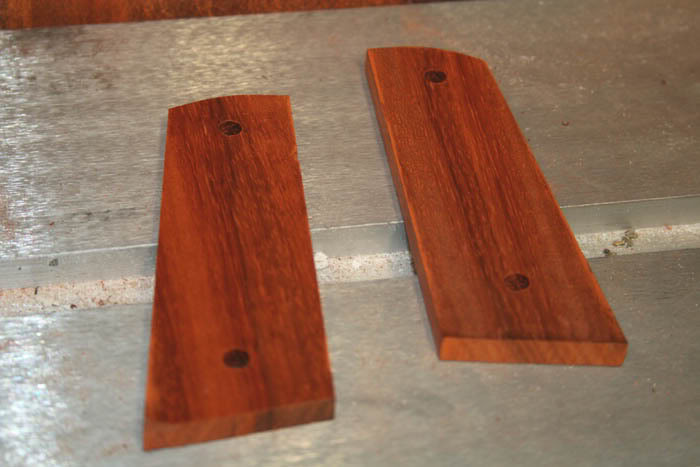
Sanded to shape.

Painstakingly fitted to grip bushings.
Quote:
Do you plan to leave the grips smooth or will you be checkering them?
I tried to checker the first set (firewood now). I can tell that I need a LOT more practice before I can make a set that will be acceptable to me. So for now, smooth.
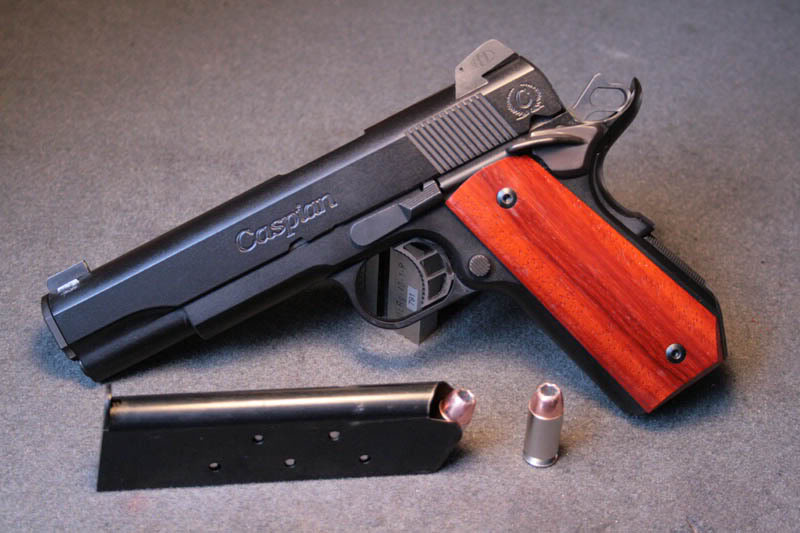
Part 12: Final assembly
Monday saw the grips dried enough (satin polyurethane) to allow final assembly.
Oh, I forgot, I also got the sights installed Sunday (front) and Monday (rear).
Everything went smoothly, even installing the plunger tube was pretty simple. I had to use a drill bit to hand ream the inside of the tube because the plungers wouldn't go in, but other than that, quick and simple.
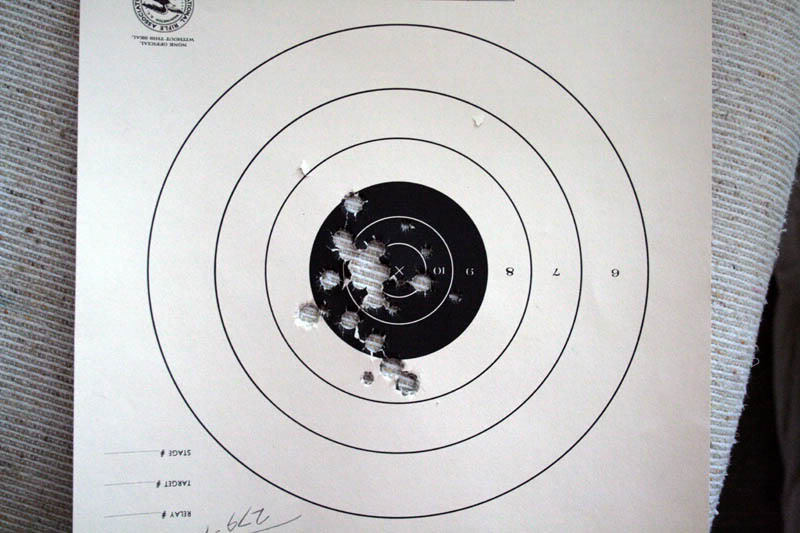
Everybody ready?
Drum roll please...
First target. 15 feet. 7 rounds slow fire. 7 rounds rapid fire. The loose group was me, not the gun.
I have a tendency to look over the sights during rapid fire, so my shots trail downwards.
(This was a used target, hence the .22 holes.)
Up next, tools used, shamefull mistakes, and final thoughts.
Thank you everybody!
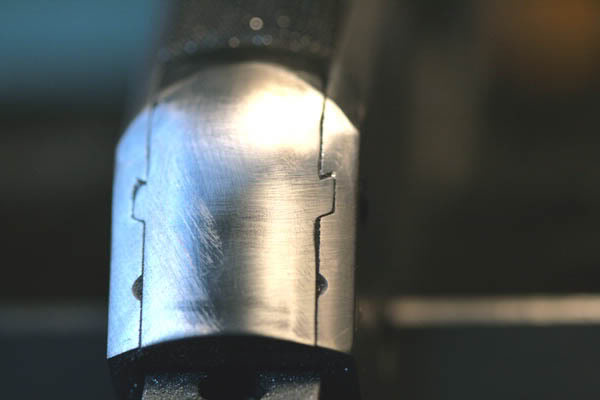
I must admit, it came out nicer than I thought it would. Not perfect, but pretty darn good.
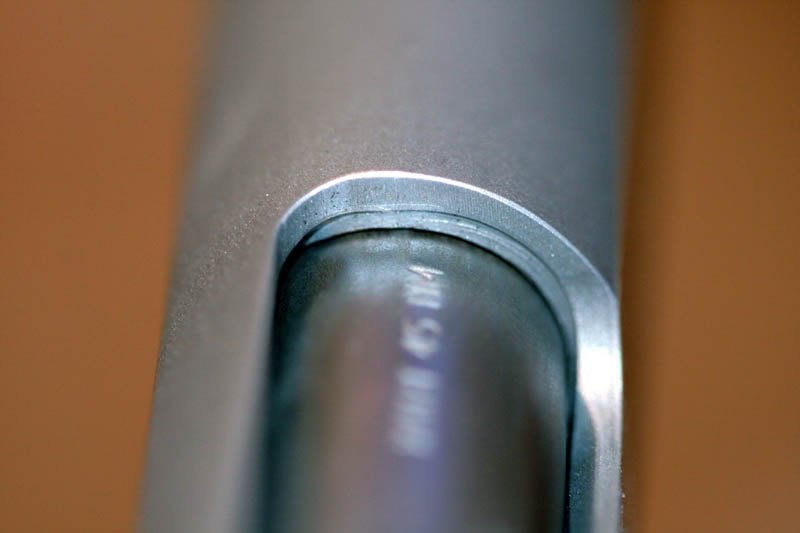
Yes, everybody is correct, it is an EGW "Melt" bushing. I recontoured the front and sides to match the slide.
The small gap you see is from the factory radius on the slide. The bushing is tight to the slide otherwise. I couldn't "square" the face of the slide, because then there would have been a gap between the slide and bushing due to the locking groove.
Now I know why custom pistols cost $3 or $4 thousand. I figure I have about 75 hours in building.
Where I work, my hours are billed at $100/hour. (wish I was PAID that!)
So, 75 hours at $100/hour equals $7,500 labor.
I would like to think I could get about $2,000 out of this if I turned around and sold it tomorrow, so I would only be losing $5,500 (plus parts) in the deal.
I'll spend some time taking pictures of my mistakes and flaws. Then I'll finish up with parts list, tools list, and "what I would do differently".
If you built another 1911 how many hours could you do it? Seems you could knock off quite a few hours becuase of lessons learned. Gotta figure if you do them for a living you'd be turning them out in half the time?
I ain't forget y'all. I been busy.
Competed in my first USPSA match two weekends ago. Won my class (single stack), came in 18th out of 31 overall.
Not too shabby, if I do say so myself.
(I shot my Kimber, that is my competition gun).
That kind of wiped me out that weekend (I got sunburned), then last weekend was Memorial Day.
I've finally gotten around to taking the "oopsie" pictures, so I'll try to get them up this week.
I better get those pictures up soon, before you guys and gals lose all patience with me.
Here's something to keep you off my back
$5.00 daily planner at Harbor Freight
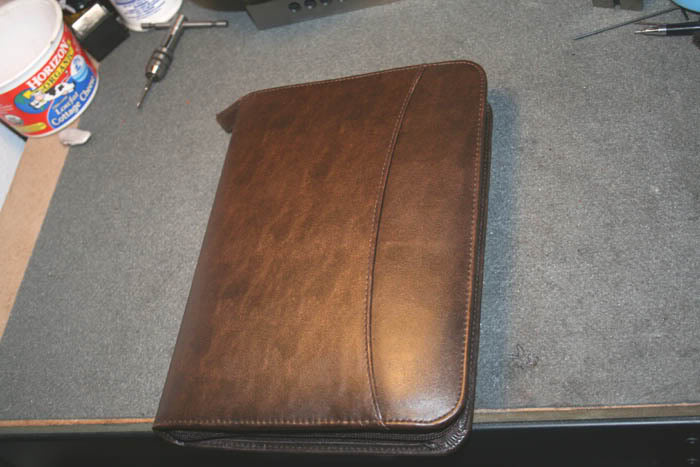
$30.00 foam from McMaster.com
Presto! Something to bring the gun into work without wearing it in the holster.
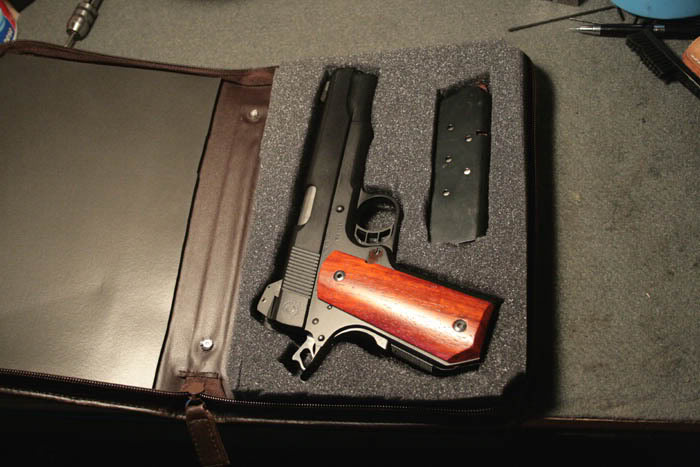
Speaking of holsters...
Milt Sparks "Summer Special"

Quote:
Pretty clever idea, makes your gun look like a Bible!
I couldn't see spending $170 for a Galco thingy.
At $35.00, this will work just as well.
Part 13: Mistakes
Well, time has come to air all of the dirty little secrets.
While this gun came out pretty good, I clearly made some novice errors that showed up in the final product.
One: The one mistake that I kept making throughout was not ordering (or losing) parts. I thought that all the parts were ordered before I started this project, but I still had two shipments of parts overnighted, and one second day air. As you can imagine, this cost me a fortune. I ordered the wrong no-go guage (45GAP), I had to order a new beavertail safety (wilson and ed brown don't use the same frame cut), and the dog stole my ejector. (TRUE!)
Some of this I will chalk up to inexperience (Capsian taking 9mm firing pins), but the 45GAP was my fault pure and simple.
Two: While fitting the slide to the frame, I got a little to file happy and I cut the frame rails more than I wanted to. I actually had to peen the rails to take some of the "slop" back out. Never a fun thing on a brand new frame.
(no pictures)
Three: Also related to frame slide fitting. I got a little too aggressive tapping the slide onto the frame and got it stuck twice. (stuck hard enough that I couldn't tap the slide back off with a soft mallet).
I had to use a punch and a hard hammer. I placed the punch below the firing pin hole, thinking that any damage would be covered by the firing pin stop. Problem was I kind of dinged the firing pin and extractor holes enough that I had to take a round file to remove the burrs at their holes so those parts would fit.
(no pictures)
Four: I put too much acid into the parkerizing solution. I don't think that this affected the project in a negative way, but the reaction was clearly too strong, and I don't think I got a nice parkerizing on the parts. I'm not worried because it is covered by the paint, but if the park was the final finish, I would have been unhappy.
Five: I have some bad spots in the paint because I didn't let the acetone completely dry before spraying. This is on the front above the magwell.
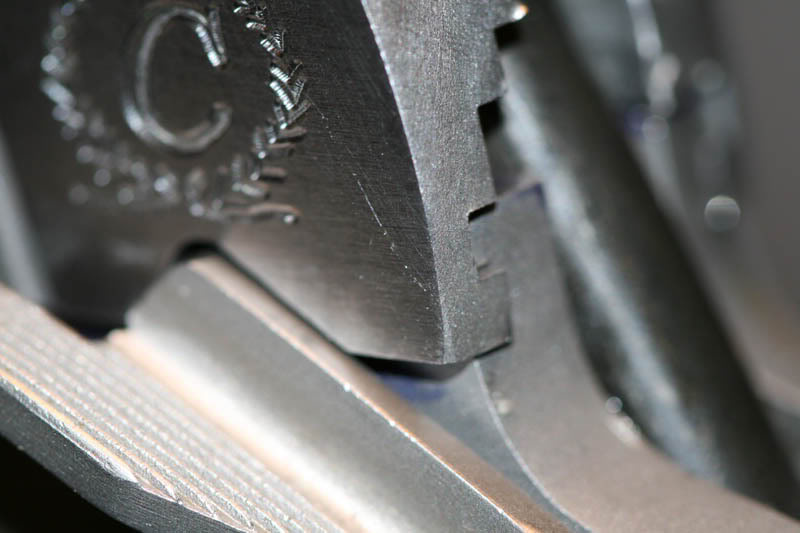
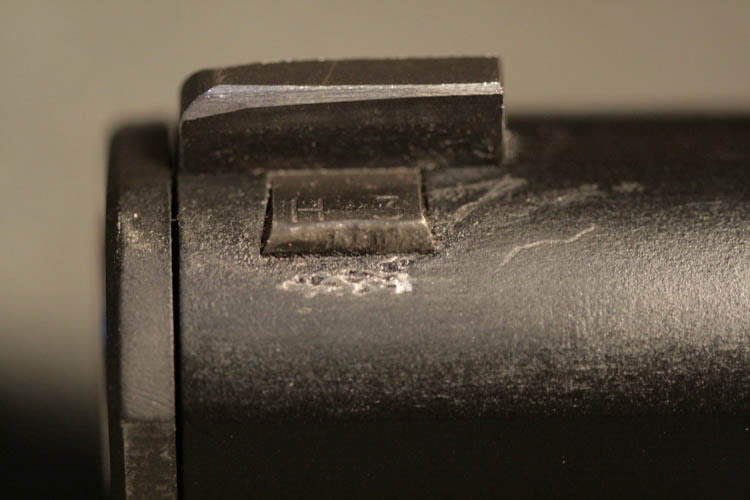
Six: I have some dull spots in the paint. I believe that this was caused by too little paint. I was worried about getting too thick of a coating and causing chipping. You can see that the paint didn't quite "flow" to cover the parkerizing. You can see it right behind the "n" in Caspian.
Seven: I didn't file the slide to match the back of the extractor. I didn't even think about this until final assembly.

Eight: I got a little impatient installing the front sight. I should have taken more time fitting it, but I got it close and drove it in, causing some dings that I'm not proud of.
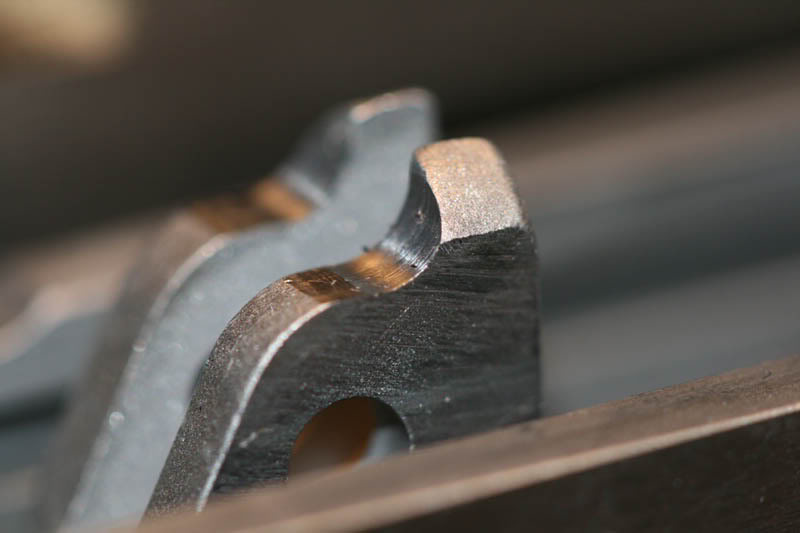
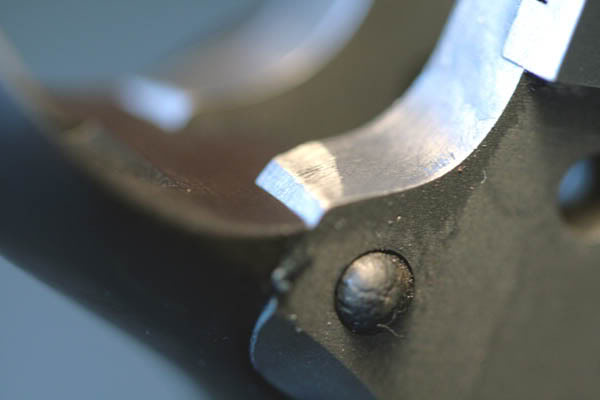
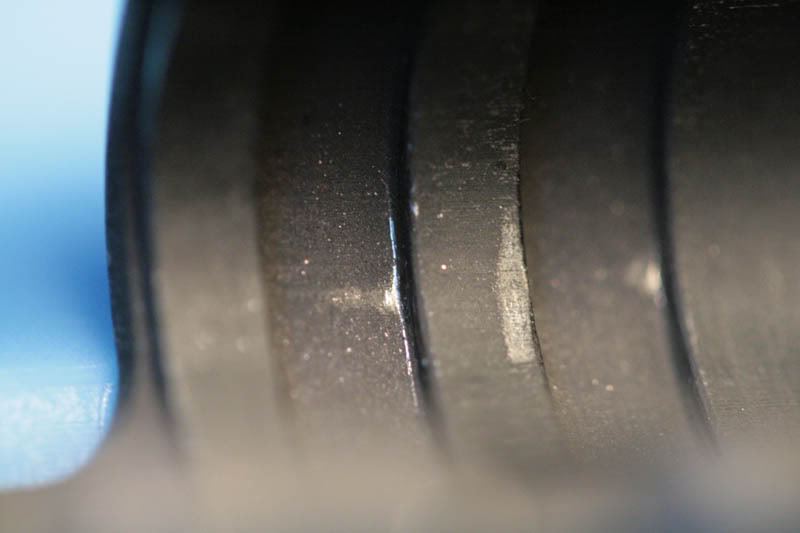
Nine: This is the one that I'm most worried about. Because I have so much vertical engagement, I'm getting a funny peening of the barrel lugs where they are hitting some machining marks in the slide. This I will have to keep an eye on to make sure it doesn't cause problems.

Looking back, I realize that most of these mistakes were caused by my impatience. If I had gone a little slower, most wouldn't have happened. Errors #'s 6,7,& 9 I will put down as no experience, but the others are directly related to getting in a hurry.
To sum it up, I give myself a grade "B" for this project. I clearly could have done better, but I'm happy with the final outcome.
Hopefully sometime today or this coming week I'll post a list of tools that I used.