
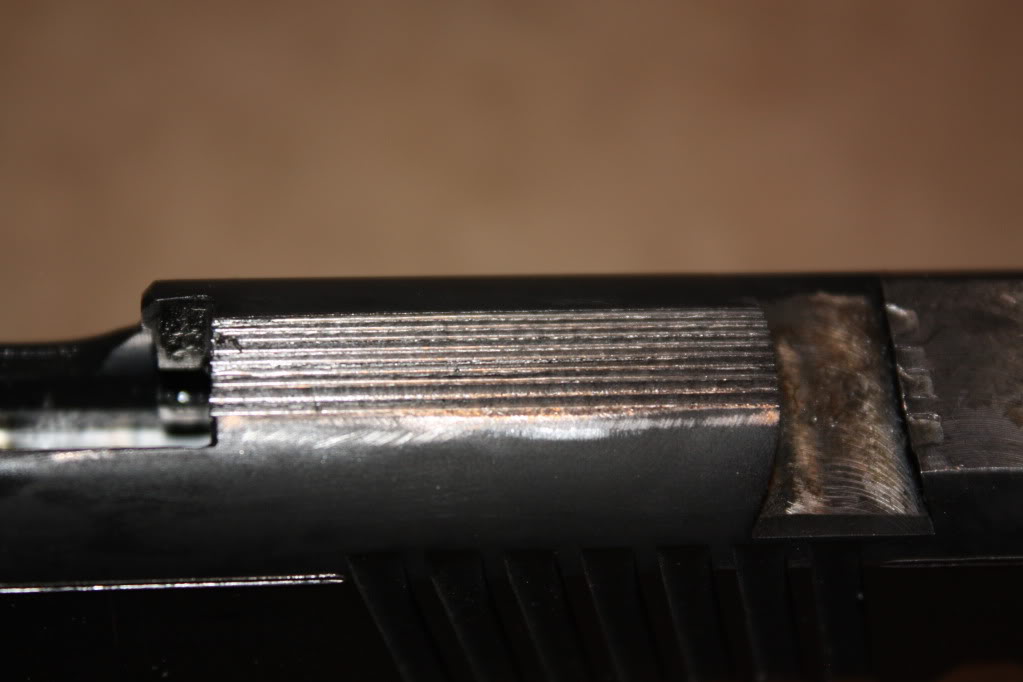
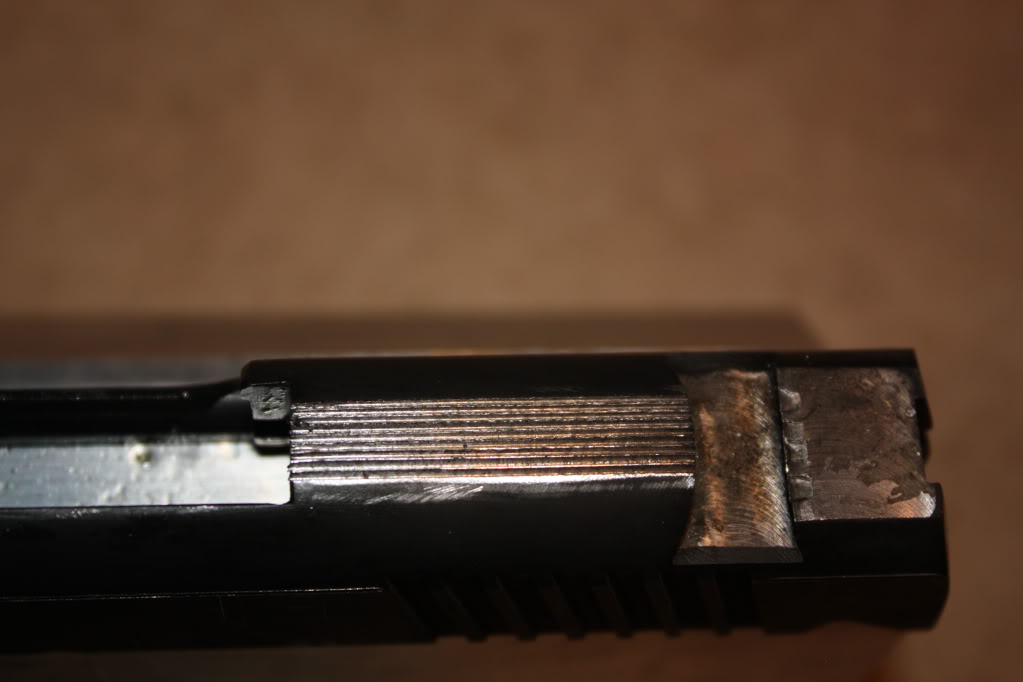
So I am finally making progress on a build that has been in the works for quite some time now. The following are a couple of pics of my first attempt at machining a slide, top serrations and a border cut.
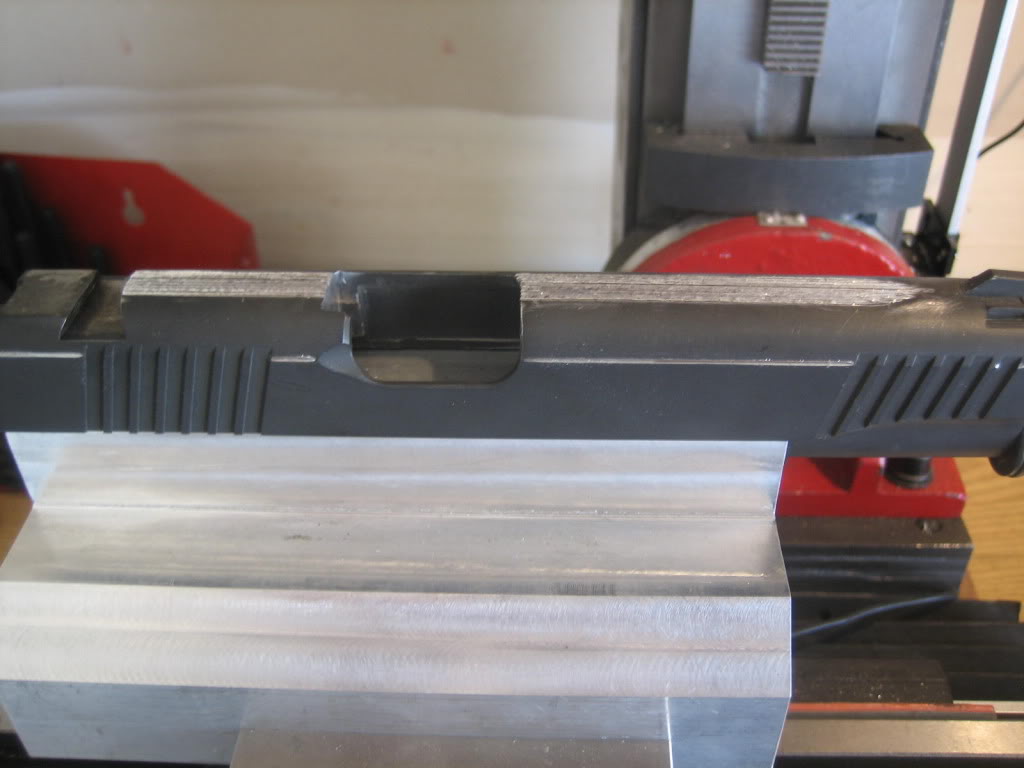
These cuts are before I cleaned them up with a little sandpaper.
The slide is held in my home made modified Yavapai slide jig and the cuts were done with a HSS 60 degree double angle cutter which dulled very quickly. The first couple of cuts came out nice but then it went down hill. the top serrations are pretty rough now but I will have to live with that.
Now for me or anyone else doing this for the first time, how do you keep your tools form dulling so quickly? I was cutting on a mini mill at about 400 rpm and feeding it by hand fairly slowly. What do you guys suggest?
I applaud your efforts. The border cut looks nice and even. Doubt if I can help but it seems like a faster RPM might be better. Do you have a machinists handbook to reference feeds and speeds? Maybe a carbide cutter. I assume you had coolant flowing. Sorry if these comments seem stupid, it's been a while since I did any real machining. I'm sure the pros will be able to help.
No books, I tried to use blindhogg's method as much as I could; I just used a little more RPM and a nice slow feed. The DOC was only .020 and I figured that would have been good.
Looks like you're on the right path. I'm about to do my first, as well, so I am 1) not competent to offer advice, but 2) have a couple of questions - :)
One excellent smith, BTW, did tell he he got five slides from a cutter (@ about $75/per). His mill does have coolant flow, which I assume was used.
Questions:
Did you flat top the slide first? Assuming you did (hard to tell from the photo), where did you stop? By that I mean how far forward did you extend the flat? To the point of the shortest (aft-most or outside) serration? Like your slide, mine too has an existing front sight already cut, so I can't take the flat all the way forward without having to recut the sight dovetail (beyond my capability).
For the french cut, did you hold the cutter at right angles to the side (flat) of the slide, or at some angle?
Looks like a slide from a Springer Loaded (?), but without the billboard. Did you remove the rollmarks? How?
I am anxious to see this when you're finished and for any info or advice the experts might offer
No, I didn't flat top this one first. I thought about it but decided not to.
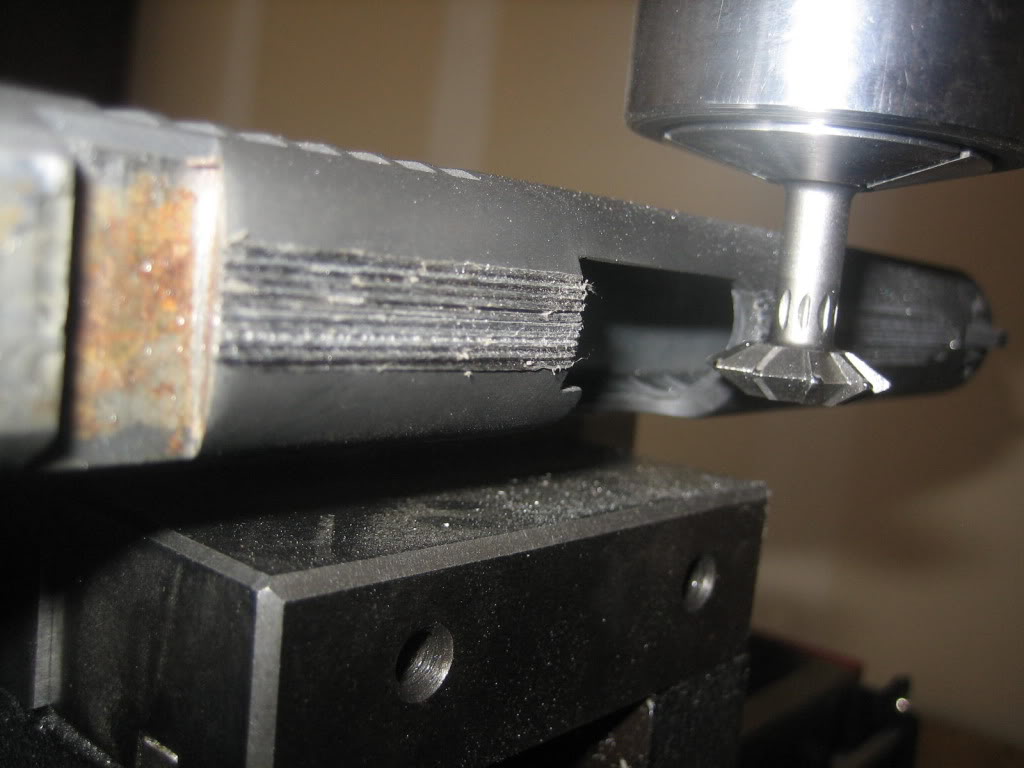
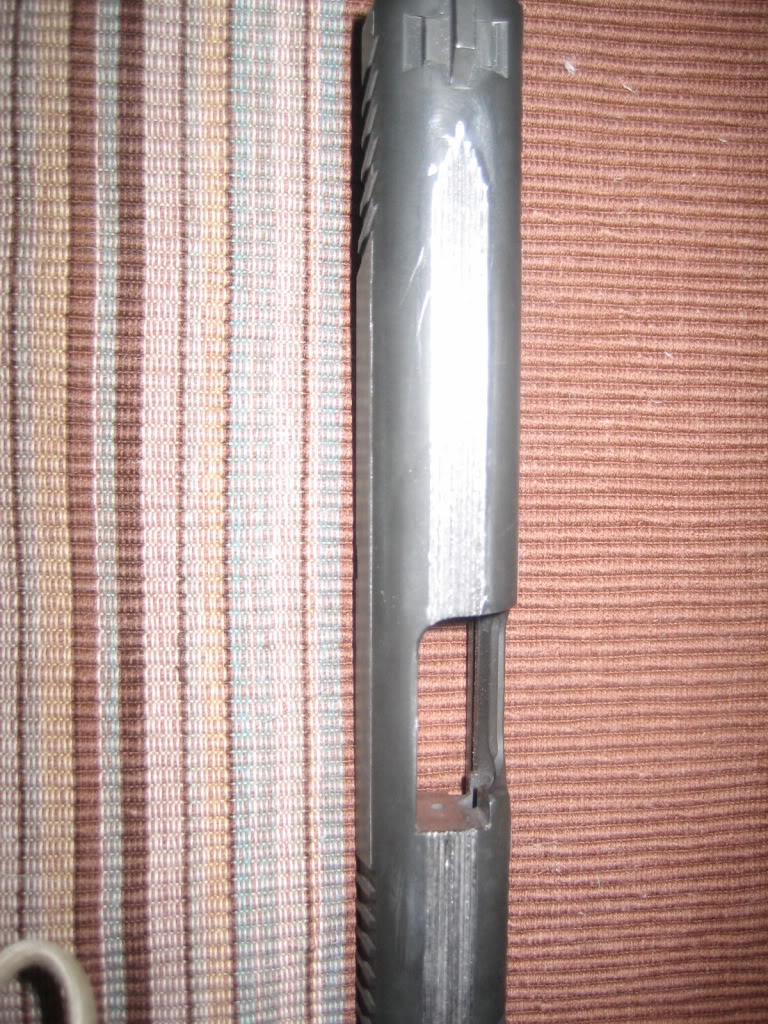
Here are some pics of the setup...
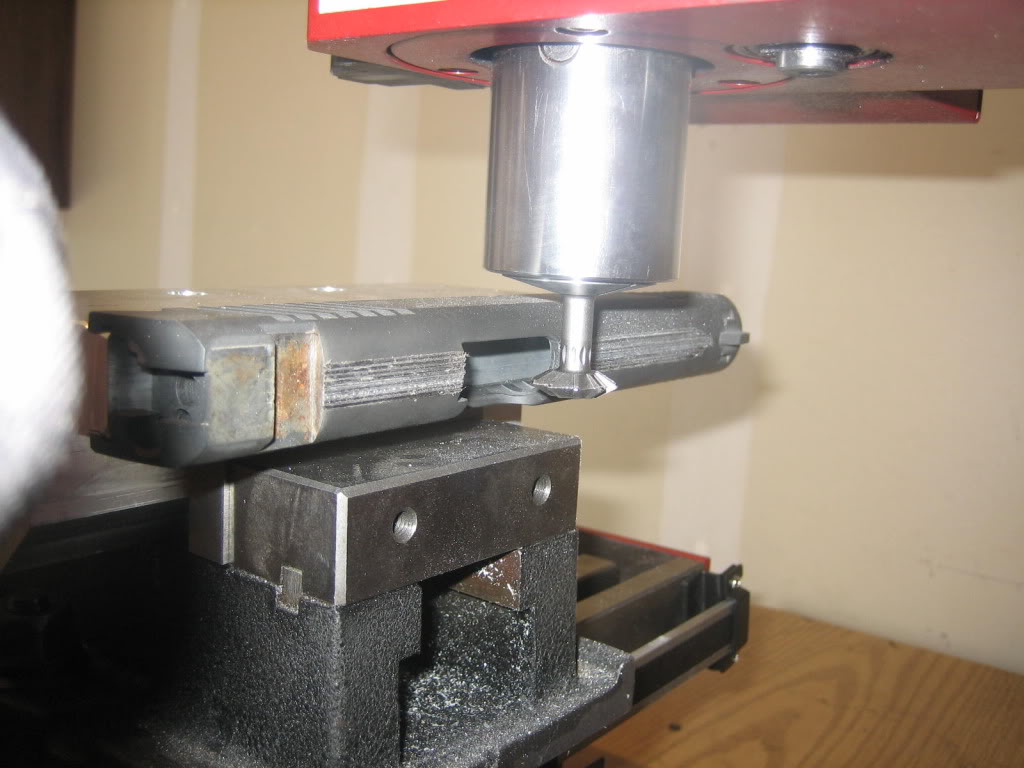
You can see here how rough the cuts are getting already, and you can also see no coolant of any kind (mistake)
The border I did just like the other pics show, straight up. I indexed the flats and made sure the cutter was positioned correctly on the break of the angle the whole way.
The border I am very happy with, that was easy.
The slide I got off of gunbroker and after doing some research I think it is a Sarco slide. It had a pretty ugly breach face that I cleaned up and squared off.
It is already beveled most of the way around and I kind of like the wide serrations.
I have heard 4 to 5 slides out of a cutter too, I got less than 1! :roll: Learn your lessons form me and go slow and use coolant. :oops: Lucky me it was only a $20 cutter, I think I will try carbide next time.
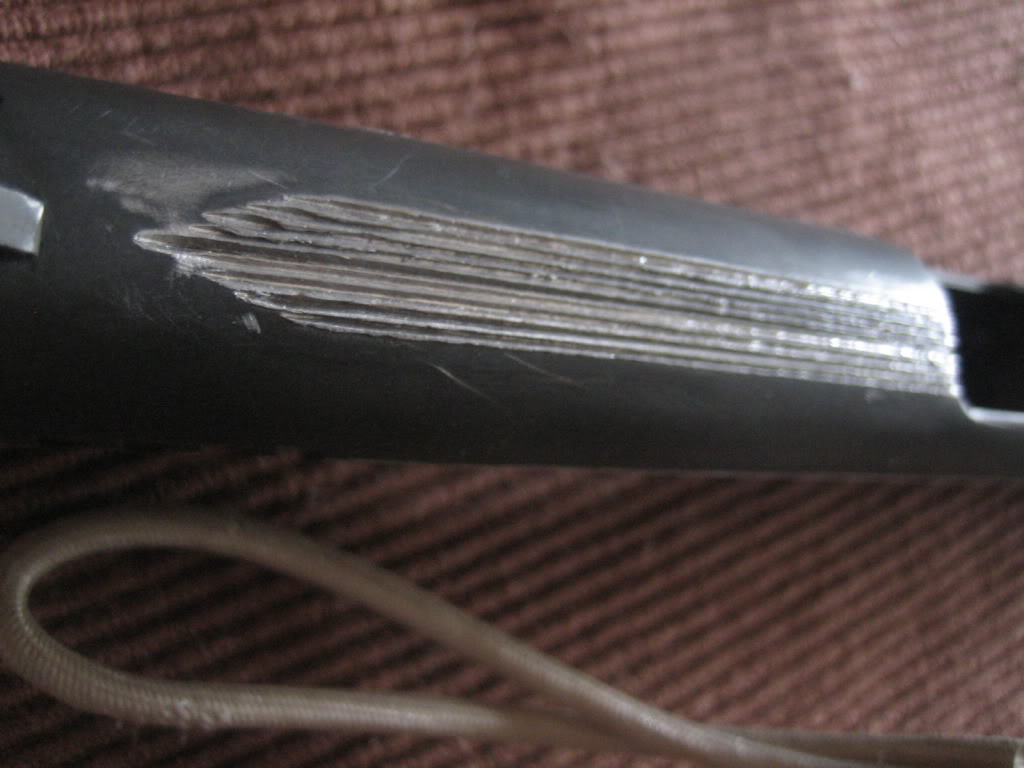
Here is a not so great pic of the after math of the arrow. I need to get some Parkerizing solution and complete this blaster.
I need to get out the wife's DLSR and get some better pics.
Sorry, I posted on another site about this but you did not use the same photos, that cutter looks toasted,the edges are dull and look cooked.
Yes Greg, you are so right. I hated even using it to finish but I couldn't just leave it.
Without flat-topping, and absent some other adjustment, the center cut would be deeper, and wider, that the outer serrations, based on the radius of the slide top. Again, it's a little hard for me to tell from the pictures - how noticeable is this difference?
I've done a couple of practice arrows on aluminum flat stock, but have now come up with some al round of about the appropriate size. I don't have use of a mill for a month or so, but will then try cutting a flat and getting the serrations to match the width :). Your comments prompt me to also try a few cuts on steel, to be sure I have the speed/feed/lube for the desired result before I attack a real slide.
Thanks for sharing your experience and do show us how it turns out.
Too much rpm kills high speed tool steel, and that apparently was too much rpm for that cutter, which at $20 may not have been the best quality. My guess is even with a good amount of flood coolant the cutter would not have completed the job. It is counterintuitive and most people assume more rpm and a slower feed (lighter chip load) is easier on cutters, in fact just the opposite is usually true. If in doubt always go slower on the rpm, especially when using economy high speed steel tools. It is possible to chip or break teeth off of a cutter once the chip load is too high, but you were a ways away from that I think.
To get the most use out of a tool, run the rpm on the moderate side, and feed heavy for the tool size and design. If the tool is not getting burned up or breaking because the rpm or feed rate is excessive, each cut (each revolution) the edge makes wears it about the same, whether it is a heavy or light cut. A lighter feed rate means the tool will have to make more cuts to finish a job. Of course, there are times when the appearance or surface finish of a cut dictates a lighter feed rate.
The tool probably would have done the job if the rpm would have been low enough and it didn't get too hot. Even with flood coolant you can only run so much rpm, most of my machines can pump as much coolant on the cutter as a garden hose would, and too much rpm still kills tools. More often than not, less expensive import cutting tools won't hold up like more expensive cutting tools. Once in a while I will do a job where I don't have the right tool, and if it's a small job and I figure I will not need the tool again, I'll buy a cheaper tool for one use, but for tools that will get used much the more expensive tools are generally cheaper in the long run because of longer life.
Unless I am mistaken, you have a small bench mill, so you will need to usually go light and slow with most cuts, at least compared to a larger floor mill such as a Bridgeport or similar machine. What I said about heavier cuts (within the tool capability) and tool life is true, but only if the machine and setup is rigid enough to handle it.
Yes BH, I have an x2 mini mill. I have found the limits and stick to lighter cuts.
I have modified it a little to increase travels and stiffen it up a bunch.
I have found a cobalt cutter that I may try and stick to low rpm and coolant.
Low rpm just doesn't sound right when it cutting sometimes.
I received my new cobalt cutter from Enco and will get to it this weekend.
I used it to clean up the rear of the ejection port to start and it looks a whole lot better, whew!
I will re-cut the front tomorrow and hopefully be done.
I used a wet cutter and a whole lot less rpm this time.
It is hard to tell how long this cutter would last if doing the full cuts though.
I'm glad you were able to clean it up. I couldn't say how long this cutter would last, cobalt is better but it's not carbide, and even then carbide eventually has to be replaced. Just like if you go over maximum with gunpowder in ammo, there is a point where too much rpm kills the tools in a hurry. If you stay in the safe zone the tool wear is much more gradual.
So here we go with a little clean up on aisle's one through 9...
and another one...
Hope to get the front cleaned up today, I just hope they aren't cut too deep already.
If not, I will take Greg's advice and run a flat top and then cut the serrations.