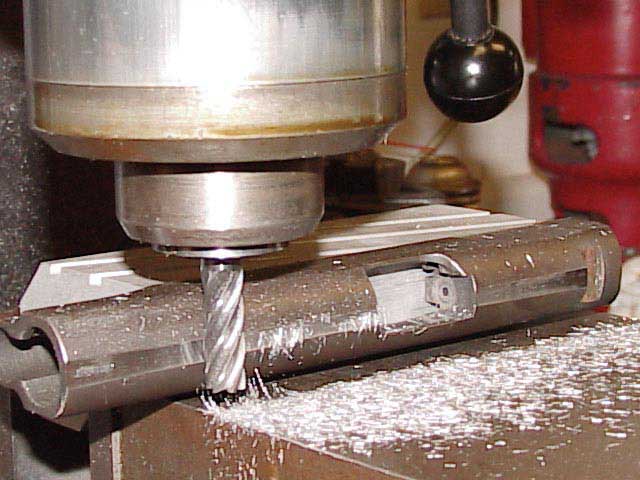
The first thing I do is chuck my slide in your Yavapi slide holder, and then put the two in my milling machine vise with the slide facing sideways. Next, I ensure the side of the slide facing up is level. I usually use a dial indicator to ensure this, but I know of others who only use a level. The next step is to ensure the top of the slide facing sideways is parallel to the vise. I would never attemp to do this without using a dial indicator for this step. What I do is run the dial indicator up and down along the top of the slide, and ensure neither the front nor rear of the slide is too far forward. If it is, just loosen vise and rotate slightly till correct. If this step is not done correctly, when you flatten the top of the slide it will be wider at one end of the slide as compared to the other end.
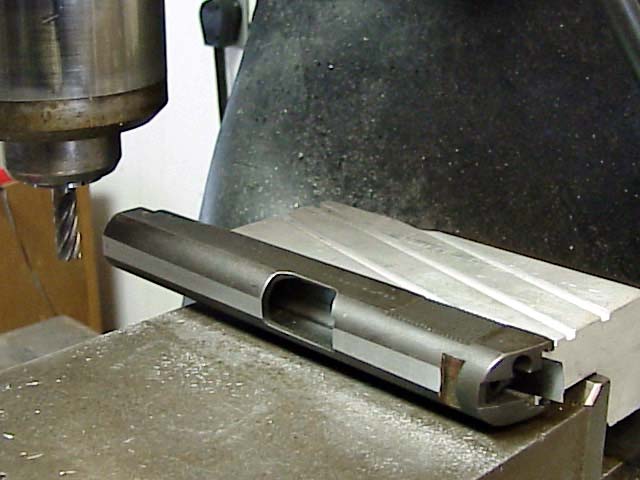
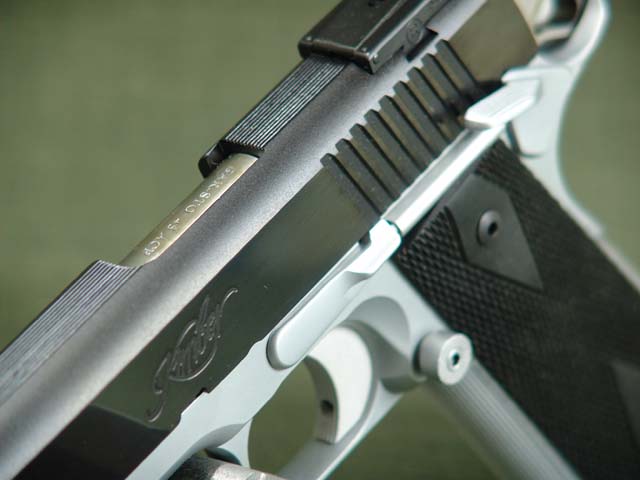
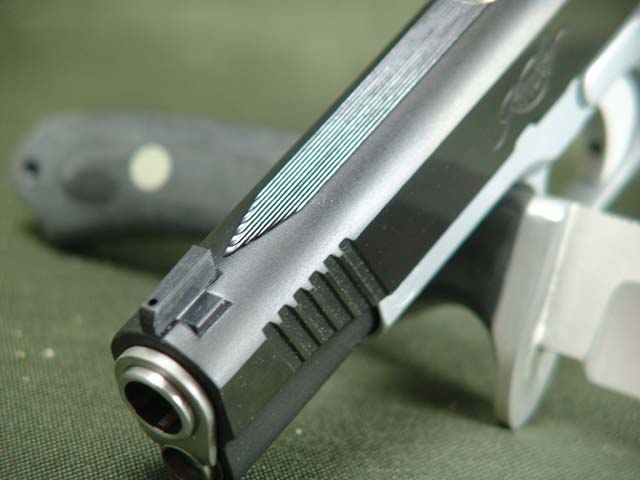
Once that is done, I go ahead and mill the top flat with my 1/2 carbide 4 flute cutter spinning at 1100rpm. I make the flat no wider than .375 wide when finished, and should look like (Fig-1) and (Fig-2). Next, I chuck in my 3/4 wide double angle cutter in my milling machine spinning at 220RPM. If I went with carbide I could get away with twice that fast at least. The first thing I do is find the center of the flat I just created, with my 60 degree cutter. I usually Eyeball it and slowly bring bit in untill it just kisses the flat on top of the slide. When I first see the bit just starting to mark the slide, I go ahead and back out. With a micrometer, I measure mark to see if I need to move table up or down to find center. Once center is found, I lock my quill and zero my table's knee dial.
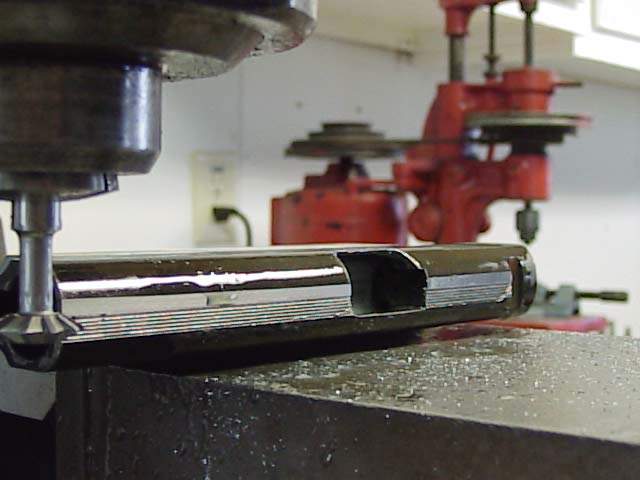
This is where the 6th of 11 lines will go; I will be cutting 11 lines at 30 lines per inch. Next, I move my bit back into the slide until bit just starts to kiss slide again, and stop. Now I zero my dial so I know exacly when my bit will contact the slide. Now back out again; This is my reference. Next I raise my table .165; This is where my first line will be cut. [I will slowly move bit into slide until I reach my 0 reference, then go in another .024, I make a cut from the front of the slide to the rear and return, before I lower the table for the next cut.] I will lower the table .033 a pass, until 11 lines are cut, ensure if you are using a HSS bit you go very slowly. When I am done I usually get some fine sandpaper and sand the top of the serrations to slightly dull them. Sometimes I might need to chase the serrations with a 60deg bent needle checkering file once or twice depending on how sharp my bit was. All that is left to do now is clean up and refinish.
The Yavapi slide holder is available from Brownells and is part #080-835-002 at a cost of $70.88, and the double angle cutter is available from Travers Tool at www.travers.com