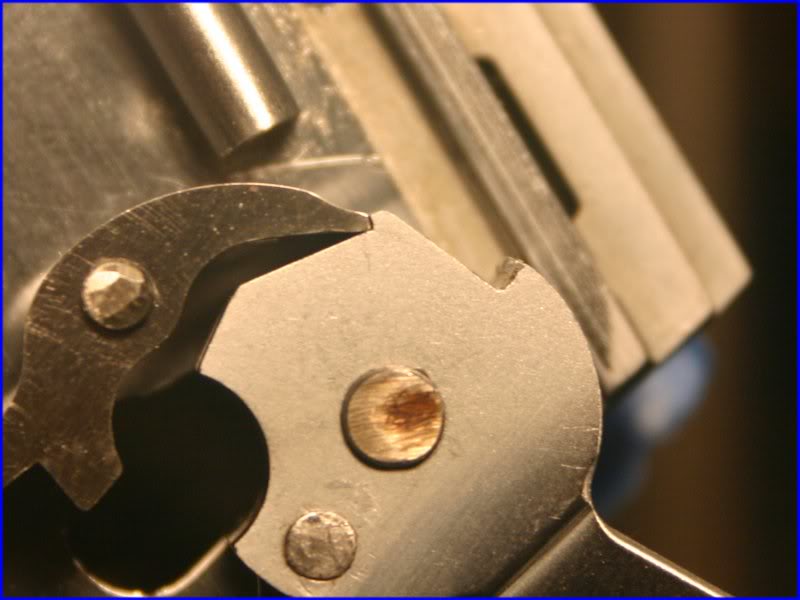
I have managed to perplex my self with these question regarding an optimal sear setup:
Is the sear primary angle supposed to sit entirely on the hook face?
Or is the hook face (corner) supposed to sit entirely on the sear face?
Or to they line up exactly?
As of now my sear upper corner is coincident with the hook corner like show here (they line up):

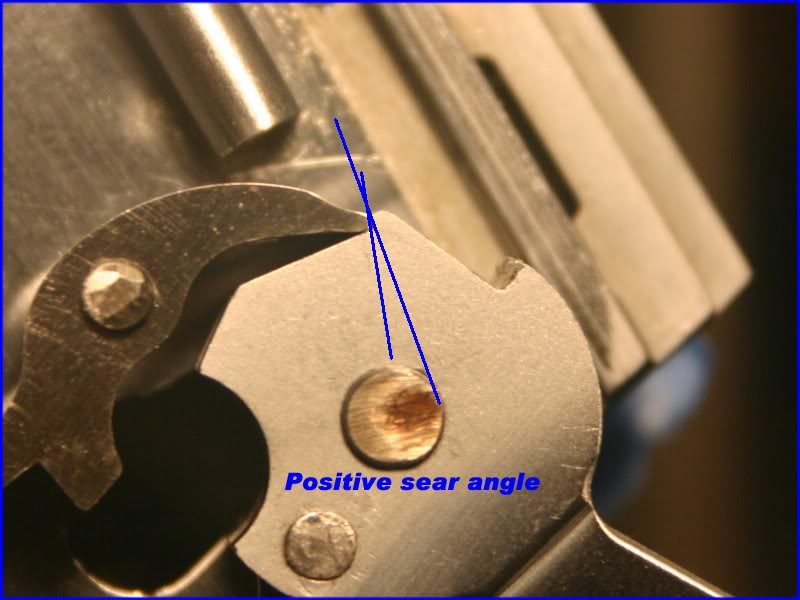
Positive sear angle (good)
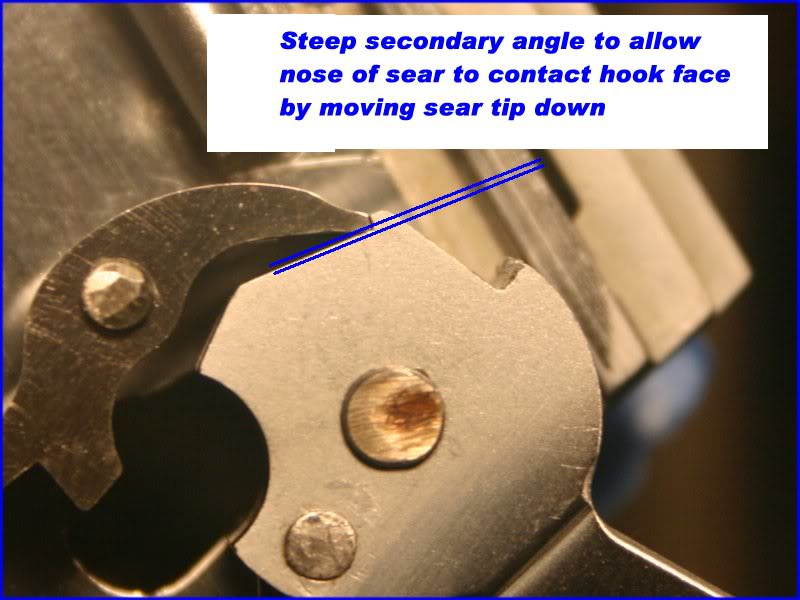
I'm thinking about moving the secondary angle to allow the sear face to be inside the hammer hook face:
This is a doctored up picture showing the results:
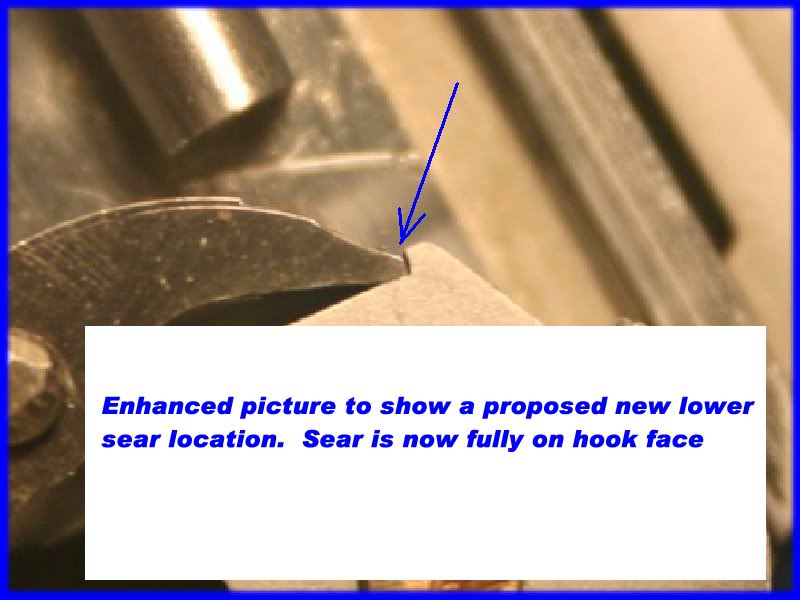
Or does an optimal sear look like this:
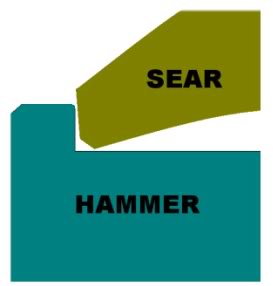
The GI prints with long hooks show the hooks hanging over the sear face (Niemi has multiple drawings showing this). But the "standard" really short hooks you see everywhere today inevitably hit the sear face like in your last drawing. I don't have a strong opinion on what's "optimum," but they both apparently work.
Having the hooks hang over the edge is probably going to mean a pretty aggressive trigger pull, but there's one way to find out for sure. And while it's hard to tell, I'm not convinced your sear angle is really positive there. It looks like it could be slightly negative to me, which would mean pulling it back into the hooks would be a good idea.
I called the angle positive which may be the wrong term but every outline print I have seen of Niemi's shows the same interior angle that mine has. I thought everyone called that positive.
I want to experiment a little with the secondary angle and I know that it will lower the sear face inside the hooks. I can easily run the hammper pull weight from 2.5 up to 5.5 with no problems but I am looking for a more crisp break. It breaks clean now but not like breaking glass clean...
By "positive," I mean that as the sear rotates under trigger pressure, it tends to overcock the hammer (compress the mainspring). It's hard to tell from your picture. The GI prints show a very slightly negative sear face (hammer tends to fall as sear rotates out), but the hooks hanging over the sear make it positive over all. Lazarus once showed me a good way to test this: set up the hammer and sear on a well-lubed jig or pins, and then bump the sear legs firmly as though firing the gun. If the hammer scoots backward a little bit (because the sear pushed on it as it was swung out), the engagement is positive.
I can't help you with the clean break; I like a bit of roll, as long as it's smooth - I favor .025 hooks, on the rare occasions when I can find them.
All the angles are from a stock Berryhill sear/hammer set that I polished a little. I will check for "hammer scoot" now because the frame/sear/hammer are fixed in my vise now.
Nice photos - thanks. They show very well that the sear nose is not a point, even though it might be useful to think of it that way during the development process.
I think there is some confusion about the term secondary angle. From your photo, your double blue line is the line of the hammer hook. As shown, your sear does not now have a secondary angle cut. It is merely resting on the inside of the hammer hook over a large part of the sear. The meaning of the term secondary angle, is a cut (usually no greater than 1/3 of the bearing sear face) at the very tip of the sear nose. The secondary angle can vary, but let's say 45 degrees from the sear nose for discussion. The purpose of making that cut will be to decrease the area of the sear nose contact with the hammer hook, while not affecting the depth of sear nose engagement.
Typically, making the secondary cut will tend to make the pull less positive (compared with where you started), and the trigger letoff smoother. That effect comes about because it is the tip of the sear that actually lifts the hammer in a postive engagement. Some say the process is necessary to produce a good crisp trigger, but it all depends upon the hook depth and sear nose width. It all depends. That's why I take 'em one at a time.
If you think about it, once you make a secondary cut, you can also make a tertiary cut and so on until the sear nose gets closer to a curved surface. But that might make for another interesting discussion.
My secondary cut small. No more than a .020 chamfer break-edge. I want to cut it deeper but I am worried that I will trash the sear or worse, the entire trigger job that I have spent some time on... trashing the sear is no big deal because this is a $30 mistake I can live with...
I have over 1200 round through this custom kitchen build and I decided to dressed the sear this weekend because it started to look a little rounded. The sear length is good at mid-spec .455 so I have some wiggel room with it.
I guess that I just need to shoot it more and stop looking at it under a microsope... huh...
The picture, to me, shows a negative angle, which is less than optimally safe.
The angle is as shown on many references like this one from Niemi
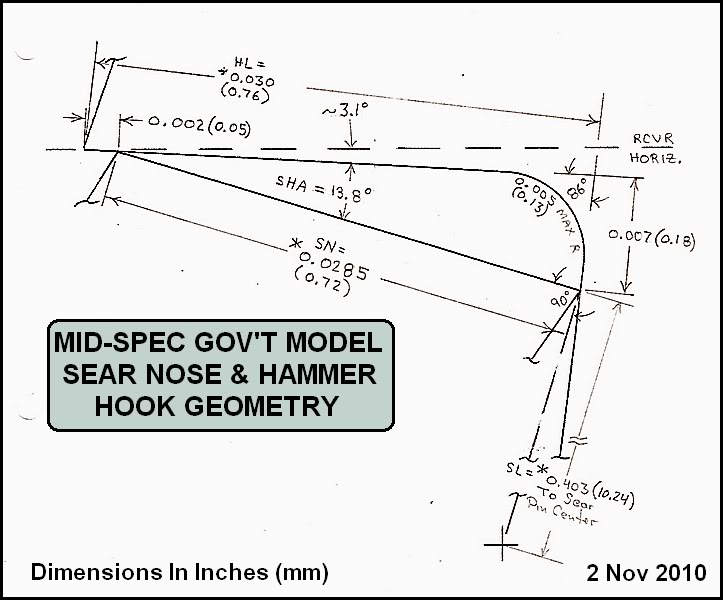
This hammer won't release (squirt out of the sear) when I push on the back of it without the mainspring or sear spring installed which means that it trapped by the sear. This is a good safety check and must mean that there is a positive sear to hook relationship.
Quote:
I guess that I just need to shoot it more and stop looking at it under a
microsope... huh...
A few years ago I got a 60X measuring shop microscope and one day decided (just for grins) to see what Petunia's (my wadcutter gun) sear nose/hook reeeally looked like.
Biiig mistake! I was absolutely mortified! Gun back together, microscope back in its box, and I vowed "Never again!". Lordy, did it look awful. But all who've dry fired her say "Oooh - sweet!" Go figure, huh?
P.S.: Most of the drawings mentioned can be found here:
http://forum.m1911.org/showthread.php?t=34444&highlight=roll+trigger
FYI, the drawing in Post #9 is for a mid-spec M1911A1 as initially assembled (no tinkering or boosting) based on the Army Ordnance blueprints in our Tech Issues section.
The truth is that I have stolen most of your drawings and they are held hostage on my hard drive... and then I couldn't find the exact ones that show the hammer hooks radiating from either the center of the hammer pin hole or the side of the hammer pin hole on this forum. The Berryhill parts I have radiate from outside of the hammer pin but this is of little concern because I did a "will the hammer stay in the sear" check when I built the pistol but I haven't thought about why too much because I know there is no safety concern.
I was trying to improve something instead of shoot-in-more... I decided to shoot more...
Quote:
...I couldn't find the exact ones that show the hammer hooks radiating from
either the center of the hammer pin hole or the side of the hammer pin hole on
this forum.
Is this the one you were looking for?
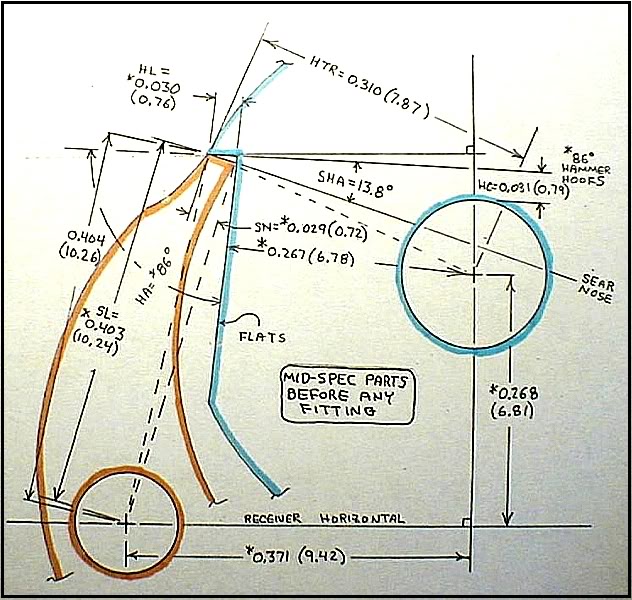
FYI, I just tidied up the one from Post #9 but you may have to go back to Post #34 in the thread "Roll Trigger" to get it. Oh fooey, here it is...
