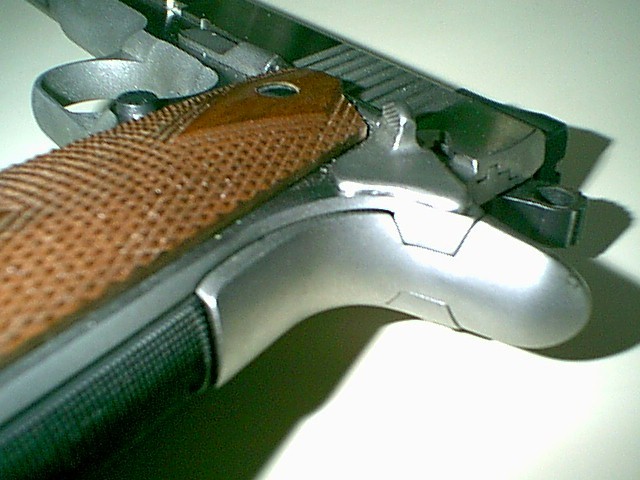
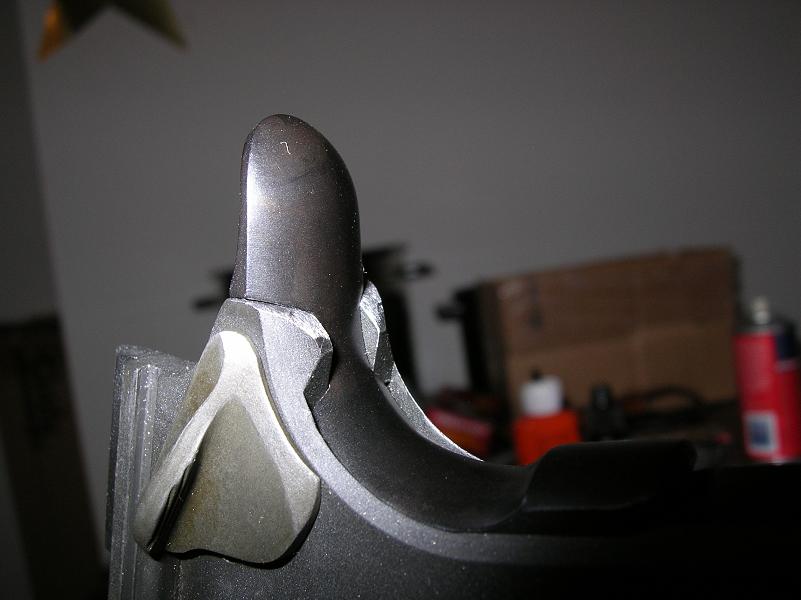
I'm installing a King's high grip beavertail and I'm using the King's jig as my template to file. My qestion on the template is at what angle should I hold/pin the jig so that it gives me the best/correct angle for the tangs? I've attached pics so you can get an idea of what I'm talking about. Depending on how the jig is depressed, it changes the angle.
In the pic, the jig is sitting down all the way in the frame.
Here's the grip safeties. You can see how the jig shape is there at the tangs.
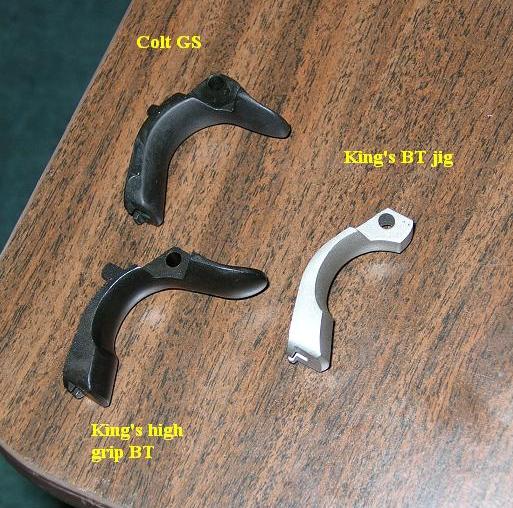
Wow, What a *hitty jig. A good jig has metal on the outside of the frame on both sides to keep you from filing at an angle. You can still make it work though, if I were you I would tape it in the down position and start filing, when you even start to get close remove jig and test fit, you will have to do this many/many/many times before beavertail goes on with a minimum of a gap. I shoot for as tight as I can get it without binding the beavertail. Its not hard to do just takes alot of patience.
Good luck and show us pics when you are finished.
I was a bit surprised at the jig myself, not what I was expecting. But it made it so I needed to be patient and take my time and be sure my filing was straight. It actually wasn't too bad and I was able to get some good work done.
I went ahead and rubberbanded (word?) the jig in place and went to work. As I got about level to the jig, when test fitting the BT I found I needed a little more off the top half of the tangs than what the jig allowed... and it was just that top curve above the jig. Anyhow, I just took it easy with the needle file at this point. The BT was binding there at the top. I've got it in place now. When doing my filing, I tried to keep focus and favor the file toward the inside edges of the tangs. I didn't want to favor the outside as I didn't want gaps to show.
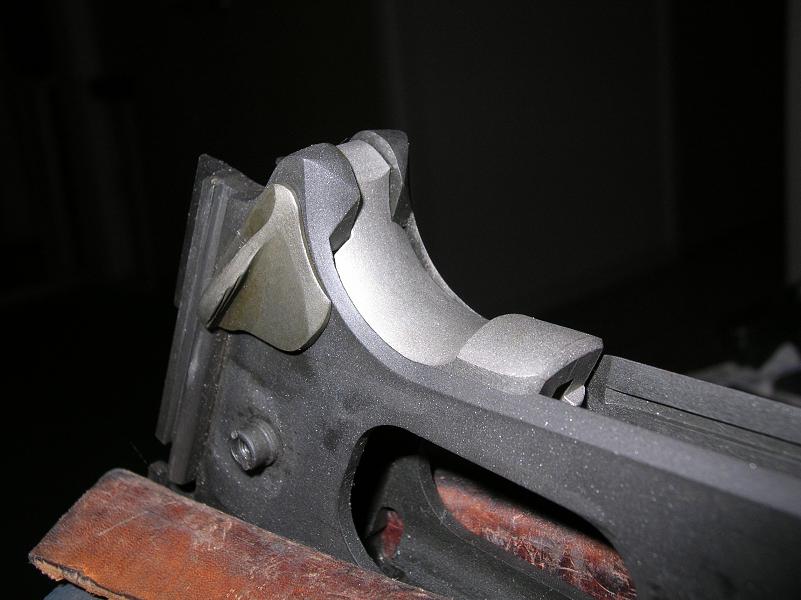
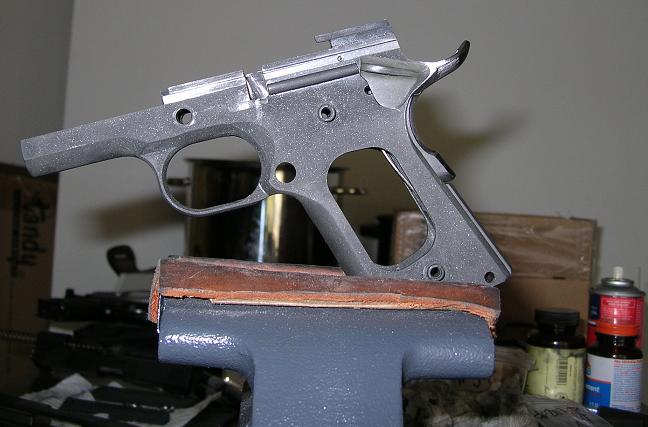
Here's the angle below. There looks to be a lot of material that's going to be filed off to blend the frame and BT to fit comfortable with the grip safety depressed.
Looks good, I usually attack the rest with a small triangle file and lastly with a sandpaper roll on a dremel.
Ive got some photos on my website of how I dress this area. Overall looks like a good start.
Thanks. I've got your site bookmarked. You have great pics that I've quickly referred to getting ready to blend that frame with the grip safety.
To dress the area under the grip safety, I will do this with the safety in the depressed position (as if I'm gripping the gun), correct?
When I dress the top of the tangs and grip safety, which position should the grip safety be in? I'm thinking for looks, the grip safety should be engaged (as if not holding the gun) so that the top area is smooth. So that when the gun is just sitting there, it flows nicely. But when I'm shooting, it really wouldn't matter what it looked like.
Is that top blending more of just a personal preference on asthetics?
That is looking mighty fine!
When I do one, I first blend top and bottom with the safety 'out'.
Then I tape it 'in' and reduce the sides of the frame just enough for comfort.
This provides a great look when the gun is not being held and comfort when it is.
Be careful how much you remove from the sides of the frame below the thumb safety, or you will have a gap when the grip safety is 'out'. The walls of the lower part of the grip safety are short and do not allow a great deal of overlap.
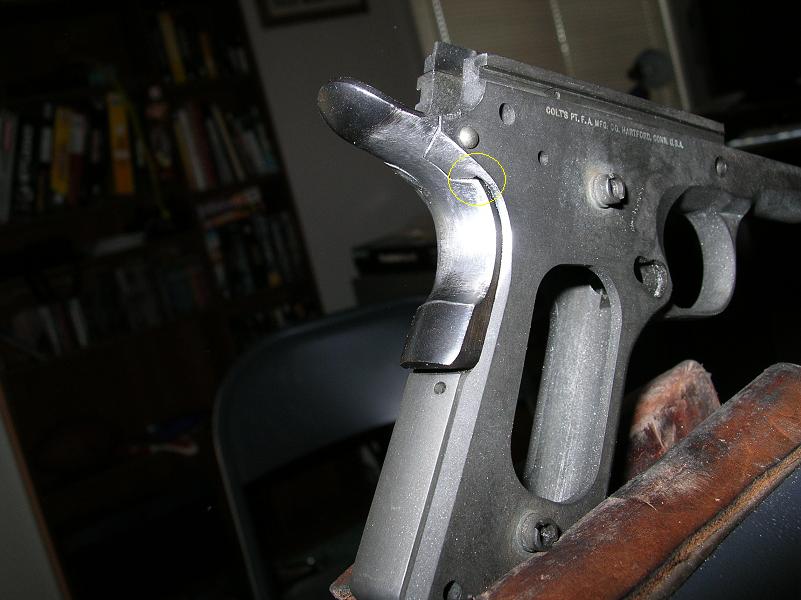
Thanks... speaking of that gap... Although, not bad. I put the gun together for function test and it doesn't show on the sides. There is, however, a gap that I don't like under the tangs. There was really a lot of material I needed to remove on the sides. I don't know if I took a bad angle or what, but I couldn't get the frame to blend very nice with the BT. It was perturbing to say the least. I did actually touch the back edge of the thumb safety with the files as well, the edge was over the edge of the frame.
Well, the grip safety is there, my frame is cut, it functions alright, and need refinishing. I'm hoping it comes together better once its got color. All in all, its alright, I just wish I would have done better.
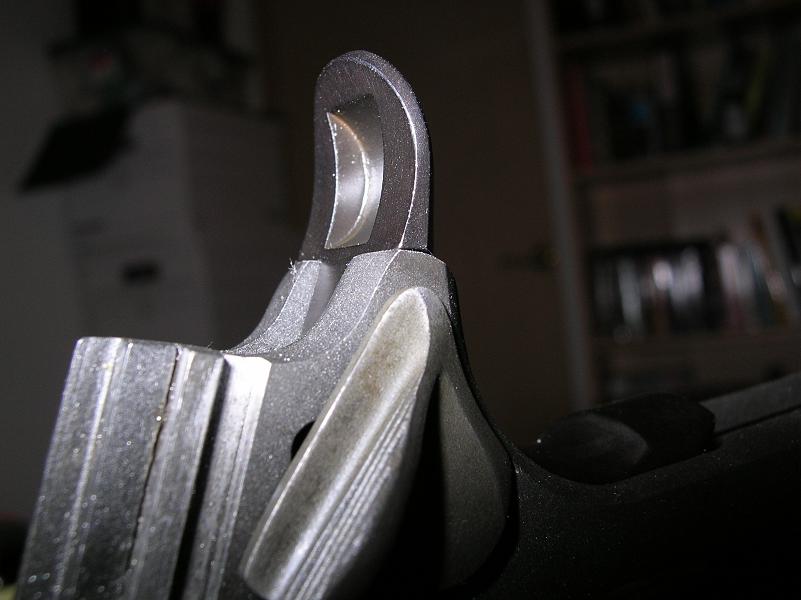
Here's the gap under the tangs I mentioned.
Finished pic. (don't ask me about the spots, I don't know)

Nice looking job.
The triangular holes/gaps underneath are common.
I've found the Brown's grip safety to be a bit better than the King's in that area.
Hey why not buy a cheap airbrush and Gun-Kote over your parkerizing? It will eliminate your spotting concerns and increase wear and corrosion resistance.
The matte black Gun-Kote looks so very similar to the parkerizing, it is hard to tell which areas have been coated and which have not.
Pistolwrench, it's good to know those tang holes are 'normal'. I wasn't quite sure what to expect with this grip safety. I couldn't find any install writeups or forum posts.
I do need to invest in an airbrush. I haven't yet as we're moving to Japan so I won't get to play with my guns for a few years?
You can get by with a cheap Wal-Mart Testor's kit. About $30 if I remember correctly. The Gun-Kote will cost about $30 delivered, from Brownell's. Don't worry about buying their thinner, MEK from the local hardware store works just fine.
The 'swoop' under the thumb safety is difficult to get just right. You must come very, very close to the pin hole to get a consistent radius in that area. This also means radiusing the thumb safety to match, which will reveal the safety's lug hole when the thumb safety is on.
Also don't be afraid to slightly taper the frame tangs on the side surfaces, to blend with the sides of the grip safety. I typically do the blending with a 1/2" drum sander in the Dremel, then finish with 1/4" wide torn strips of shop rolls, 220 grit. The old 'shoe-shine' method.
Wow looks really good, as you mentioned I blend the BT under the swoop with the BT in the depressed position. I then blend the top of the BT swoop with the BT in the out position. Overall your install looks well done and as Pistolwrench mentions the tang holes are common depending on the frame/BT combo you use.
Keep up the good work
PS I for a year or two used a Harbour freight $15 airbrush and it worked quite well, I have now moved on to a Paasche airbrush but for the money the lower dollar one was well worth the investment.
Looks like a fine job to me. That little gap you have circled is normal. Here is a CMC project using an old Ed Brown GS in progress I did a few years ago and as you can see it also has those inevitable pesky little gaps.