This is a build of a TanneryShop chrome-moly 1911, which is being built on a Sarco parts set.
Initially, I planned to use a keyseat cutter to cut the rails, but after reflection, I decided on a slitting saw. It worked out very well, and I will be adopting this method for any future [external] rails. I used a .095" thick slitter, as I wanted to make my mistakes in steps. ;)
One point, as I see lots of questions on the Sarco kits, and the Brazilian slides - they are rough.
The Sarco kit came with a bent slide stop, requiring lots of fitting (and straightening). The mainspring is oversize (compared to my Colt Gov't Model Series 70); the recoil plug does not have the characteristic Colt step to hold the spring in place (and the spring is not crimped for the step); the trigger is an aluminum aftermarket 3-holer; the hammer has the side "wings" that commercial models lack; the extractor is bent way too much (like 1/8" over its length); but most importantly, the included Brazilian slide was not machined correctly in the rail area. The cutter used must have been broken or dull, because the rail slot on one side of the slide had a rounded corner, rather than a 90* angle.
This caused me a lot of annoyance, as I *assumed* the slide would be correctly machined. Once I convinced myself that my machining was correct ( *my* corners are square!) and started looking at the slide, I found the problem. A little work with a flat file eventually allowed the slide to fit, but I would have to assume this slide had never been used, or it would have jammed easily. On my frame, it wouldn't even push on.
The slide-to-frame fit is now better than my Colt. In the future, I will likely clean up the slide internal rails with a keyseat cutter prior to trying to fit it.
The Sarco "kit" does not seem to be from disassembled pistols, as I assumed (that word again!), but rather odd lots of parts, many of which may be seconds, blems, or rejects.
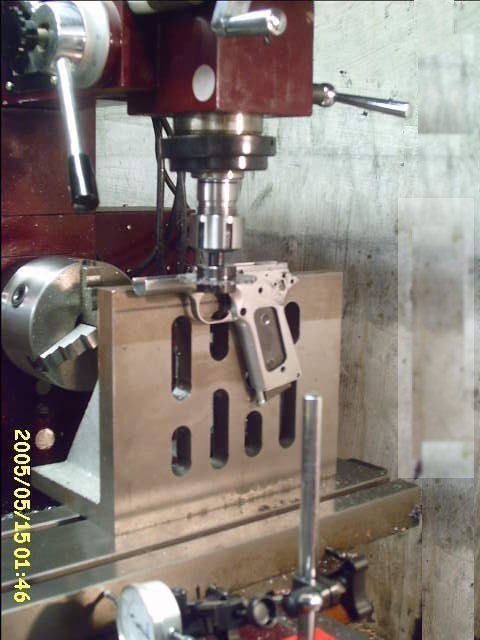
I attached a pic of the frame rails being cut. I used a 1/2" steel bar/magwell fixture to hold the frame to the angle plate. Worked fine. Slitter worked OK too; I used 200rpm with a 2-1/2" dia. slitter. Feed was very slow. Lots of cutting oil!
Good job!
I did the same thing with my two 80% frames. The Y-axis travel on the mini- mill left no room to spare -- so I had to get it set up in exactly the right spot.
Looking at your pic, that clamp was the way I was going to clamp it, but I was afraid I'd crush the frame (no rail on mine). So I went with the magwell clamp.
I also let the frame stick up past the angle plate so I could cut both sides from the same datum point, as someone else on this Forum suggested.
I don't have a DRO, so I kept moving my magnetic base indicator around. For most critical measurements, I used a dial vernier.