
Retrieved: January 12, 2011
Last Post: January 2004
Well, this is now the 3rd topic that I've had to start on this frame. For some reason every topic that I start gets screwed up and you can't post in them any more. Does any admins know what's going on?
Here is the post that I've started before...
http://www.roderuscustom.tzo.com/cgi-bin....0;t=267
Here is what I tried to post in the other topic...
I got 2 more operations done today. I worked on the grip saftey area. Once again I had to make another fixture to hold the frame for these ops. I'm getting pretty good at making the fixtures....haha I'll show the fixture later on in these post. Here is a pic of the setup I used to start this operation...
This is after the 1/2 hog endmill....
This is after the 1/4" carbide endmill cleaned some of the material out...

This is a pic after the 9/16 and 1/2 undercut tools mill the undercuts in the frame. This pics sucks, but I'll try to post a better pic later on...

I used a 1/32 carbide endmill to mill the slot for the leaf spring...

Here's a pic of the under cut tools that I used in this operation...

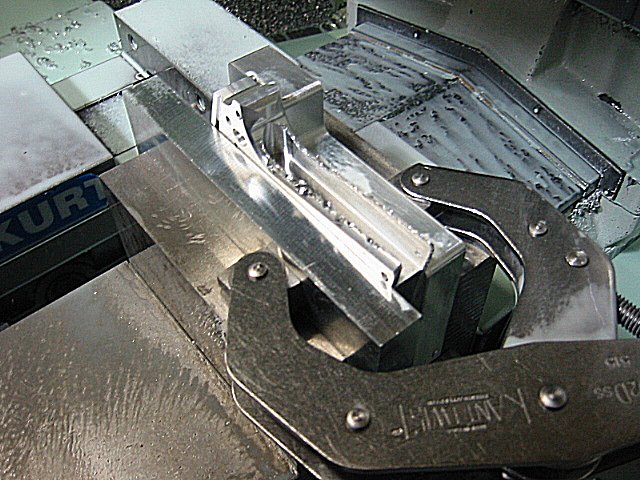
Here is the start of the next operation. This operation mill the slot for the mail spring housing...

This was a pretty easy operation...since there was just 1 tool. This is a pic after woodruff cutter milled the slot...

Here is a pic of the fixture I had to use for these 2 operations. The dowel pins are not pressed into the holes, I'm able to pull them out so I'm able to get the different angles for the 2 different operations.
I'm still shooting to have this frame done by the first of the year. The shop is shut down for the holidays, so this should give me plenty of time to finish this project up
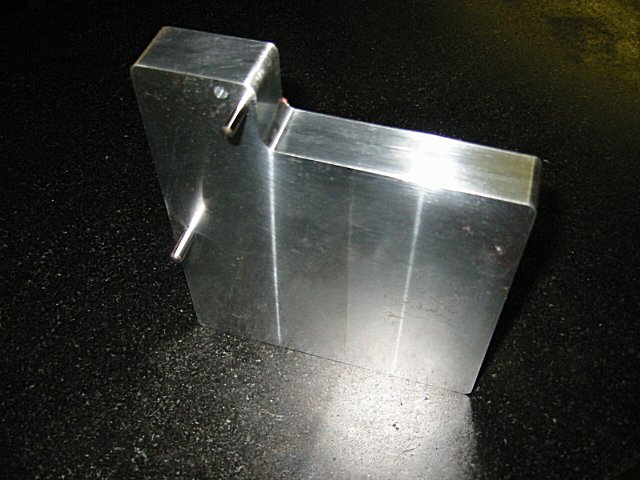
The digital camera I have at home is alot better than the one we have at the shop, so I took a better pic of the undercuts that I made. You can also see the cut that the woodruff cutter made at the bottom right of the pic. The ruff jagged edge you see in the pic will be removed when I mill the big pocket in the side of the frame.
Slowly but surely, this block of aluminum is starting to look like a pistol frame :D
I'm going to try to get to the shop tomorrow, but it might end up being a day or two before I can get time to work on this some more. But I'll keep posting this stuff as long as you guys keep wanting to see it


Here's a "shitty" pic after the undercut tool cut the area for the saftey keeper...

This is a pic while I was cutting the grip pocket. You can see in this pic how there was material left in the center of the mag well. This material was here because I only went so deep when I milled the top and bottom of the mag well. I knew there would be material left in the center, but I wanted to keep it there so it'd be stronger when I held it for some of the operations I done.
And here is what it looked like after the pocket was cut...
Sorry guys, I just realized I screwed up....I've been calling the mag release keeper the safety keeper. But anyways....here's a pic of the undercut tool I used to cut the undercut for the mag release keeper...

That was all of that operation. I made a new set of jaws for the vice so I could hold it for the next operation. I didn't take any pics of this operation, because I couldn't show what it was cutting since it was all cuts made inside the receiver. I milled the undercut for the safety and then I used 3 3"x0.057 saw blades stacked on top of each other. I used the 3" saw blades to cut the area inside the receiver....I believe this was needed for clearance for the hammer. I stacked the 0.057 thick saw blades on top of each other so it wouldn't take as many passes. With the blades stacked on top of each other it made the tool look like it was 0.171 thick. Here is a pic of the undercut tool I used to mill the area underneath the safety and also the saw blades...

Here is a better shot of the of mag release keeper undercut that I made. I'm not sure if that's the correct name for this area, but you guys can correct me if you know what it's called. :D I wish the camera at the shop took as good of pictures as my home camera, but I guess all cameras will start taking crappy pics after they get coolant splashed all over them...haha

And here's a good pic of the undercut for the safety. You can also see in this pic where the 3" saw blades cut the clearance for the hammer.

I've got to once again grind a undercut tool....this time it'll be for the trigger bow....the horizontal slot. I'm going to go inside the mag well to cut as much of this material out as possible. Anything left I may have to end up using a file on. I think after I cut this undercut, it should open up the vertical slot of the trigger bow. Depending on how much this opens up, I may make a brouch to brouch the rest of the trigger bow, or I may have to end up using a file. Here is what the inside of the mag well looks like at this point...

I got the tool ground for the undercut today. Before I took the undercut inside the mag well, I first used a 1/4 carbide endmill and (as much as possible) cut the trigger vertical slot. I was only able to mill just a little bit of the vertical slot, but this gave enough clearance for the undercut to get in there. With the undercut tool I milled the front part of the trigger bow, and then milled back to the rear of the frame as far as I could without hitting the side walls. After this operation, I stood the frame up and mill the slot on the back of the frame where the trigger will slide in. I used a 1/4 carbide endmill for this also. I used the endmill to mill down to the depth of where the undercut left off. I will have to use a file to file out the corners on the back of the frame before a trigger will fit in, but this will be better than having to brouch the slot.
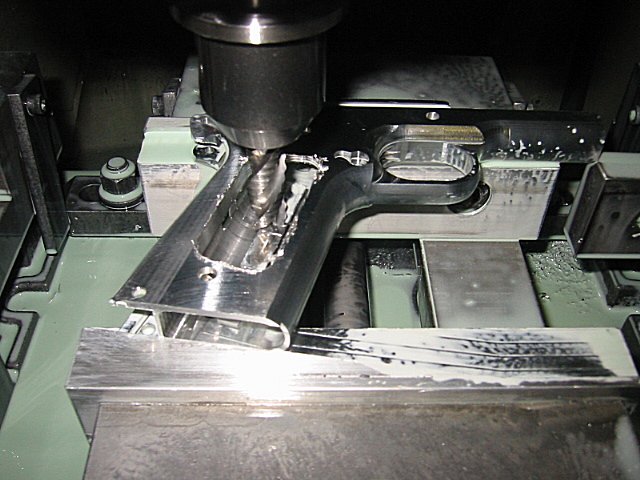
Here is a pic of the setup I used to mill down inside the mag well with the undercut tool and the 1/4 carbide endmill...

Here is a pic of the undercut tool I ground to mill down inside the mag well to cut the trigger bow.

And here is where I stood the frame up to mill the back part of the frame. I milled the slot down to where it meet with where the undercut tool left off.

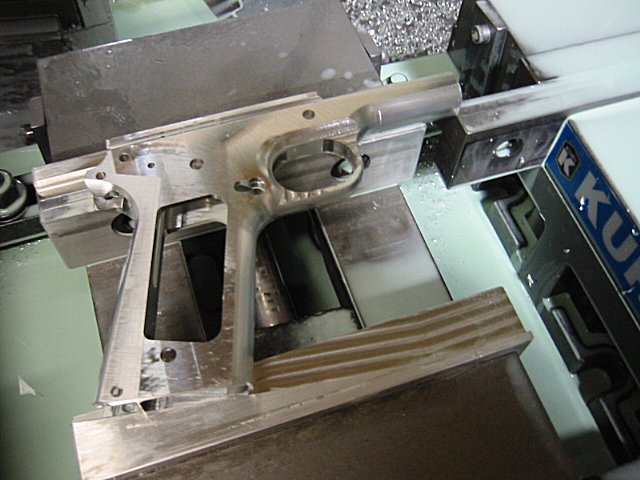
Here is what the frame looks like from the top view now.

Here's another detailed pic...

With the vertical and horizontal slots milled, this opened up a hole so I'm able to get a file in a hole to finish clearing out the vertical slot.

Here's a crappy sketch of what will have to be filed out....the yellow lines. I never said I was a good photo editor...haha

this project is by far the hardest project that I've ever done. I've never in my life done a part where it had to have so many different undercut tools. But oh well....IT'S ALL FINISHED NOW!!!! :D I finished this 1911 frame today...woo hoo. I still have some filing to do in some corners, but there is no more machine work that has to be done. I done the last 2 operations today. I ended up with 14 operations.
For the 13th operation, I done the angle on the bottom of the mag well. I was able to use one of the fixtures that I made on a previous operation, but I had to mill out some clearance on the fixture so the 1/4 ball nose carbide end mill could machine the mag well and not hit the fixture. Here is what it looks like...

I used this same fixture for the 14th operation, but I had to make a couple new holes in the fixture. This operation done the hole on the top of the frame....the hole that is at a 6 degree angle. Here is a pic of the fixture with the new pins in place...

This 6 degree hole has an undercut. I had two options here....I could either grind another undercut tool, or I could try to drill the rest of the hole on another operation with a really long drill. I didn't like the idea of using the really long drill, and since I'm getting pretty good at making undercut tools, I just ground another undercut tool....haha This time I used a 11/64 double ended high speed steel end mill. This end mill would give me just enough side wall clearance so I could plunge into the hole that the 1/8 carbide end mill would make. Here is a pic of the frame setting at the 6 degree angle on the fixture with the hole already finished...

And here's a pic of the 11/64 undercut tool I used...


And this is what I was shooting for...

For my references I used the blueprint and solid model I got from this forum, and also a Wilson Combat frame I bought. The solid model had a couple things left out, but I was able to work about that.
The trigger area (undercuts) was hard to do, but I was only able to machine so much of this area...the rest I had to file out by hand...which was really hard. But besides that, I would say doing the dust cover was pretty hard. The reason for this is because I had to use a super long endmill to get down inside the dust cover. Having a endmill sticking out that long tends to cause alot of viberations.