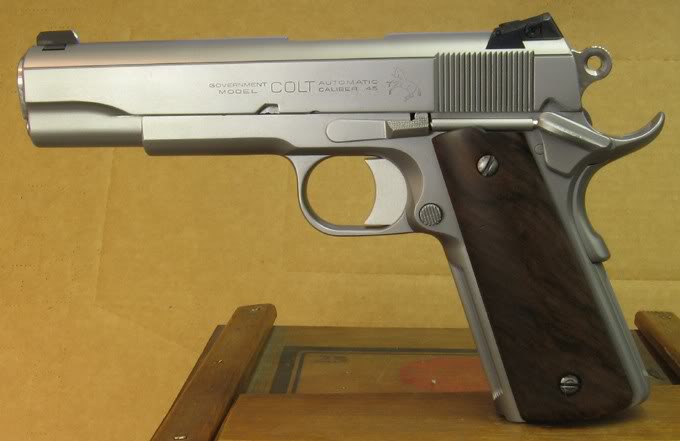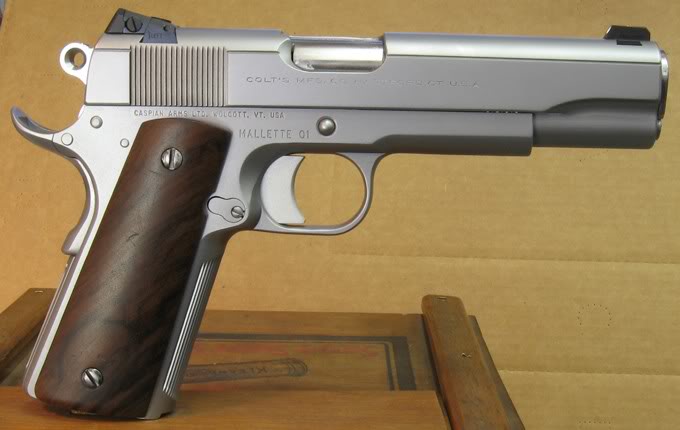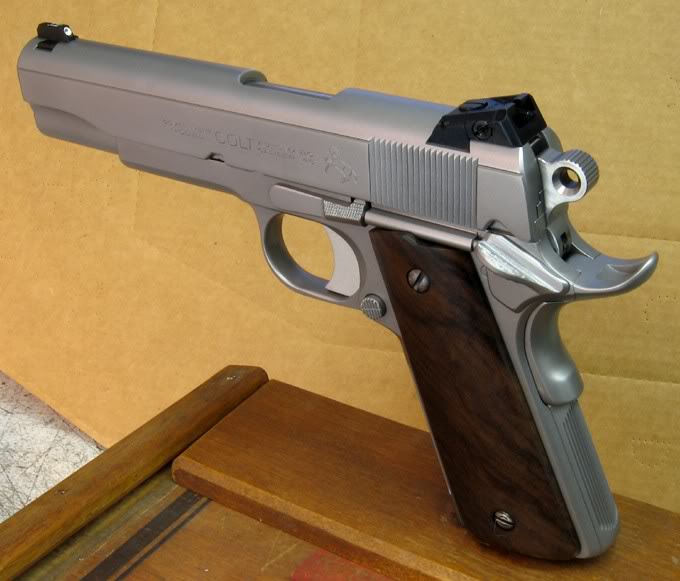
A friend of mine?s father, who was a member of the Army Pistol Team around the middle of the last century, died recently. When going through his dad?s stuff, my pal found a box of 1911 parts. When I stopped by to visit, he showed me the parts. There was some cool stuff in it. There were several barrels - two stock GI barrels, one old Colt take-off with the collet bushing still attached, and another unusual barrel that seemed to be higher toleranced, and was wrapped in marked, military wrapping. There were also several each of specific parts, including sears, disconnectors, a pack of bushing and screws and even an old trigger shoe. Of great interest, though, was an unused Colt Hard Slide.
That started us on a project to build a pistol using the slide and, to the extent possible/advisable, a few of the other serviceable parts in the box. Next, we set about choosing a receiver and other parts for the build. For the receiver, I went with Caspian. (That?s pretty much all I use because I?ve never had an out-of-spec problem, and of equal importance to me, the slide rails are oversized and therefore allow me to fit them. Caspian receivers do seem to come with a few warts, specifically the trigger slot can be a bit too deep and the frame-ramp angle is not just right, but those can be easily recitified.) As for other parts, we wanted this to be an heirloom for his family, given the source of the slide and other parts. Also, he and I are both fairly conservative, so we decided to build a gun that would appeal to the traditionalist in us, and show its quality in the details rather in ?bells and whistles.? That had some degree of influence on our parts choices. Here?s a list of the parts we decided to go with . . .
Slide - Dad?s (Colt Hard Slide)
Barrel, Link and Bushing - Kart EZ fit
Firing Pin - Caspian
Ejector - Caspian
FP Stop - Wilson, standard radius *
Recoil Spring Guide - Caspian
Front sight - Fat, black post for old eyes, plus tritium insert
Rear Sight - Probably flat-black Champion adjustable
Receiver - Caspian ?Basic? with integral plunger tube
Ejector - Caspian
Slide Stop - Dad?s (Stock Colt)
Hammer, Sear & Trigger - Dave Berryhill **
Disconnector - Dad?s (Stock Colt)
Hammer Strut - Ed Brown
Grip Safety - Wilson
Thumb Safety - Dad?s (Stock Colt)
Mag Catch & Lock - Berryhill
Grip Screws & Bushings - Dad?s (Stock Colt)
Springs - Wolff *
Mainspring Housing - Brown (S&A for Work) ***
Pin Sets - Nowlin (no roll pins)
* FP Stop and Spring Weights: I went with a « strength mag catch spring, a 19-pound mainspring, and a 16.5 pound variable recoil spring. As for the recoil spring, this ties in with my choice of FP stop, so I?ll mention those together here.
Deciding to go with a FP stop with the standard bottom radius was a decision I made using a combination of trial, error and logic. I?ve read a lot on the web about the oversized EGW stop that is adjusted with the bottom edge with much less radius than the standard, stock 1911 stops. I also actually bought two and fitted them up, so I have actually seen and tried them. After all that, and not wanting to start a big brouhaha about it here (only offering my thoughts to show why I personally went this way), I elected to go with the standard-lower-radius FP stop for a number of reasons. Again, these are only my own conclusions, and I do NOT consider divergent opinions to be ?wrong.?
First, the only reason I?ve seen offered for using the EGW part is that it reduces perceived recoil. That?s it. I don?t find a .45?s recoil objectionable, and especially so with a big, heavy, steel gun, especially one built on the beefy Caspian receiver.
Second, the recommendations I?ve seen for the recoil-spring weight to use with the EGW stop is 10 pounds. Proponents also admit that use of the EGW stop bleeds off slide energy and speed on the extraction phase. Everything else aside, it defies logic (at least my logic) to suggest as proponents of the EGS stop assert that with two guns set up identically, a gun with a slower slide on the extraction phase and a lighter spring on the chambering phase has the same ability to extract and chamber in unforeseen, less-than-optimum conditions as a gun set up with a higher rearward slide speed and higher recoil-spring weight.
Third, as I said, recoil is a non-issue for me, especially for an all-steel, 5" 1911 with the beefy Caspian receiver. But even it were an issue, I don't see how the EGW-stop/lighter-spring setup would be any better at reducing perceived recoil than a variable-rate recoil spring, which progressively loads as it compresses - and without the aforementioned narrowing of acceptable operating conditions.
That?s why, instead of using the EGW stop with a 10-pound recoil spring, I went with a standard-radius stop and a 16.5 variable rate spring.
** Trigger: I went with a Berryhill trigger for only one reason ? the look. I wanted the pistol to have a relatively conservative, old-school look, and I wanted to eliminate the adjustment-screw hole in the front of the trigger. Dave?s product is a nicely finished, oversized aluminum trigger, available in long or short and with or without pad serrations. To eliminate the over travel-screw hole, Dave tapped the back of the trigger and installed a permanently fixed set screw that, instead of turning from the front to set, is filed down until the desired over travel setting is reached. It?s permanent, and again, it doesn?t have the hole in the front of the pad.
*** Mainspring Housing: The Wilson GS and an S&A MSH I already had didn?t like each other. Oh, they worked fine together, but they left a large gap between them that I didn?t like, so I have a Brown MSH on order that I hope will be a little taller and eliminate some of the gap. Mentioning that as a line item, though, because the S&A unit still came in handy ? I found that it was short enough that I could install and remove the GS as I fit it without having to remove the MSH each time.
Okay, now on to the work . . .
Here are a couple of photos of the slide as it appeared in the box . . .

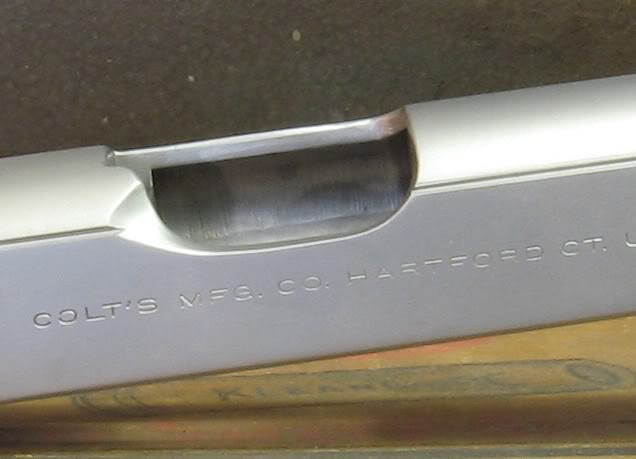
I had seen guns built with Colt hard slides before, but I?d never tried to build with one myself. When I started smoothing things out, I was absolutely amazed at the depth of the tool marks on and in the slide. Conservatively, they were twice as deep as tool marks on Series 70 slides I?d used in other builds. It was unreal! Inside the barrel channel, there were a series of X tool marks from the muzzle end all the way back to the lug slots, and I mean deep! I usually smooth this area by hand, but on this one I eventually threw in the towel and went to ?lectricity. I grabbed a 1/8 wooden dowel, taped 220 paper to it, chucked the dowel up in a drill, chucked the drill in my vice, and started in. Took awhile, but I finally got the tool marks removed and the channel polished down to 440 grit (will go finer later). The disconnector rail was almost as bad. On the sides of the slide, the tool marks were so deep that I was afraid I'd lose the rool marks during pre-finish prep, but they survivied.
I also did the port and roll-over notch by hand. I got it "pretty good" but had eventually it professionally re-done by mill. Here?s an in-progress shot of the port, followed by shot of it in it's current, nearer-to-finished condition - before it was re-machined. . .
[one picture 404]

Now, on to the receiver . . .
Grip Safety: I used a Wilson for no reason other than I had never tried one and just wanted to. I?ll never do it again. No flies on the Wilson product, per se. It?s just that (1) despite Blindhogg's excellent instructions on his website, I had some sort of mental block that I don't seem to have when installing other types of GS's, and (2) when I was in the process of installing the Wilson unit, I didn?t realize until I was well into the blending stage that it was loose in the frame tangs - so loose that it even wiggled up top! ARGH!
Of course, "parts-is-parts" does not apply when truly building a hand-built, custom pistol; everything?s a little different, and it may be that the Wilson GS and the Caspian tangs just don?t like each other. Whatever the reason, though, I had to find a way to tighten the GS in the frame, and since I?m not a welder, putting little beads of metal inside the tangs was out. That meant it was . . . EXPERIMENT TIME! Here?s what I ended up doing, and it worked pretty darned well.
To stabilize the GS in the tangs, I did two things. First, I slightly bent the inside of the right side of the GS to widen the GS overall in the Grip. I just bent the top of the lip - it's not visible from outside the gun. Second, I tightened the GS in the frame tangs by careful peening, which took a LOT of detail time. Of major concern were peening only where it would not show, and to peen the metal in a way that did not deform the TS hole in the GS. As you know, the metal around the hole is thin, thin, thin. So, I found a suitable sized taper pin and tapped firmly into one side of the GS hole. Then, with a light brass hammer, I peened around the hole only where it would not show on the outside of the gun, and I peened just enough to displace tiny bit of metal outward all the around the hidden part of the radius. I then repeated on the other side. That widened things enough that I could no longer put the GS into the tangs, and I filed and papered each side just enough to get the GS in with a nice, tight fit up top and with almost all of the wiggle down below gone. This has to be done extremely carefully.
Also, because I didn?t discover the wiggle until I had already fit the GS to the tangs, I had gaps at the junction that were bigger than I could stand. I was able to eliminate the gaps on the sides by carefully peening the tangs to push a little metal out there too. (Again, this was done before blending had been finished - I was about 1/2 way when I did that). That, of course, meant that I had to do some extremely detailed work with files, stones and paper so that the peened area on the tangs disappeared, but I got it done. The sides of the pistol where the GS meets the tangs look much better (cleaner) now, even though there are still small gaps underneath that I could not address by peening, since there are curves there, and since I had blended farther there by the time I discovered the problem. Will have to address those somehow later, or just live with them. As you can see from the photos below, I have the surfaces and side lines where the GS and frame meet pretty well squared up, and with the TS pin cut flush.
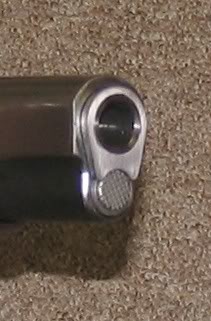
I also did my first effort at a flush-cut muzzle, and I did it with hand tools and elbow grease. I have done crowns on rifles before, and I figured that if it didn't turn out perfectly at 90 degrees to the bore (thankfully, I believe it is, though), the main thing would be to have the gun lock up repeatably in the front and make it so that the bullet exited the bore the same way each time. To do that, I used the Brownell?s hand cutters, and started by cutting an 11-degree crown just out to the OD of the muzzle. Then, I cleaned everything up to be sure the gun would completely lock up, reinstalled everything, and checked it. As expected, the muzzle still stuck out a bit, so I marked everything up with a magic marker, removed the barrel, and then continued with the 11 degree cutter until I'd gotten the barrel short enough. Then, I cleaned everything up again and reassembled the pistol. At that point, the muzzle was where I wanted it - just a hair inside the bushing - just enough to feel the step up to the bushing with my fingernail. Here's what it looked like at that point . . .
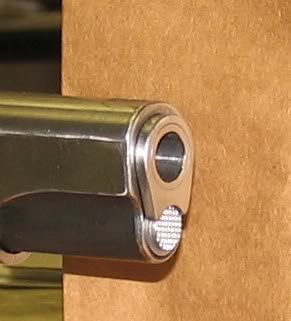
Once to that point, I left everything installed, and using fine paper on the pad of my thumb, polished in a circular manner to get everything smoothed. Specifically, I placed my paper-covered thumb directly over the centerline of the muzzle and rotated it clockwise and counter-clockwise, and in a random way like you'd do with a brass muzzle lap and compound (clear as mud?) and then finished up with a brass lap on the ID of the barrel crown. Here?s how it turned out . . .
When I operated the gun, I found that the slide stop only went up a hair into the slide notch ? enough to just barely catch the slide. I wanted more purchase there, so I carefully measured and eyeballed everything and came to the conclusion that the slide-stop notch just wasn't tall (deep) enough. None of the mags (new, and various manufacturers) would push the stop higher, and I confirmed that this was because the stop's lug was already going all the way to the top of the lug hole in the frame. So, with major trepidation, I grabbed my Dremel and a cutting bit and went to work. By hand, I raised the notch, and after cleaning up my work, it was not even noticeable. The slide- stop now goes up a bit more, and I am comfortable that it will be a more sure thing about catching the slide. I also countersunk the slide stop hole to add some symmetry to the countersink on the hammer.
Here are some photos of the pistol assembled, but before I did what I like to do to the grip area to round things off very slightly, change the depth of the MSH, etc. . . .
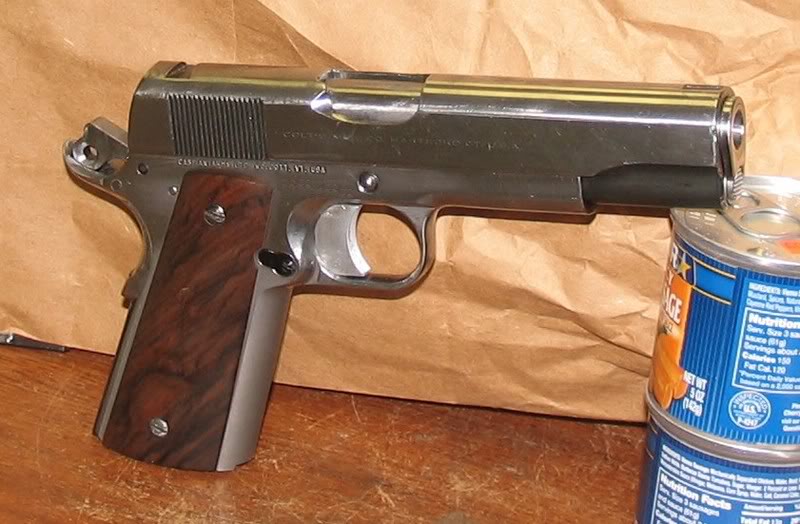
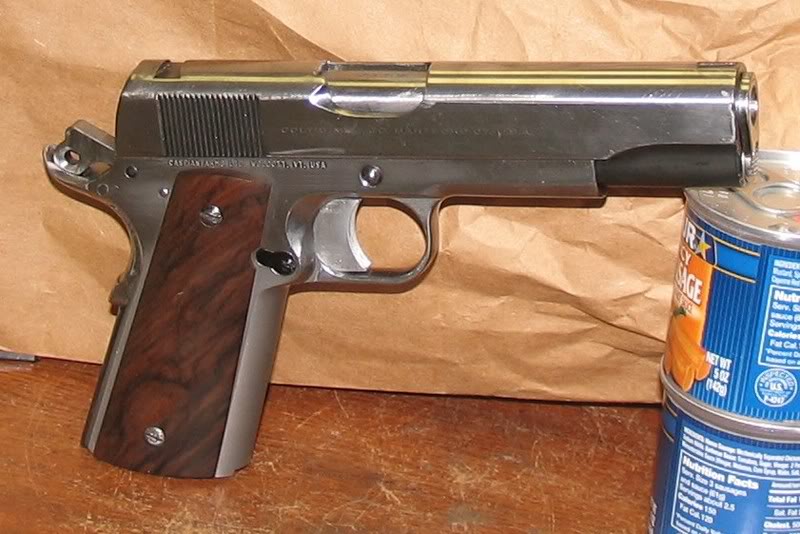
At this point, I still had to install and contour the Brown MSH (the last major item remaining), finish contouring the GS, do the precision work on the carry bevel, do the final metal prep, etc. etc. After that, the gun went off to Mr. Chuck Rogers for French border, sight installation, front-strap serration (can you tell I need to get my mill up and running?!!?!?) and a few other items.
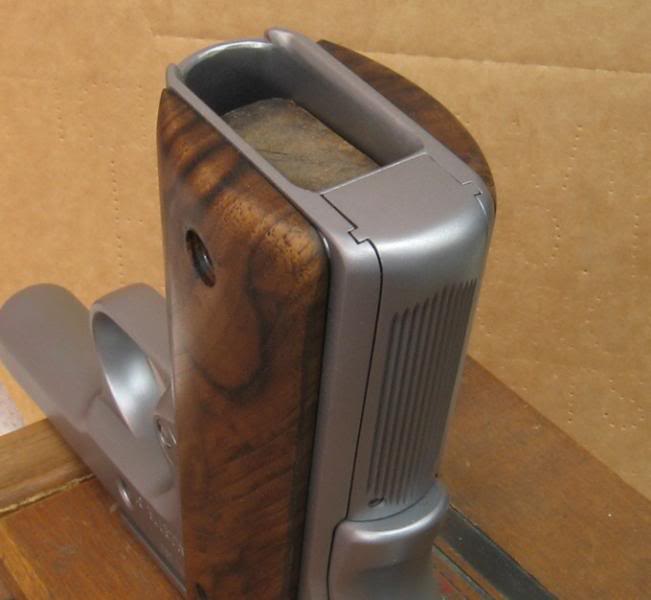
These next photos show the work I did around the bottom of the gun. I had tried a S&A MSH and also a Brown, but both left a gap at the top, between the MSH and the GS. Not a bad gap, but more than I personally could stand. I started contouring the MSH and GS from the heel of the pistol all the way up and through the GS. My purpose in this area was two-fold. First, I wanted the gun to cosmetically be as seamless as possible, but still keep the lines - AND keep them consistent. Second, I do a lot of work on the GS and MSH to get as much contact between hand meat and steel as possible, and to make that contact as comfortable (non-sharp) as I can. For some reason, I find the back, bottom corner (the heel) of the grip to be uncomfortably sharp, and while a bobtail would really alleviate the problem, I just like the classic, traditional look of a 1911. So, I contour all that to make it more comfortable and, at the same time, to give this a seamless look but without changing the lines of the pistol in a major way. As you can see, part of that is by reducing the depth of the MSH quite a bit. Once I do this, the grip purchase on these fine old pistols fits my mits just fine!

That pretty much got the gun ready to go to Chuck Rogers. As I mentioned, I could not tolerate the gap between the top of the MSH and the bottom of the GS. Here's what it looked like after a little Roger's magic with silver soldering. After that, you couldn't get a piece of paper in there.
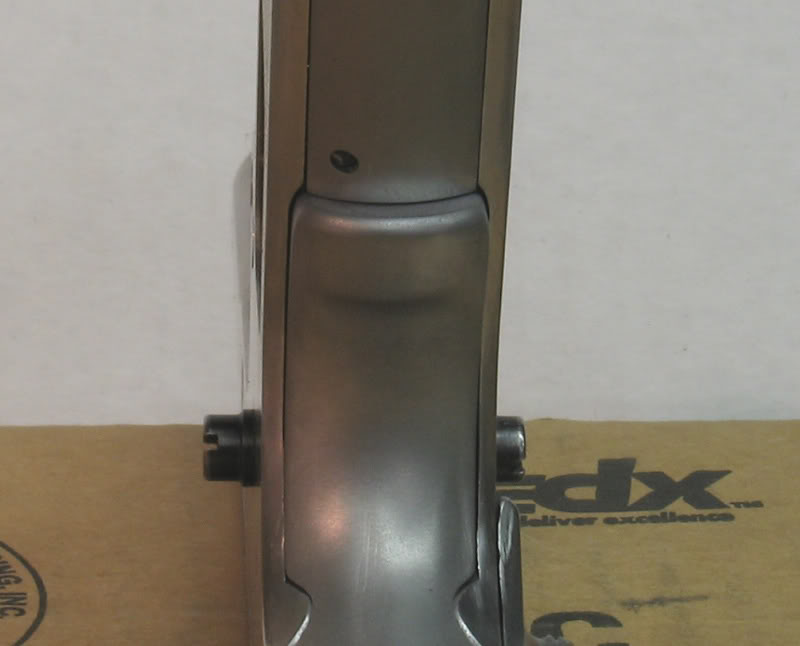
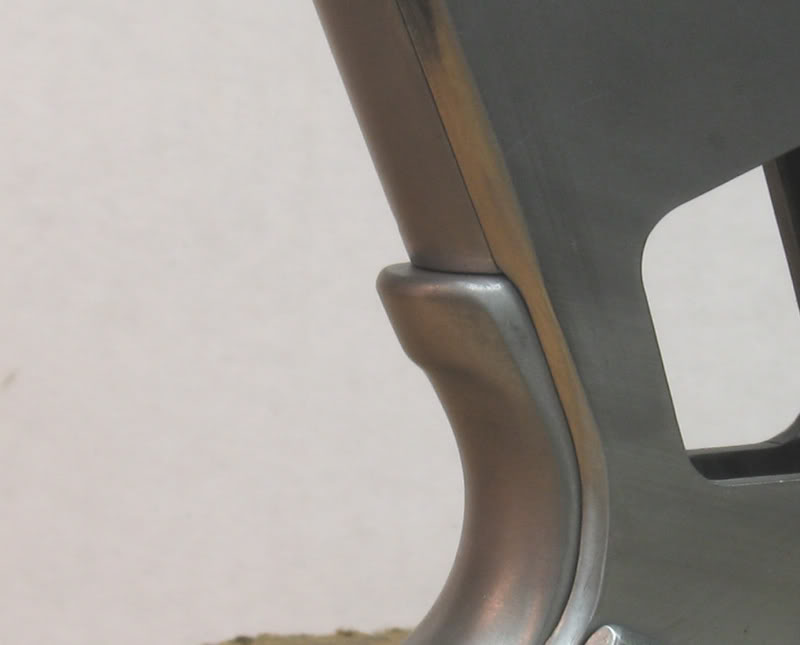
Also got him to mill the slide for a simple Caspian tactical adjustable rear sight.


Here's a photo of the junction of the frame tangs and TS. You may notice that the bottom line is not quite flush. I did that on purpose. my thumb knuckle fits into that hollow space. Not really visible, but you can really feel the difference when you grip the pistol.
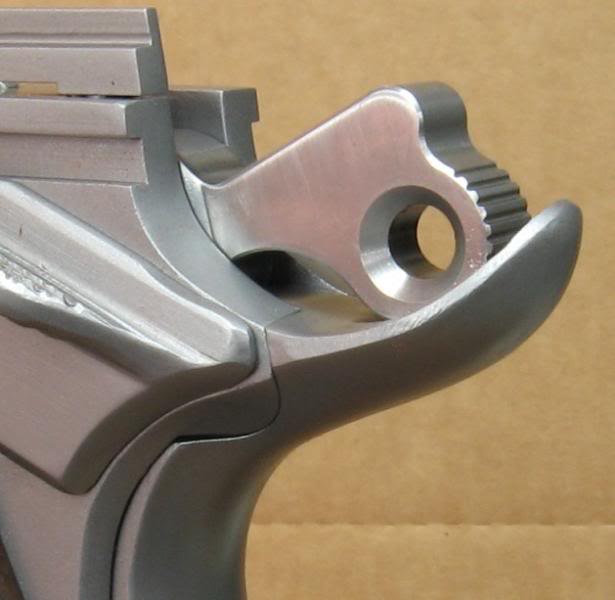
You may remember that I took the sides of the GS pad way, way down to make the look more uniform. Chuck also did the serrations on the front strap and MSH . . .
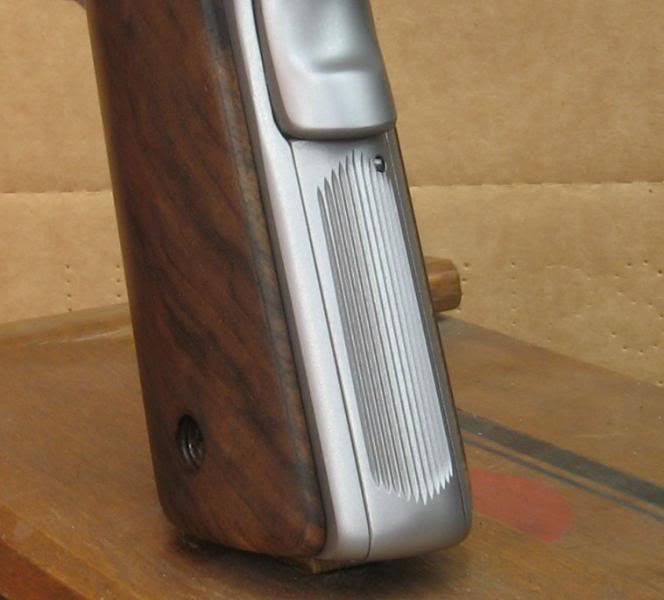
And as I mentioned, I also substantially rounded the heel of the pistol and beveled the mag well. . . .
Chuck also high-cut the guard for me . . .
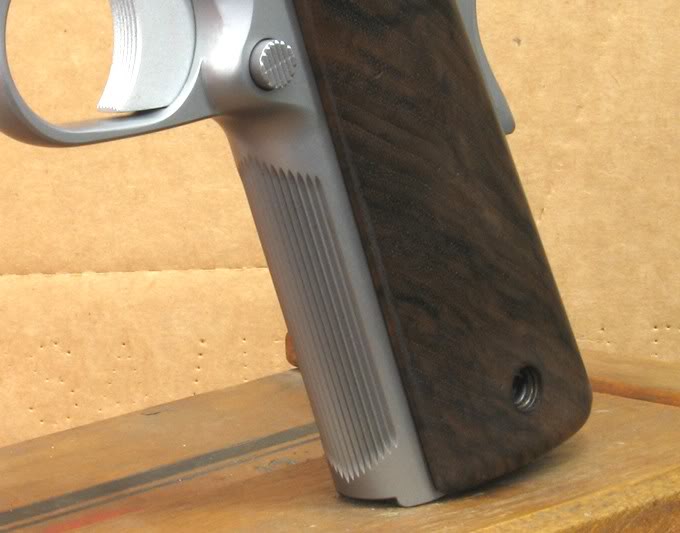
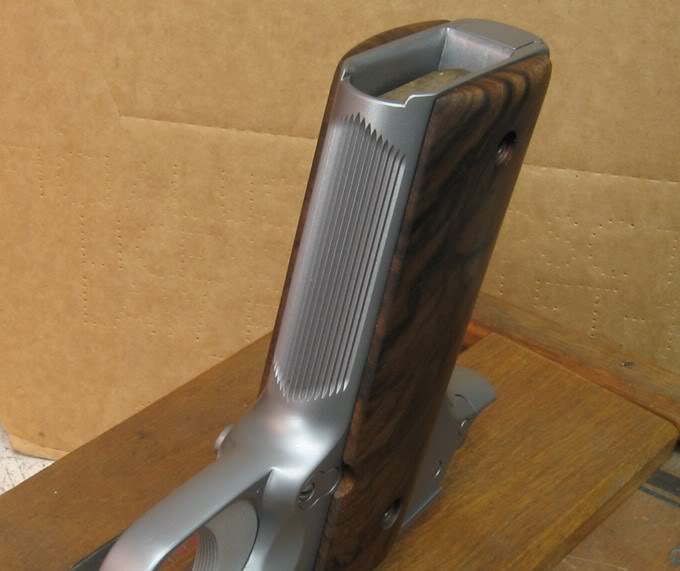
Here she is all finished up and ready to go to Glenrock for bluing.
